
In this section create curtain wall and exterior veneer on the base story.
|
The previous steps have been applied in the project file named Create the Curtain Wall. You can download the file and follow the steps given in this title on the project. |
Start with the curtain wall.
-
Click the curtain wall command from the facade tab.
-
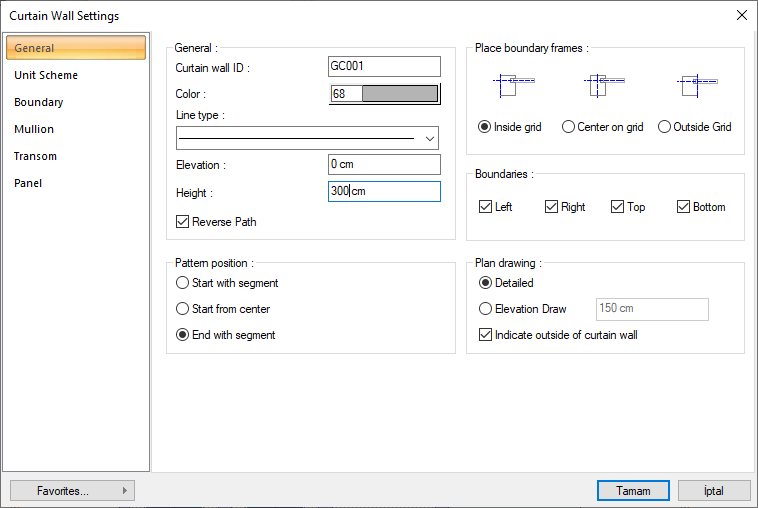
Click the settings icon from the curtain wall toolbar.
-
In the general tab, enter 300 cm in the height value.
-
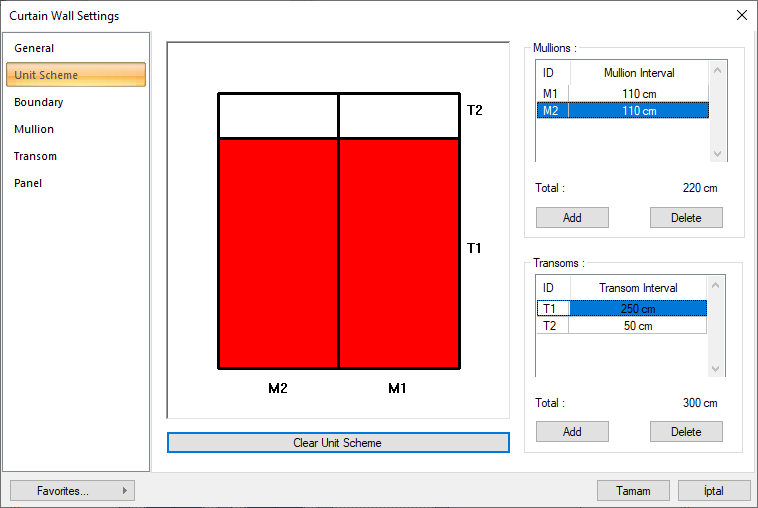
From the unit scheme tab, enter 110 cm for M1 and M2 values, 250 cm for T1 and 50 cm for T2. Click the OK button to close the dialog.
-
You can find detailed settings related to curtain wall under the title Curtain Wall .
-
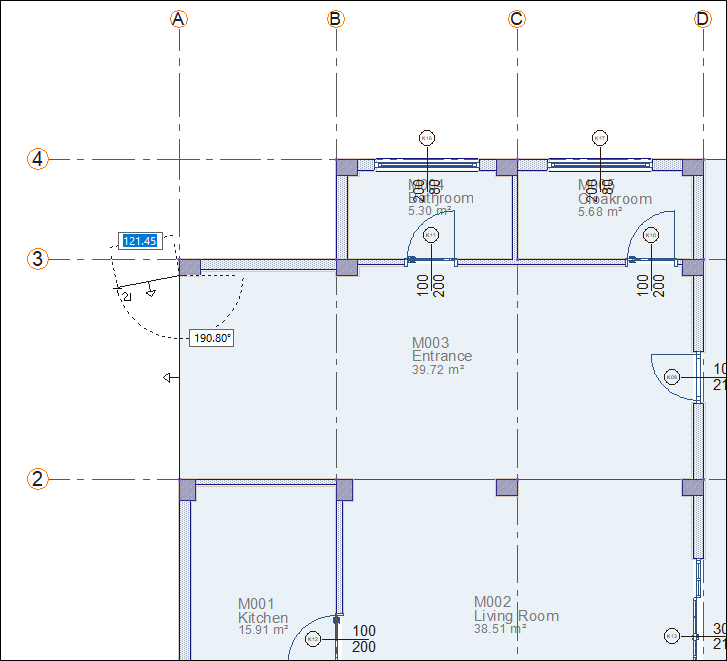
Click the A-2 axis intersection as your starting point. Then click on the lower left corner of the column located at the A-3 axis intersection.

-
Press the spacebar to change the direction of the curtain wall.
-
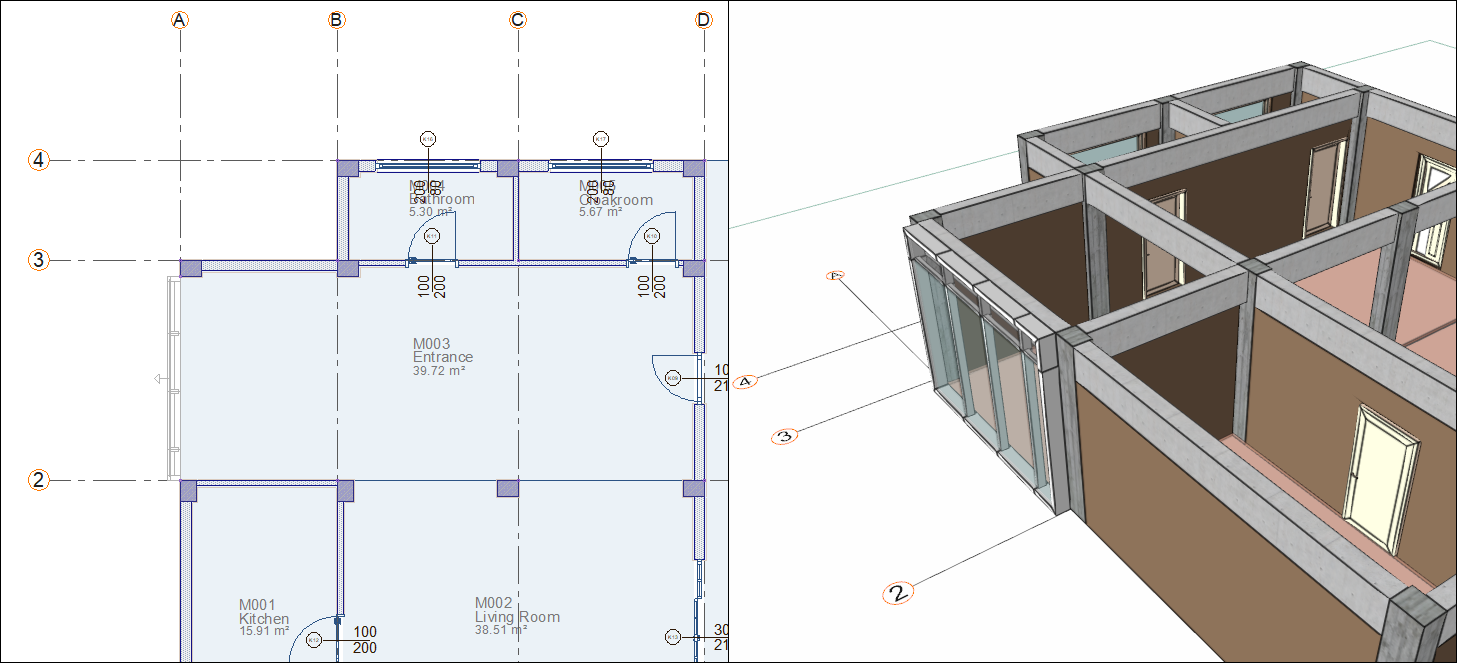
Click the right mouse button to end the command. A curtain wall will be formed.
Create the exterior veneer.
-
Click on the exterior veneer command.
-
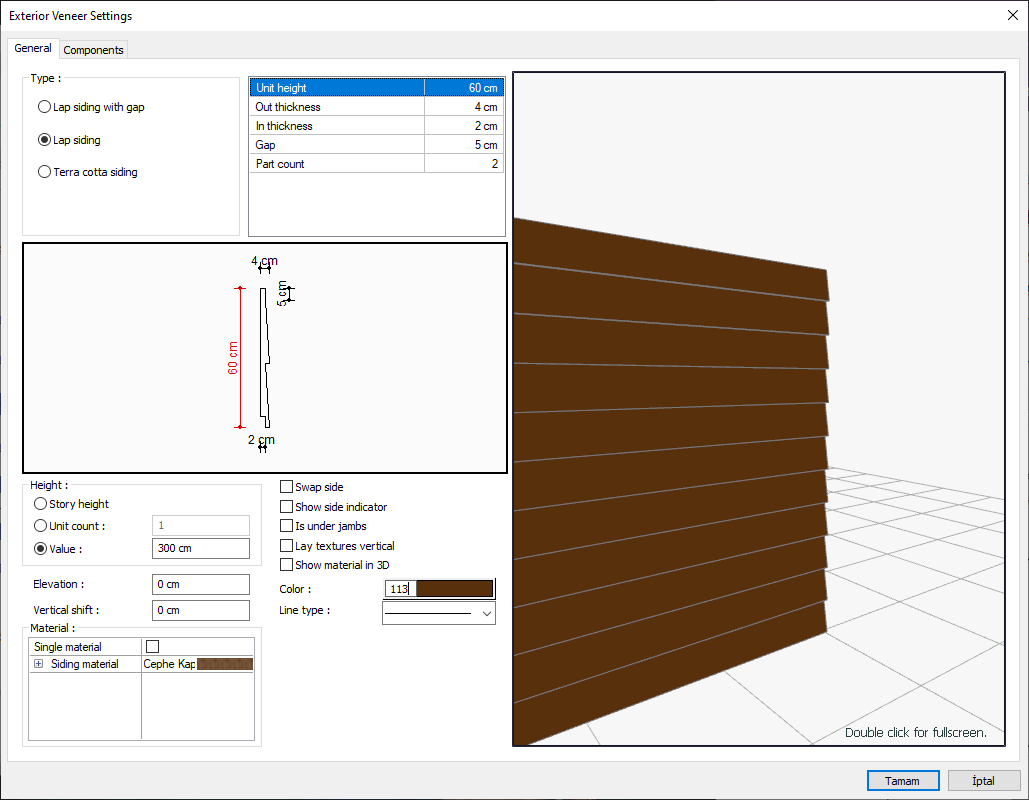
Click the settings icon from the exterior veneer toolbar.
-
Check the option for lap siding.
-
Enter 300 cm in the height section value line. Click the OK button to close the dialog.
-
You can find detailed settings for siding under the heading Exterior Veneer.
-
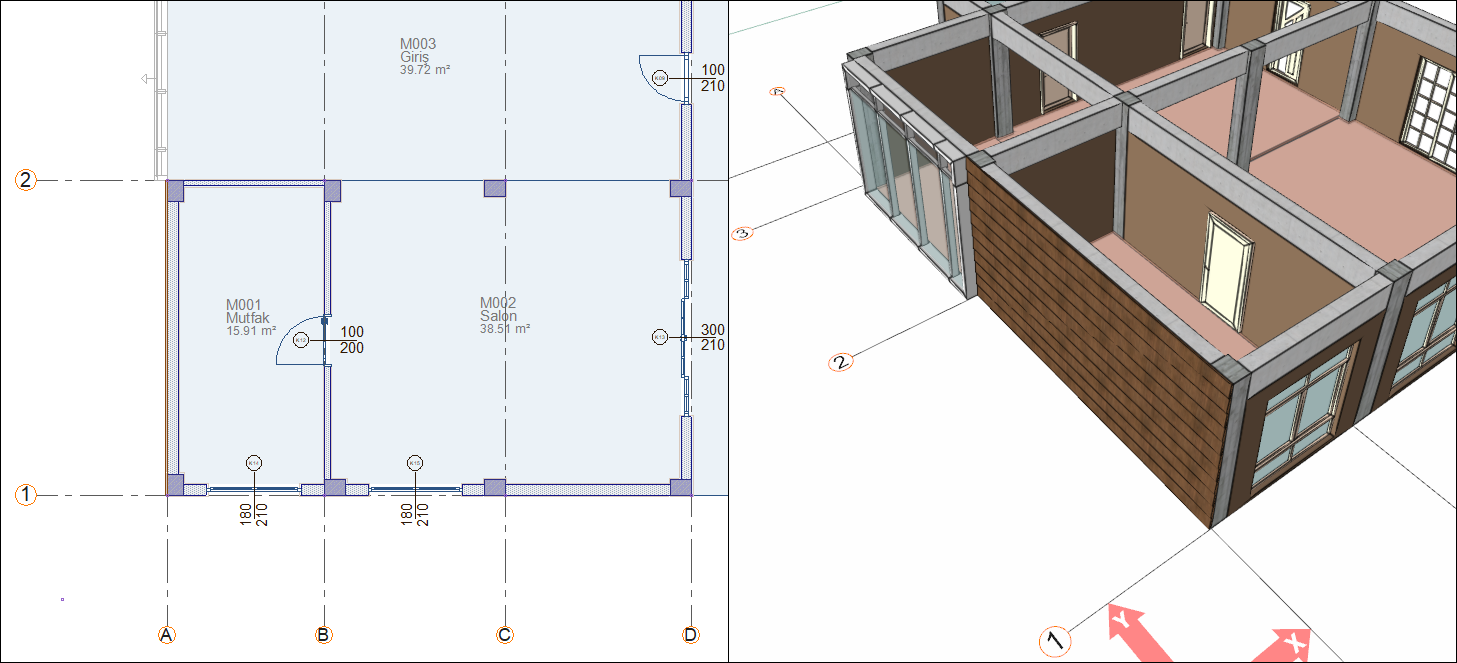
Click the A-2 axis intersection as your starting point. Then click on the A-1 axis intersection.

-
Click the right mouse button to end the command. A exterior veneer will be formed.
Follow the steps of the video below.
Next Tutorial