
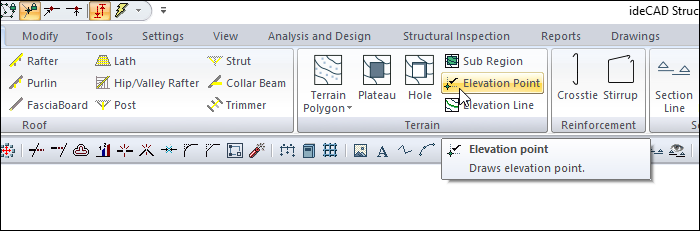
The Elevation Point command creates an elevation point at the clicked point on the terrain. It also shows the elevation value of that point as the elevation dimension. If necessary, the elevation value of that point can be changed by entering the properties of the elevation point.
Location of the Elevation Point Command
In the Architectural Program
You can access it under the ribbon menu Home tab Terrain title.
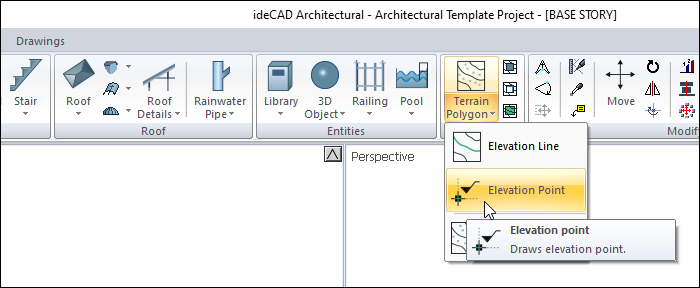
In Structural Program
You can access it under the ribbon menu Objects tab Terrain title.
Usage Steps
-
Click the Elevation Point icon in the ribbon menu .
-
Write the elevation of the point in the elevation box and click a point on the terrain.
-
The elevation point will be formed.
|
Usage steps |
|---|
|
Terrain before the elevation point is given 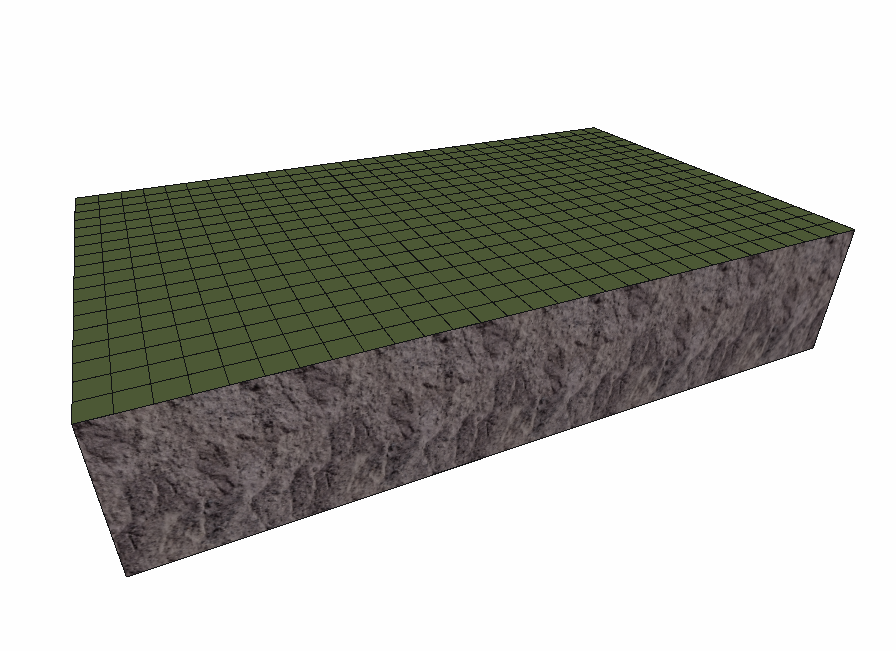
|
|
Entering the elevation value (50 cm) into the terrain toolbar opened while in the elevation point command |
|
Move the mouse to the point where the elevation point is wanted. 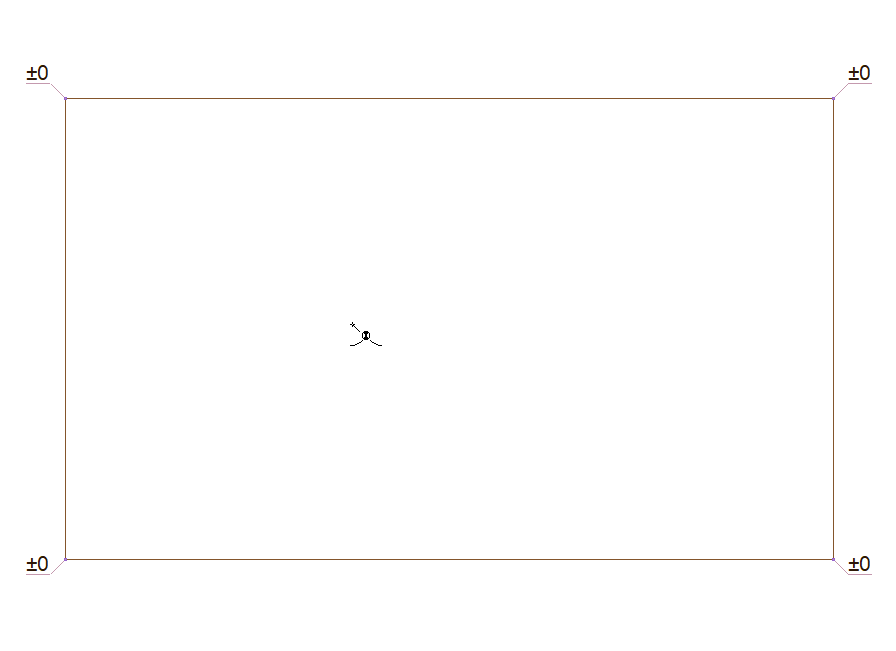
|
|
Clicking the specified point with the left mouse button 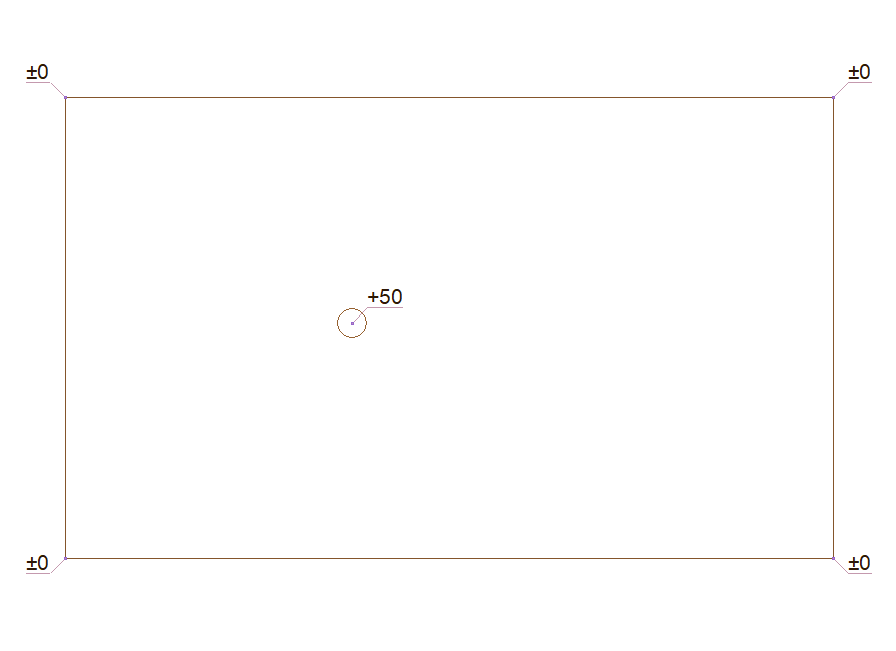
|
|
Terrain after giving elevation point 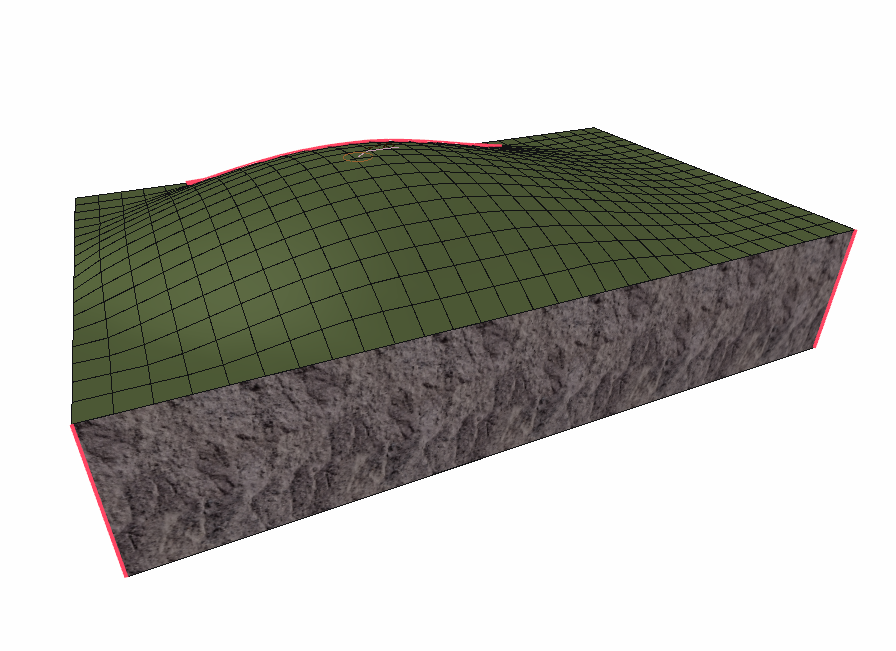
|
Location of the Elevation Point Settings Dialog
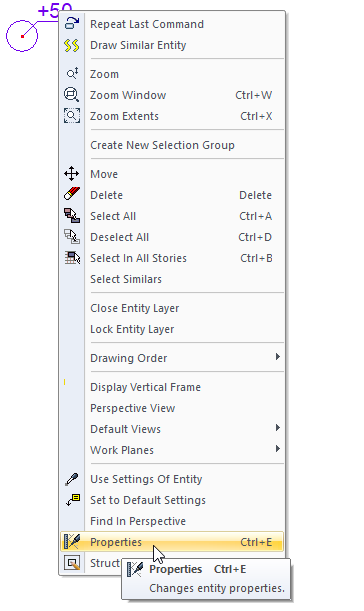
Select the elevation point you want to enter its settings and click the Properties line from the menu that opens by clicking the right button of the mouse .
Elevation Point Settings
|
Specifications |
|---|
|
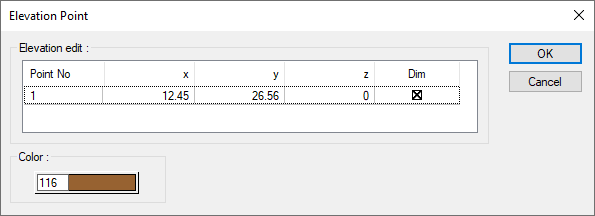
Elevation edit 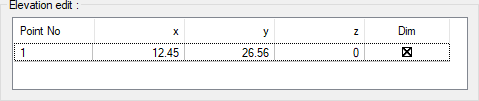
The coordinates of the elevation point placed are given. If wanted, a new value can be entered in the z box. |
|
Color The plot color of the elevation point icon in the plan. When the color box is clicked, the appropriate color is selected from the window that opens. |
Next Topic