
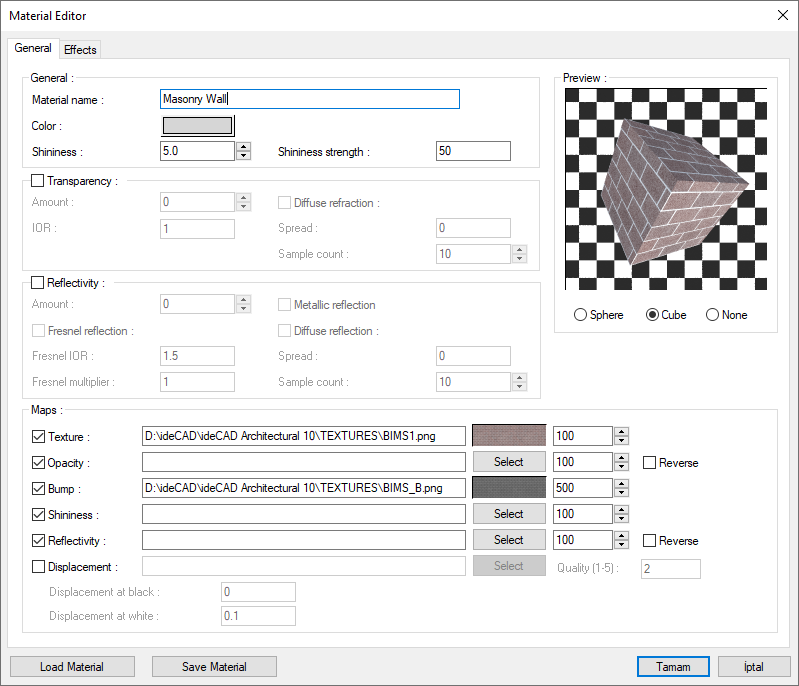
Material properties can be changed or new properties can be defined in the Material Editor dialog.
Location of Material Editor Dialog
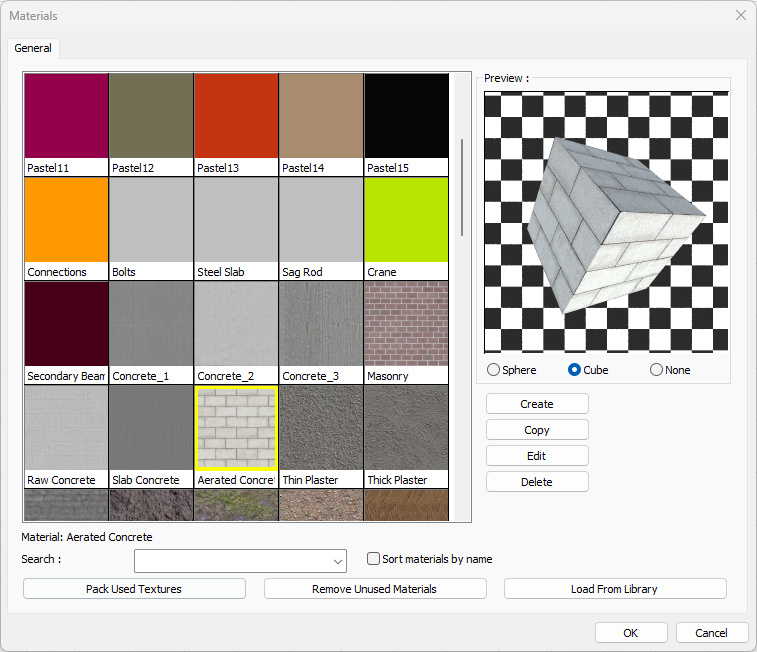
You can access the item editor dialog by clicking the Create or Edit buttons in the material list dialog.
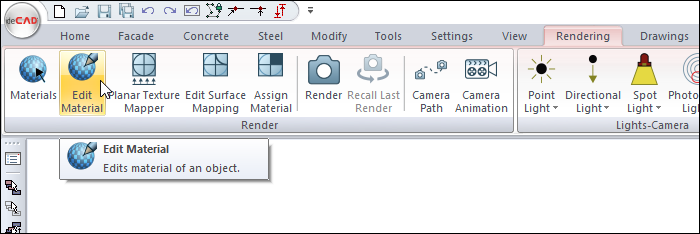
You can also access the Edit Material command in the Rendering tab, Render, and click on the object you want to change the material property for in the perspective window.
General Tab
|
Specifications - General Section |
|
Material name The name of the material is entered. |
|
Color The color of the material is selected, if the texture is not assigned, this color will appear on the perspective screen. It can be changed by clicking on the color box and dragging the mouse cursor on the color palette that opens. |
|
Shininess The shininess value is entered. |
|
Shininess strength Shininess strength is entered. |
|
Preview 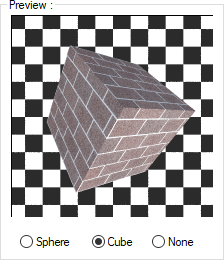
The image of the selected material to be obtained when rendered is previewed. Sphere The preview is shown on the sphere object. 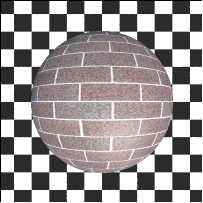
Cube The preview is shown on the cube object. 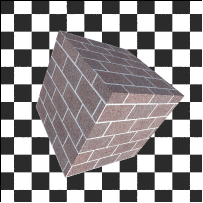
None Preview is not shown. 
|
|
Specifications - Transparency Section |
|---|
|
Transparency The material is provided to acquire the property of a light-permeable substance. |
|
Amount Value between 0-100 is entered. 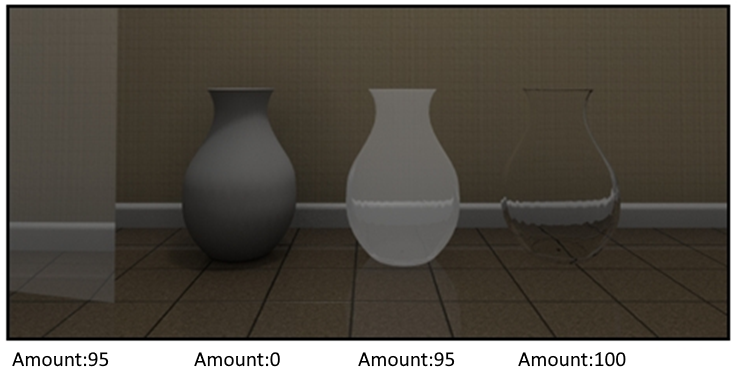
Since the 1st object is a single surface element, the surface behind the object can be seen. Although the third object has the same feature due to its vase form, the surface behind it is not clearly visible. In short, the transparency value should be entered based on the form of the object, what kind of effect is desired from the material of the object in the rendering. |
|
IOR It is the coefficient showing how slow the light on that substance travels compared to the light traveling in the space. 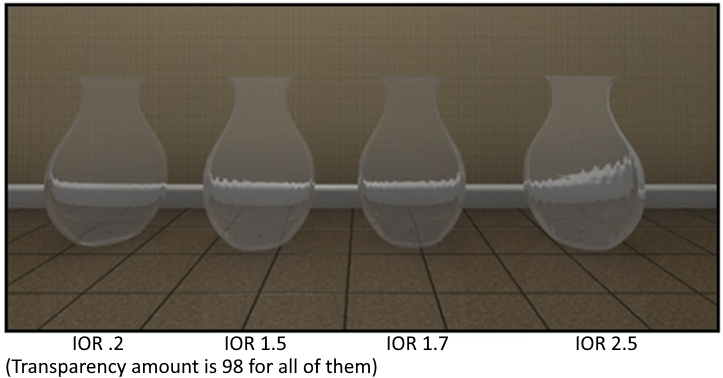
As the value increases, the diffractions and distortions increase. For example; water: 1.3, glass: 1.05, diamond: 2.5, copper and chrome: 2.7, ice: 1.31, crystal: 2 etc ... |
|
Diffuse refraction 
By increasing the spread and sample count values, it provides the opportunity to give the material a frosted glass feature. The increase in the values ensures that the points are distributed homogeneously. Accordingly, rendering time may increase. 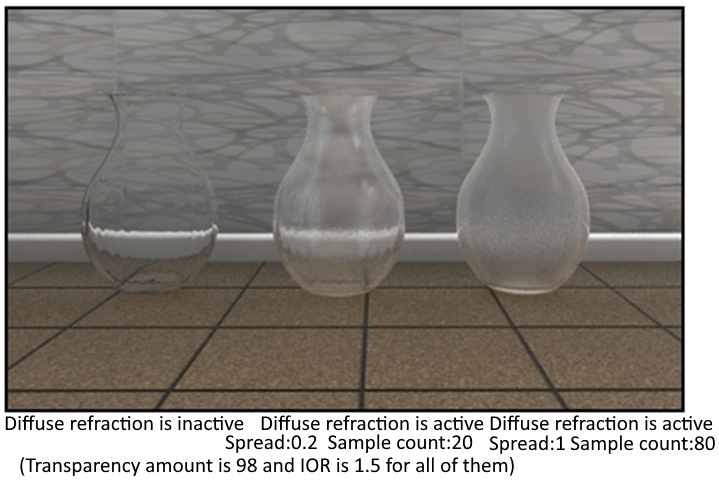
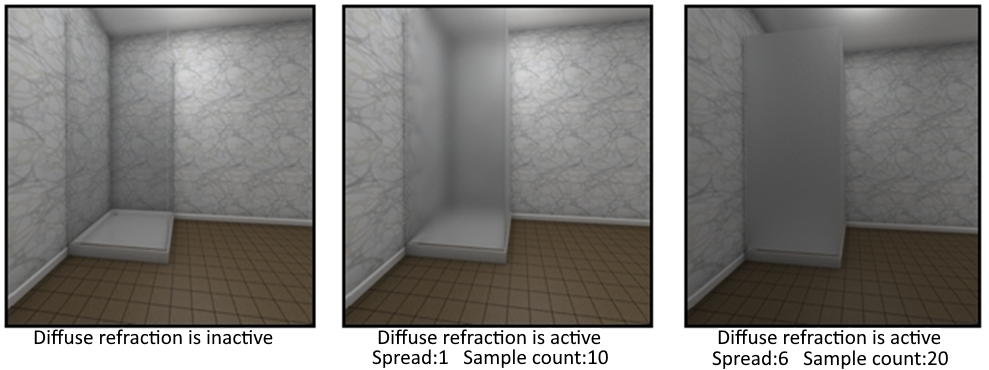
Defective refraction feature vases, glasses, shower cabin and glass wall etc. can be used for. It is seen that the effect of frosted glass increases by increasing the defective breakage values in the shower cabin in the example. |
|
Specifications - Reflectivity Section |
|
Reflectivity The material is provided to reflect light. |
|
Amount Amount between 0-100 can be entered. 
Materials such as glass, parquet and ceramics have reflective properties. |
|
Fresnel reflection It is the back reflection of a part of the light that passes from one of two media with different refractive indices to the other. Fresnel reflection should be activated in materials such as parquet and ceramics or when defining the curtain wall element. Fresnel reflection allows you to define the object view for perpendicular surfaces and reflections for angled surfaces. 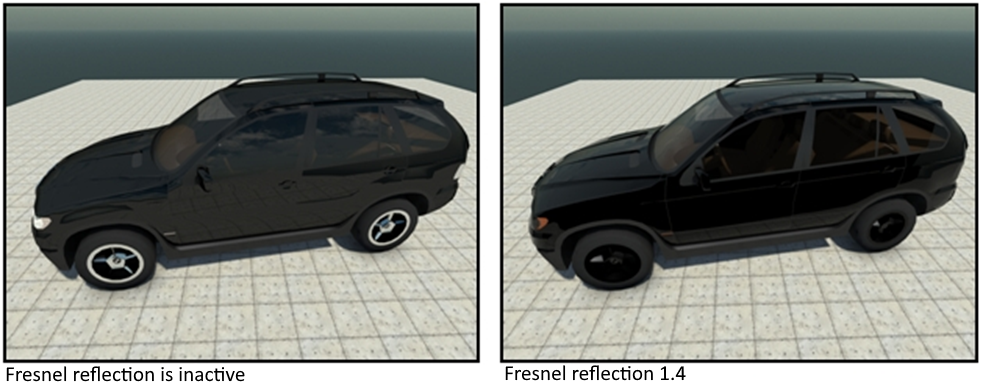
In the first example, the reflection of the tile on the floor can be seen on the door surfaces that look upright. The object's own color should be seen on the surfaces viewed at 90 degrees for correct reflection. Fresnel reflection provided the opportunity to define more realistic reflection as in the second example. |
|
Fresnel IOR It is the refractive coefficient of light passing from one medium to the other. 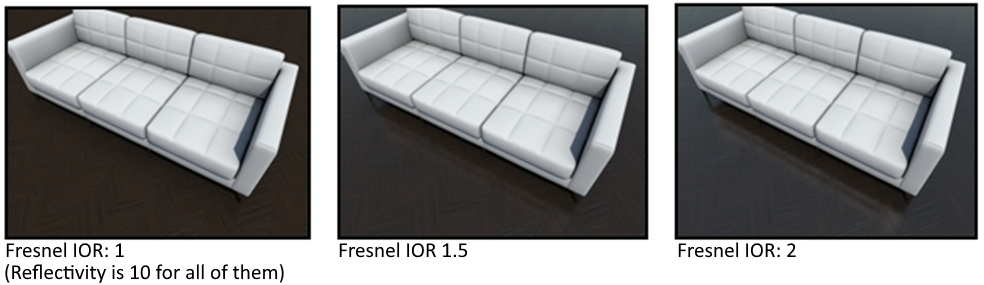
|
|
Fresnel multiplier As the value of the reflection multiplier increases, the reflection becomes more evident on the parquet. 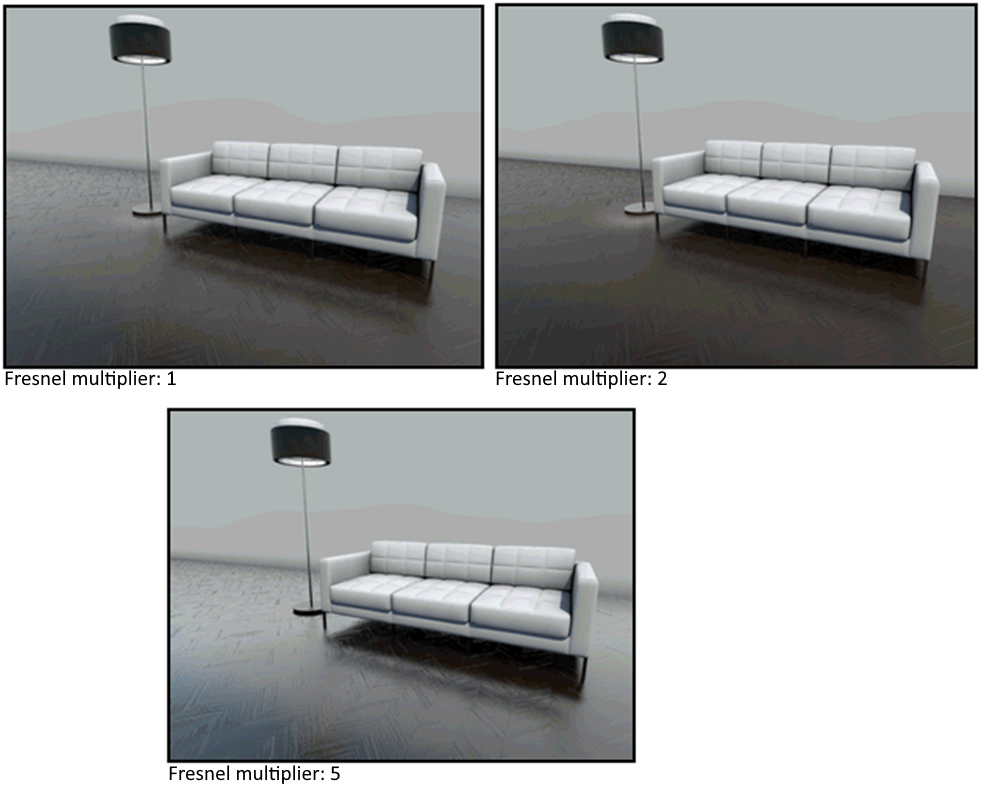
|
|
Metallic reflection It allows the object to reflect while preserving its own color. 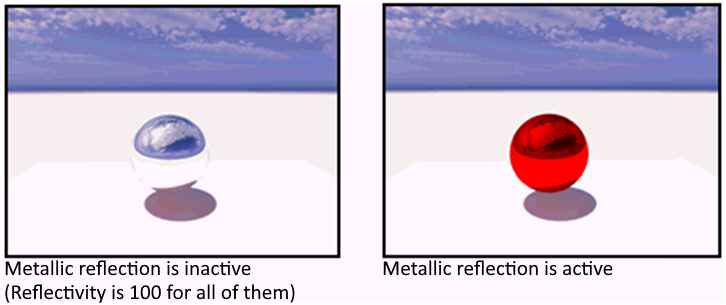
While the reflection is active, the color of the object changes according to the color of the materials affecting the facade. With metallic reflection, the object preserves its own color and reflects the surrounding objects affecting it. In samples 1 and 2, the color of the material is also red. However, in the 1st example, the object reflected the surrounding objects like a mirror with 100% colors. |
|
Diffuse reflection It determines the degree of deterioration of object reflections. All objects show more or less imperfect reflection. 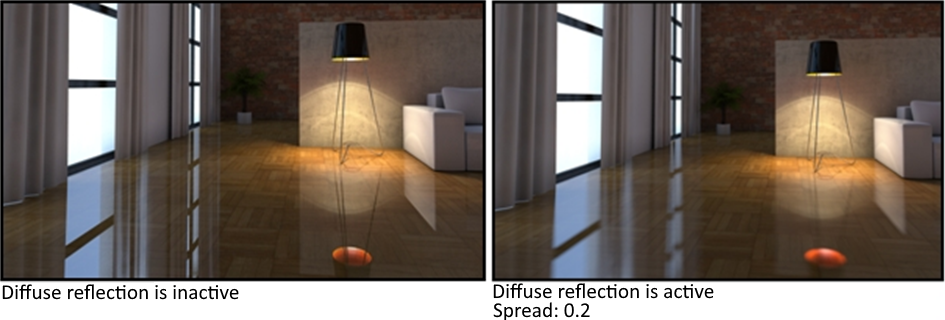
While Fresnel reflection was inactive, it reflected other elements such as parquet, glass, and curtains. The parquet should have a slight reflection feature, but it should not reflect exactly like a mirror. For parquet, it should be ensured that both the texture of the material and the imperfect reflection are created in the parquet by activating the imperfect reflection. |
|
Spread Spread affects the clarity of the reflection. 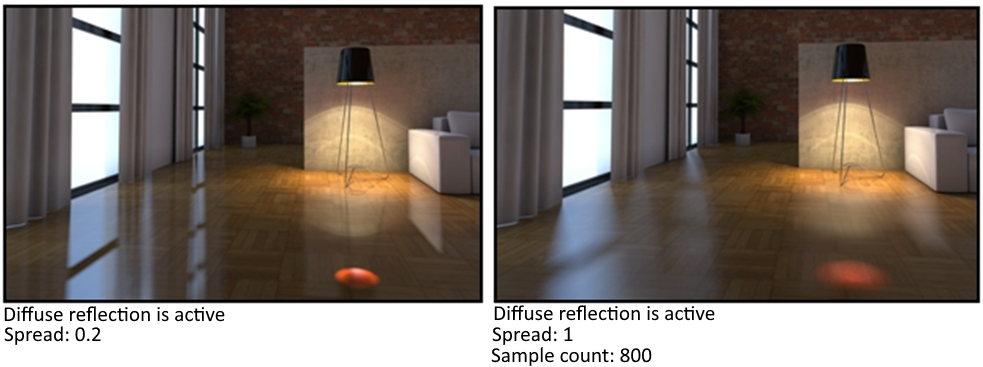
|
|
Sample count It provides a homogeneous distribution of the points on the surfaces where reflection will occur. 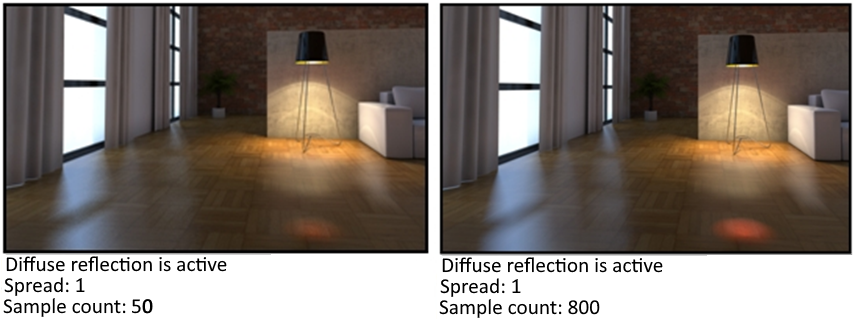
|
|
Specifications - Maps Section |
|
Allows you to define textures in the program or in your hand to the material. You can select and use these textures from the textures folder in the program, as well as textures obtained from the internet (jpeg, bump and shinness in a package). 
You can select and use these textures from the textures folder in the program, as well as textures obtained from the internet (jpeg, bump and shinness in a package). Select texture which is d for texture , bump b for embossing , s or r shinness for reflection. 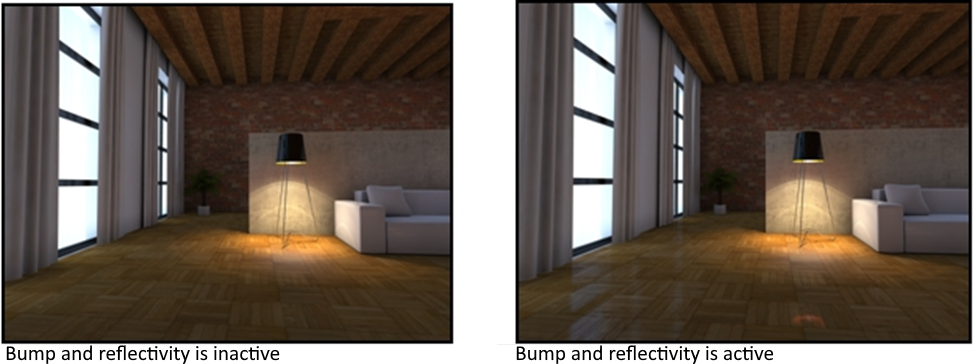
|
|
Texture The image of the material to be used for the object is defined. |
|
Opacity It is the definition of the jpegin to show the back black part as empty and the white part. 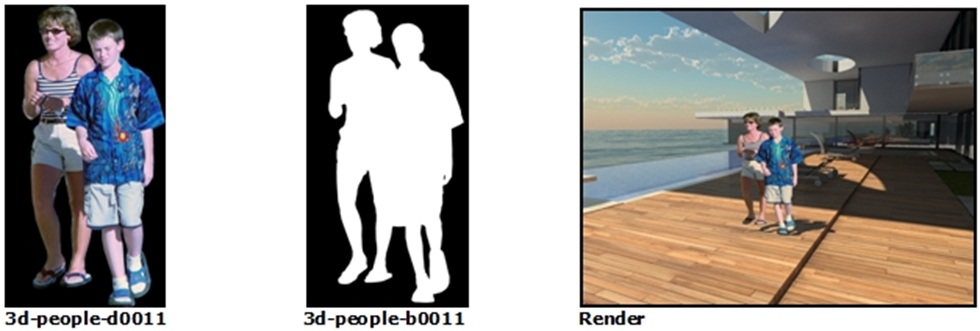
Opacity property can be used for objects such as trees, people, vehicles, etc. Since these objects are 3D dense, it can be made to take up less space by placing a large number of objects created as silhouette instead of placing 3D objects. In addition, by running the "always turn to camera" command in the library settings dialog, silhouette and library objects are automatically turned perpendicular to the camera without the need to be placed perpendicular to the camera. |
|
Bump It allows to feel the created material in 3D. 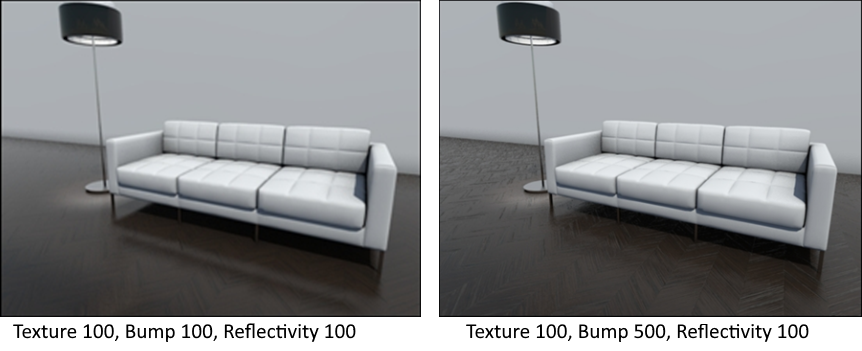
|
|
Shininess It gives shine to the created material. |
|
Reflectivity Gives reflection to the created material. 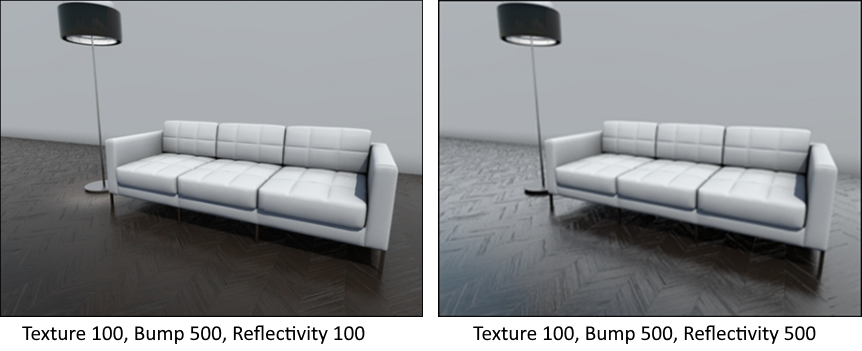
|
|
Displacement 
According to the value in black color defined on the material, the material gains 3D. 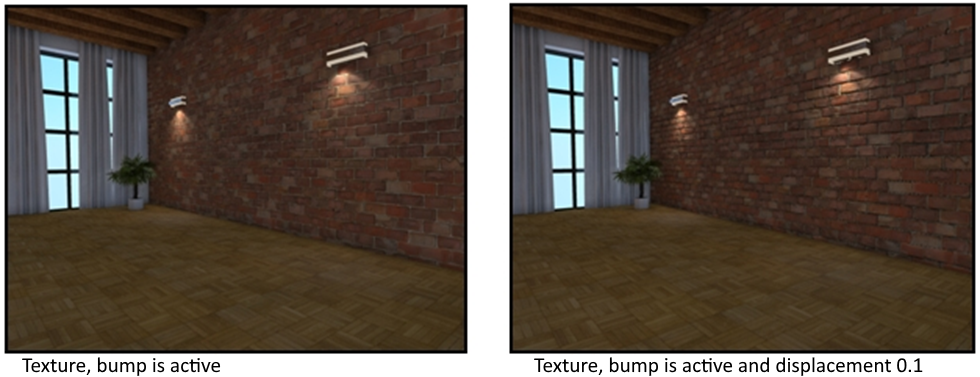
It is seen in examples 2 and 3 that the distance between joints changes with the increase of the displacement value. The quality value is entered between 1-5. This value increases the render quality. Giving the translation feature to the material will increase the rendering time. |
|
Save material Saves the material as .imt extension. |
|
Load material Selects previously recorded materials and adds them to the list of materials. |
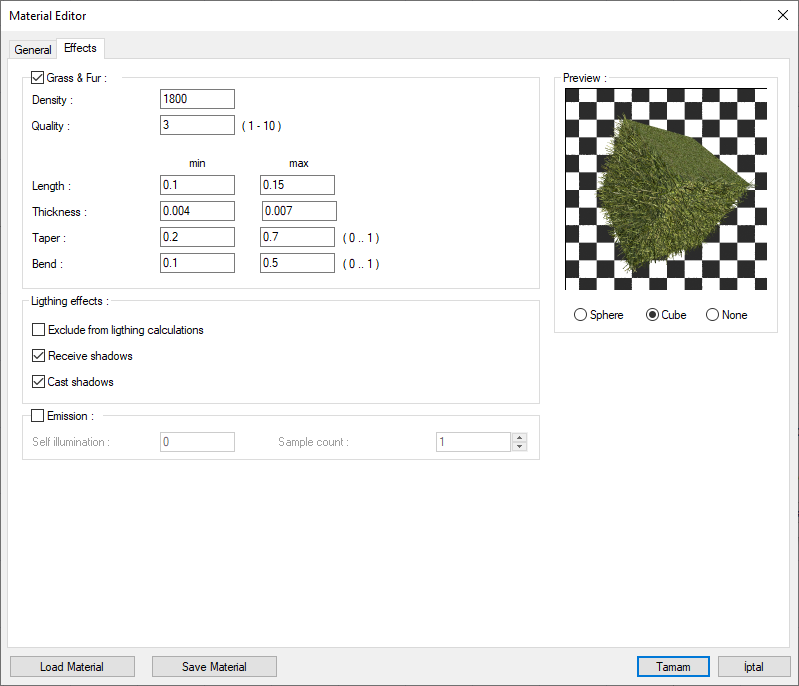
Effects Tab
|
Specifications |
|
Preview 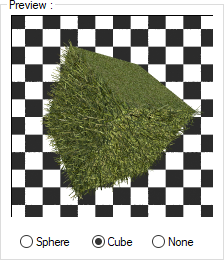
The image of the selected material to be obtained when rendered is previewed. Sphere The preview is shown on the sphere object. 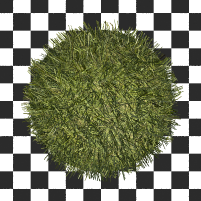
Cube The preview is shown on the cube object. 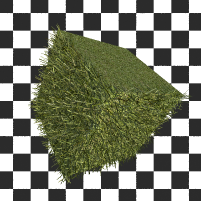
None Preview is not shown.
|
|
Grass & Fur In the effects tab, grass and furs are activated and the grass or carpet is made 3D. |
|
Density It is the amount of grass per unit area. Depending on the increase in density, rendering time may be longer. 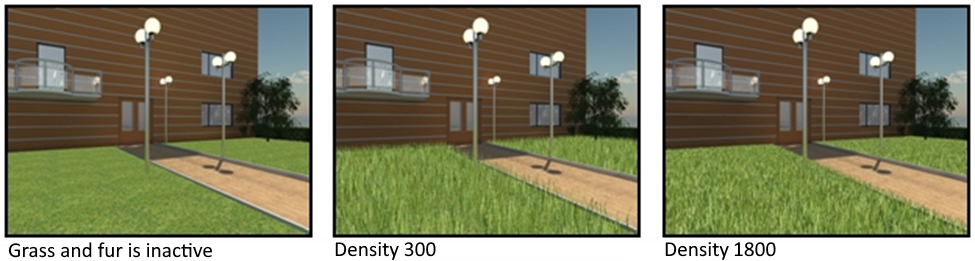
|
|
Quality A value between 1-10 can be entered as the quality number value. The higher the quality number, the higher the bending details of the grass. 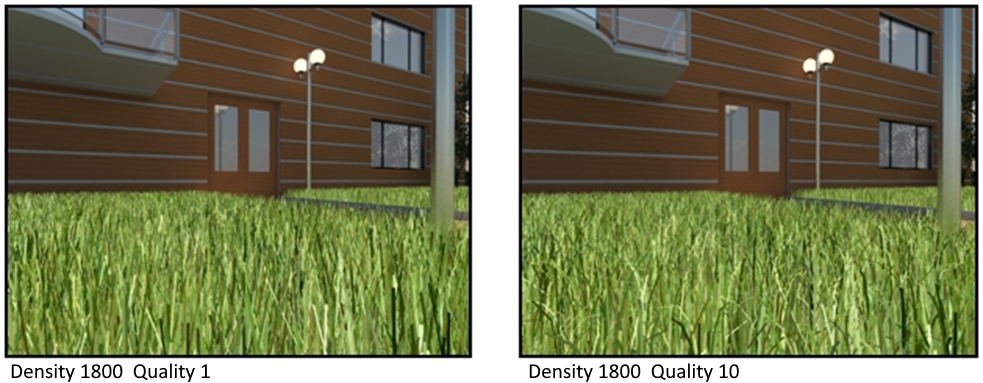
|
|
Length The minimum maximum length is generated in a random interval. The largest and smallest values are entered. |
|
Thickness 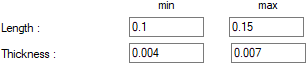
The minimum and maximum thickness is generated in a random range. The largest and smallest values are entered. |
|
Taper 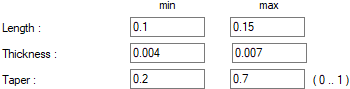
The minimum and maximum thinning is generated in a random range. The largest and smallest values are entered. |
|
Bend 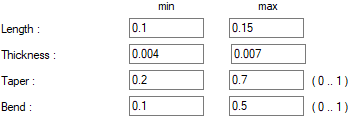
The minimum maximum bending is generated in a random range. The largest and smallest values are entered. |
|
Exclude from lighting calculations It excludes material in light calculation. |
|
Receive shadow Controls whether the object with this material can cast a shadow. |
|
Cast shadow Controls whether the object with this material cast a shadow or not. |
|
Emission By giving the material the luminous intensity, the object itself is made to be a light source. 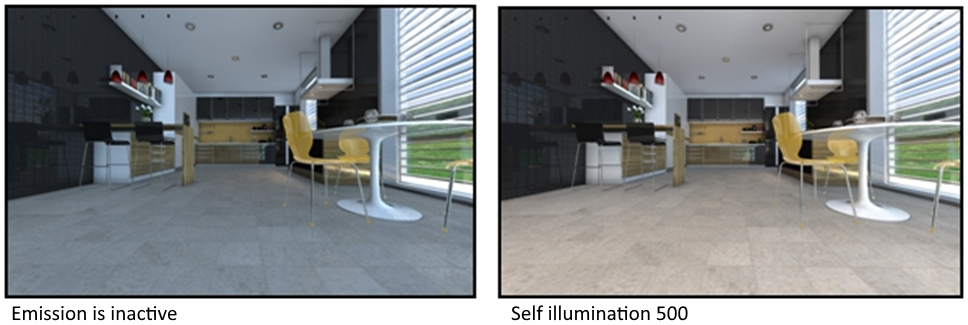
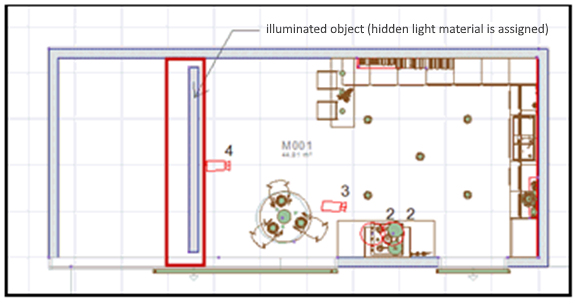
The object that we use the light material can be a wall or a box object. As seen in the example, the wall object can be elevated. When the glow feature is active, the illuminated object can be defined in addition to the environment or the lampshade etc. with the help of the 3D geometric object command. The lighting element can be modeled in 3D, and the material can be given the luminous feature. |
|
Self illumination The amount of illumination is entered. |
|
Sample count It specifies how many points the light will be calculated. It affects the quality of the edges of soft shadows. |
|
Save material Saves the material as .imt extension. |
|
Load material Selects previously recorded materials and adds them to the list of materials. |
Next Topic