
Composite materials are the collection of different layers such as plaster, wall core, levelling concrete, and insulation in a group. Objects defined with composite material are drawn with the material properties defined in plan and section planes. The drawing technique to draw practically all possible layers on an object is defined by the user as a composite material and this composite material is assigned to the wanted object in the object settings dialog.
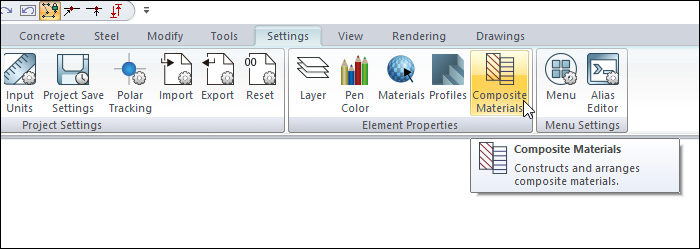
Location of Composite Materials Command
You can access it under the Ribbon menu Settings tab Element properties heading.
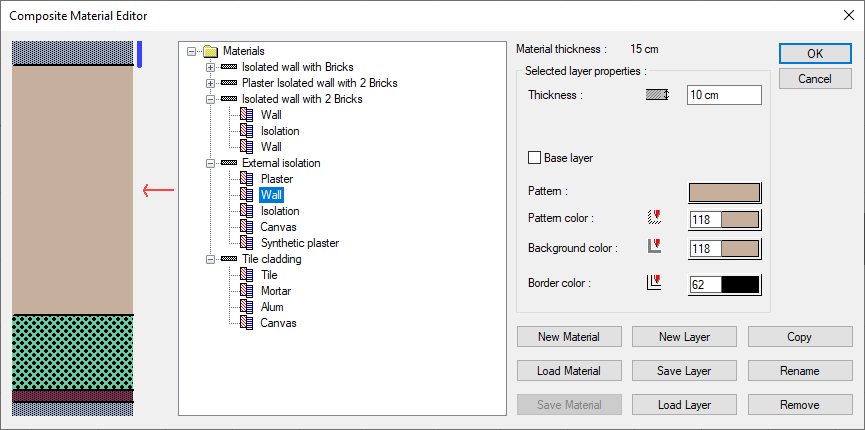
Composite Material Editor
To create composite material;
-
Click the Compound Materials icon.
-
The Compound Material Editor dialog will open.
|
Specifications |
|---|
|
Layering preview 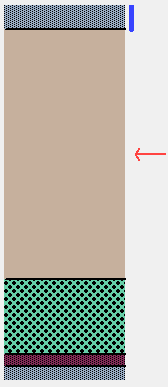
The cross section drawing is shown taking into account the layers of the material, hatches and thicknesses. |
|
List of materials 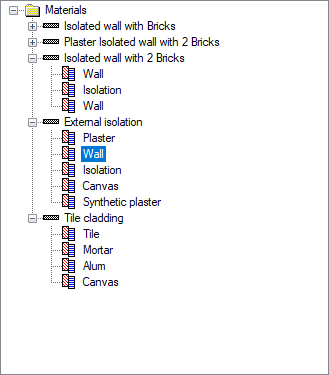
Composite materials loaded in the project |
|
Material thickness Writes the thickness of the composite material defined. |
|
Thickness The thickness of the layer created is defined in this line. |
|
Base layer A layer is defined as the base layer, as the composite material can consist of more than one layer definition. When entities with composite materials are intersected, intersections are made based on the base layers. Normally, in objects with the same composite material, the intersection will occur automatically, since each layer coincides in the same direction. When objects with different composite materials are combined, the layer on which the intersection will be made is determined by the base layer. Intersections will be joined by extending the base layers to each other. Other layers will end at the junction of the object. |
|
Pattern It is determined in which hatch the selected layer will be drawn. The desired hatch type is selected in the pattern options dialog that opens by clicking it. |
|
Pattern color The color of the selected hatch is determined. It can be changed by clicking on the color box and dragging the mouse cursor on the color palette that opens. |
|
Background color It is the color of the ground under the hatch. It can be changed by clicking on the color box and dragging the mouse cursor on the color palette that opens. |
|
Border color The line of the color that defines the boundary of the hatch is set. It can be changed by clicking on the color box and dragging the mouse cursor on the color palette that opens. |
|
New material Used to create a new material. |
|
Load Material Used to load a previously defined material. |
|
Save Material Used to save a defined material for later use. |
|
New layer Used to open a new layer. |
|
Load layer Used to load a previously saved layer. |
|
Save layer Used to save a defined layer for later use. |
|
Copy Creates a copy of the highlighted line. |
|
Rename It is used to change the name of the composite material or layer being studied. |
|
Remove It is used to delete a defined material or layer. |
Usage Steps
-
Click the New Material button to define a new composite material .
-
A line named New Material will appear in the composite materials list . The new item can change the name at this stage.
-
A layer named Empty Layer has also been created under the new material row .
-
You can change the names of New Material and Empty Layers by clicking the Rename button .
-
You can create other layers with the New Layer button.
-
As you layer, the appearance of the materials will change on the left. Each layer represents the layer of composite material. You can change the thickness, color, hatching type of the layer using the parameters on the right.
-
When the layer definition process is finished, click the OK button and exit the dialog. You can assign the layer you define to the object you want.
|
Usage step |
|---|
|
Creating new material 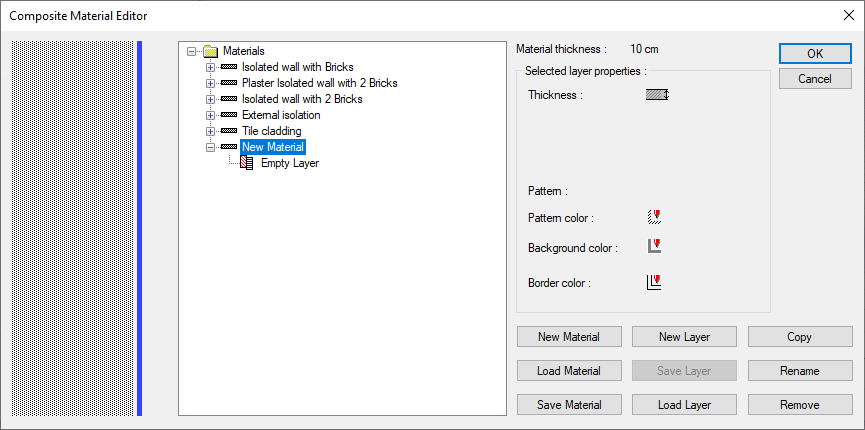
|
|
Naming the material and layer 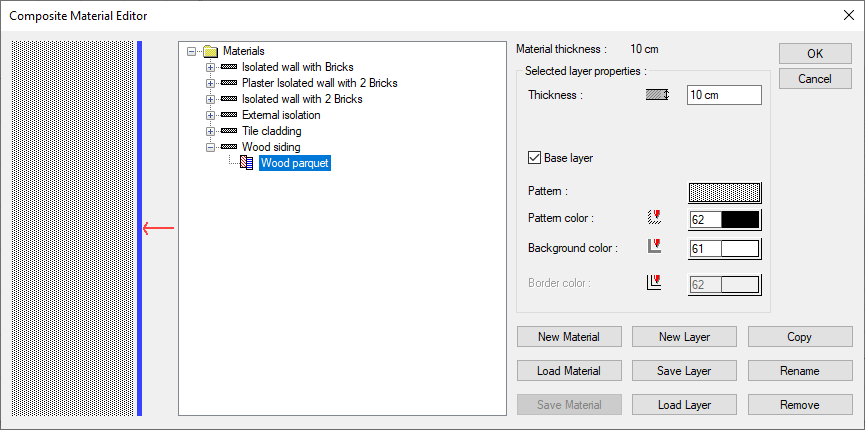
|
|
Entering thickness value in layer and selecting its hatch 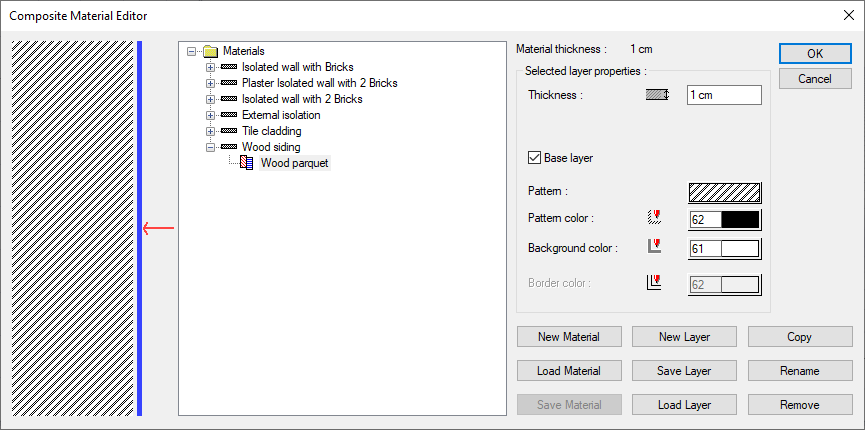
|
|
Creating new layers 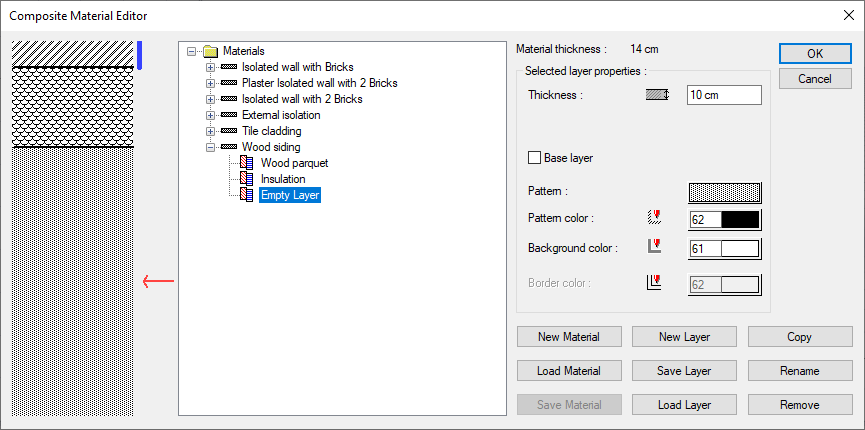
|
|
Completing compound material 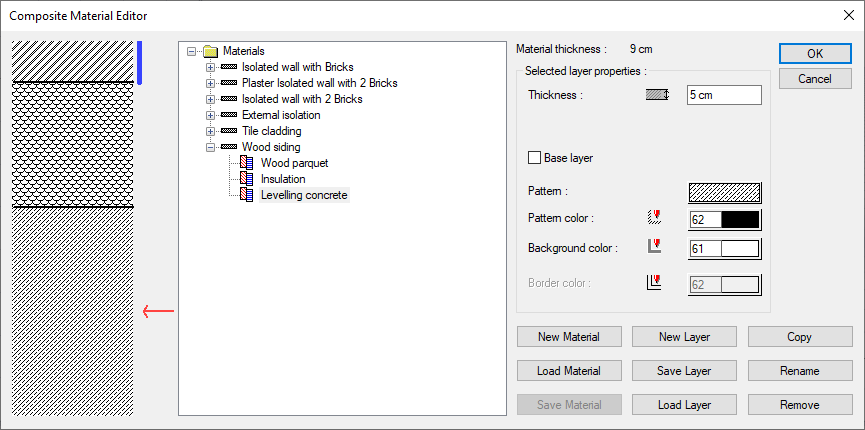
|
Next Topic