
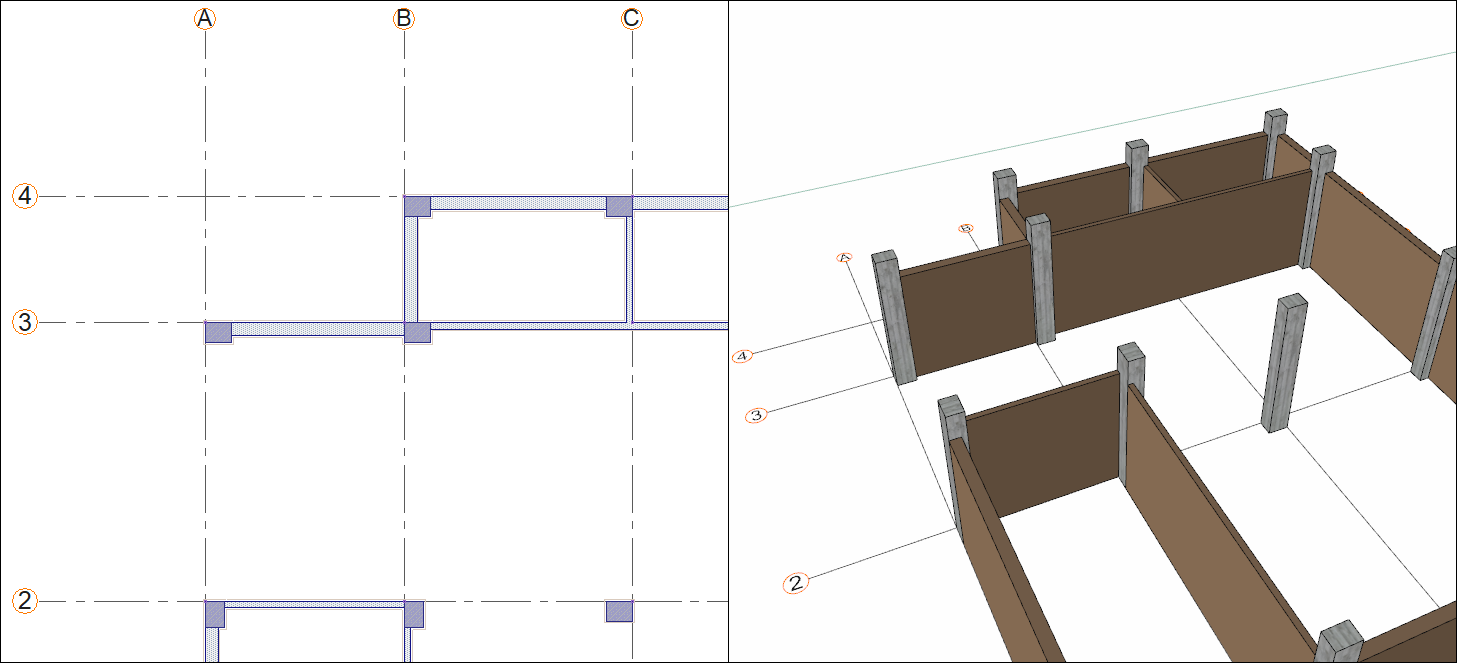
Create the base story zones in this section. Create a border with the zone edge to define zones for areas with or without walls.
|
Previous steps have been followed in the project file called Create the Zones. You can download the file and follow the steps given in this title on the project. |
-
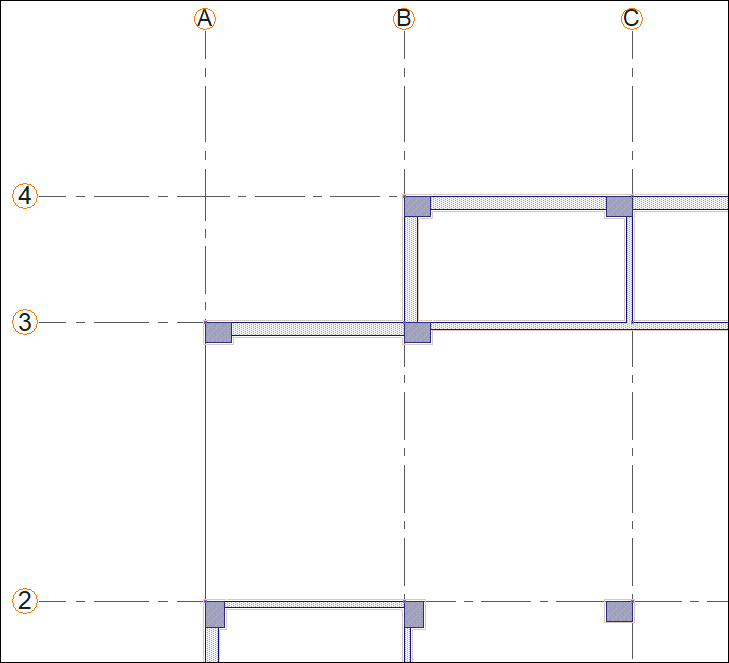
First, delete the wall located on the vertical axis A between the 2 and 3 axes. In the following steps, you will define a curtain wall here.
-
Click on the command zone edge. Click the A-2 axis intersection as your starting point.
-
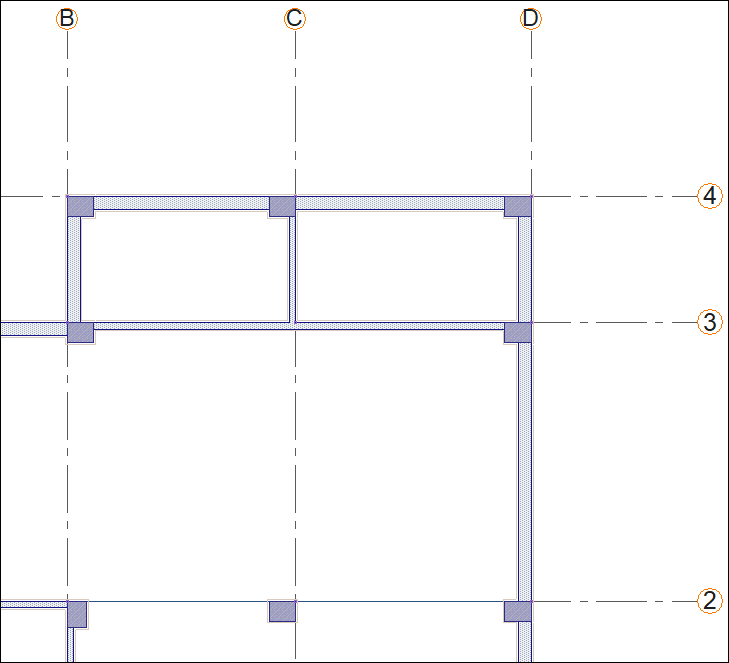
Click on the D-3 axis intersection. Zone edge will be formed.
-
To draw a zone edge independent of the drawn zone edge, press the Esc key on the keyboard and exit the command.
-
Click on the command zone edge.
-
Click on B-2 axis intersection then click on D-2 axis intersection.
-
Your zone edge will be formed. It will allow you to have 2 different zones in one closed area.
-
Press the Esc key on the keyboard to exit the command.
-
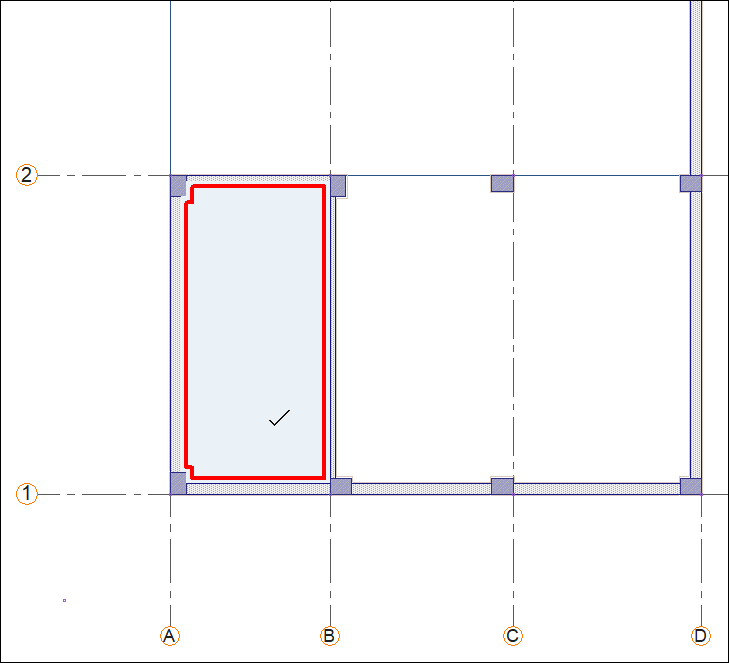
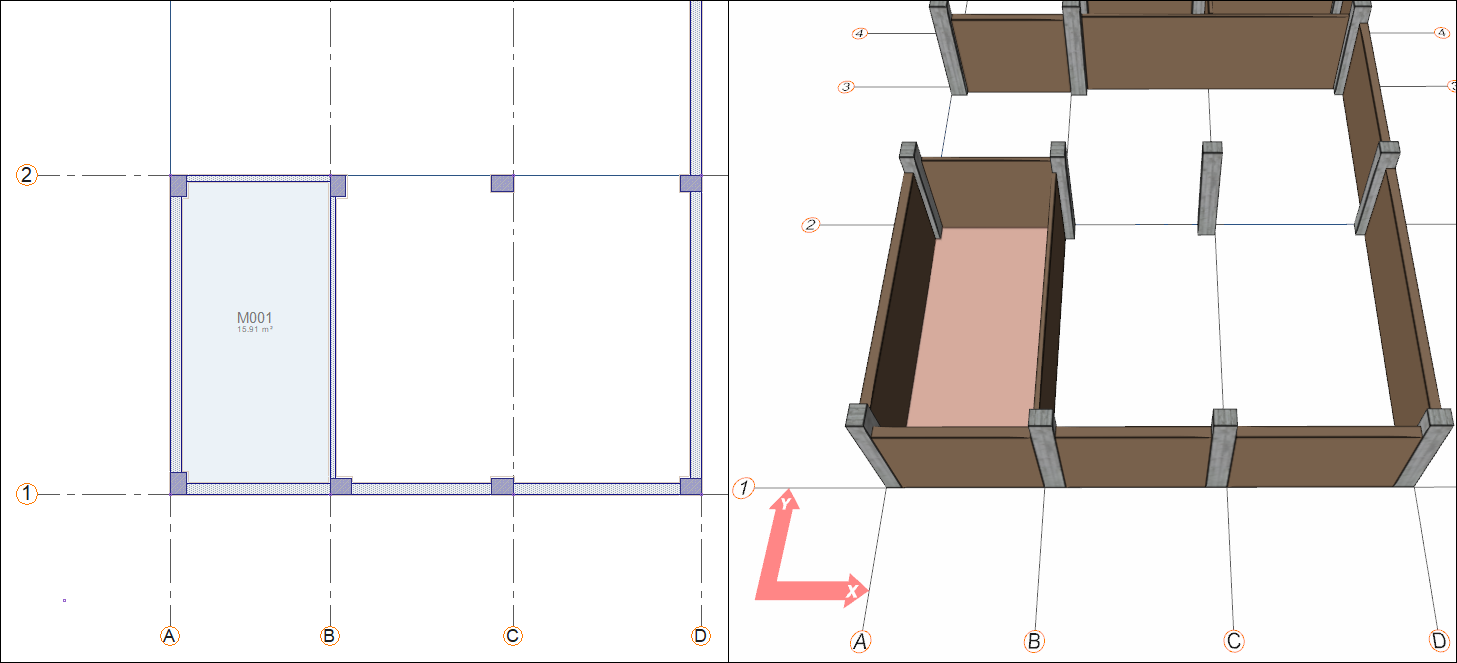
Enter the zone command.
-
Move your mouse over the area delimited by axes 1-2 and A-B and click the left button.
-
The zone will be formed.
-
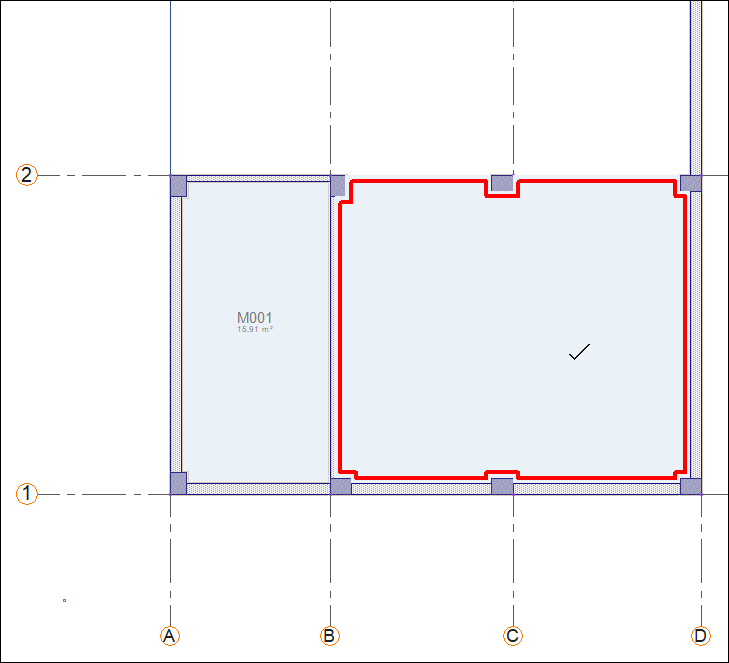
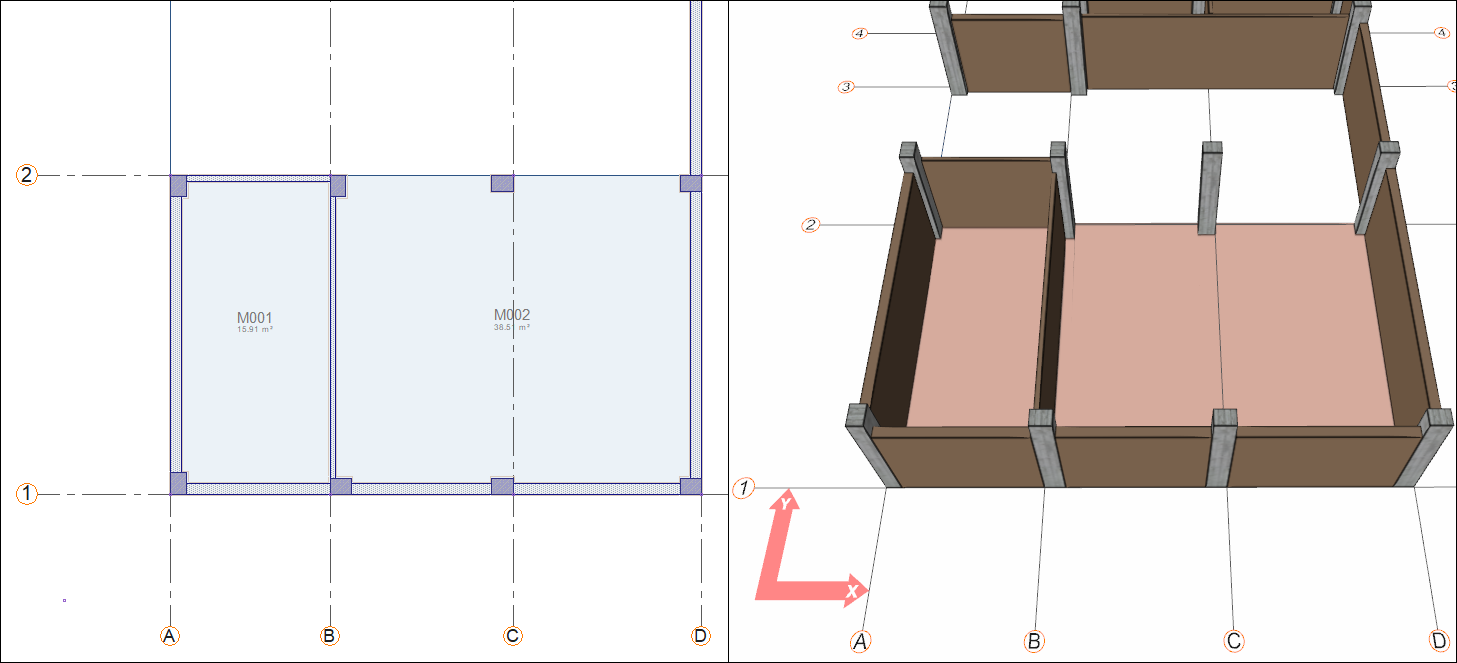
Move your mouse over the area delimited by axes 1-2 and BD and click the left button.
-
The zone will be formed.
-
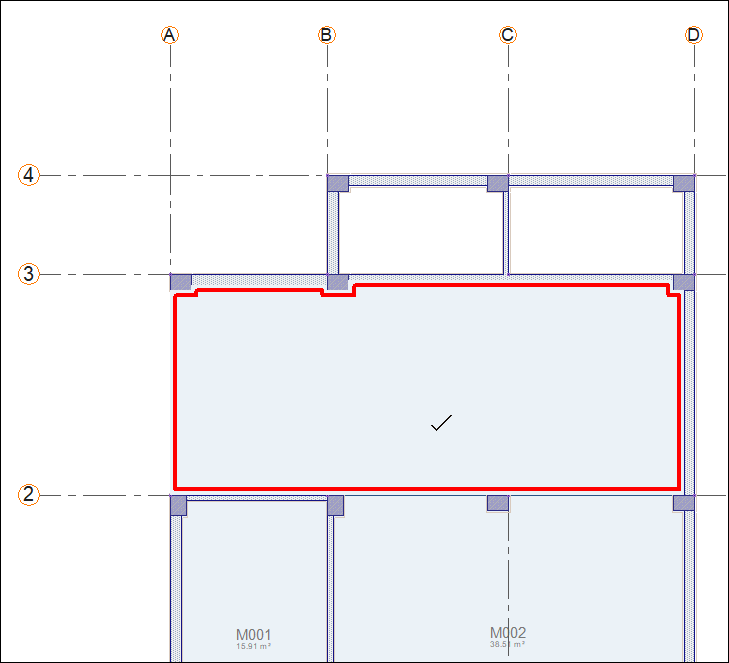
Move your mouse over the area delimited by axes 2-3 and A-D and click the left button.
-
The zone will be formed.
-
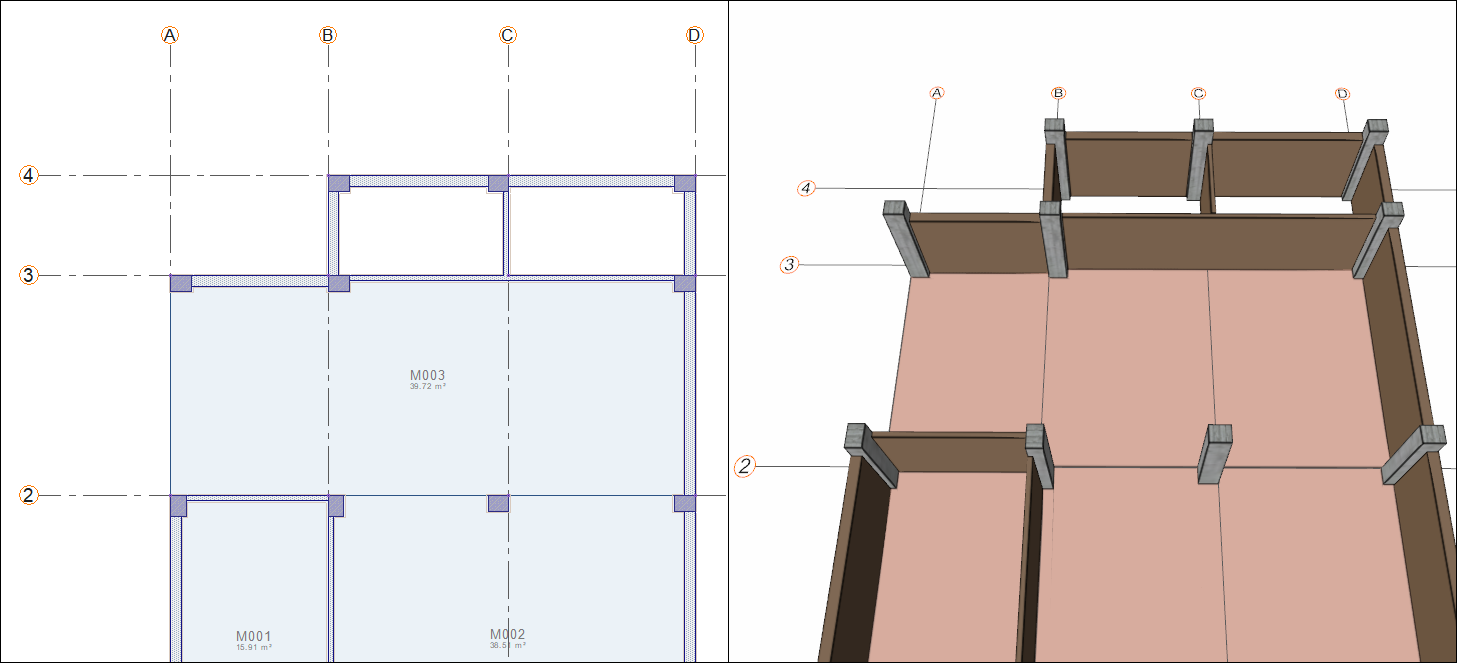
Move your mouse over the area delimited by axes 3-4 and B-C and click the left button.
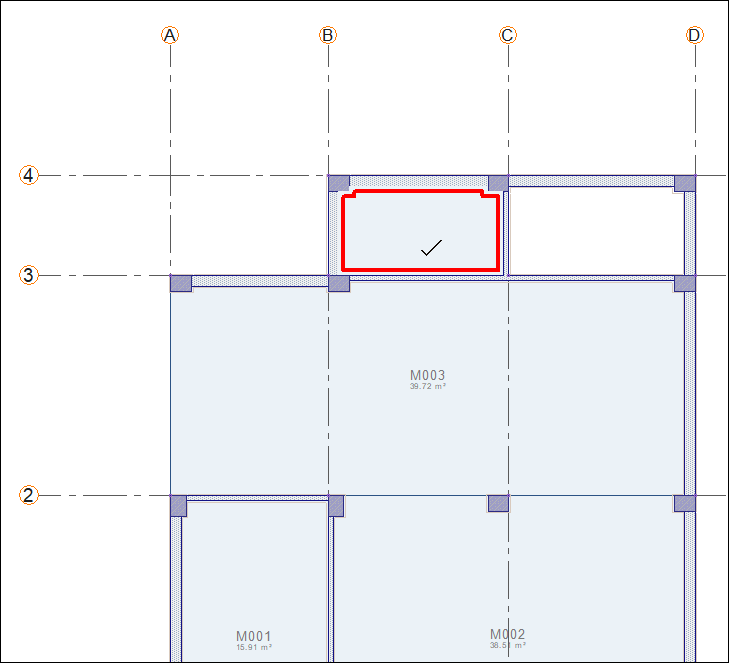
-
The zone will be formed.
-
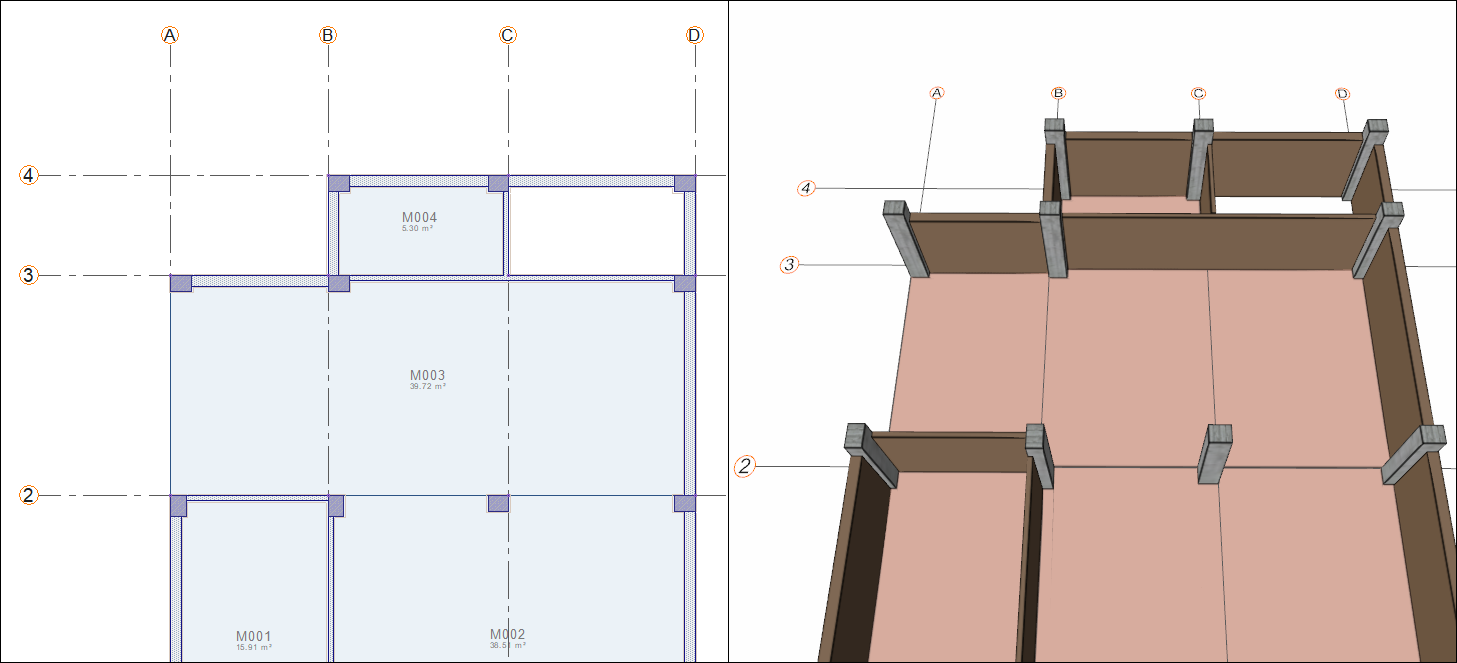
Move your mouse over the area delimited by axes 3-4 and C-D and click the left button.
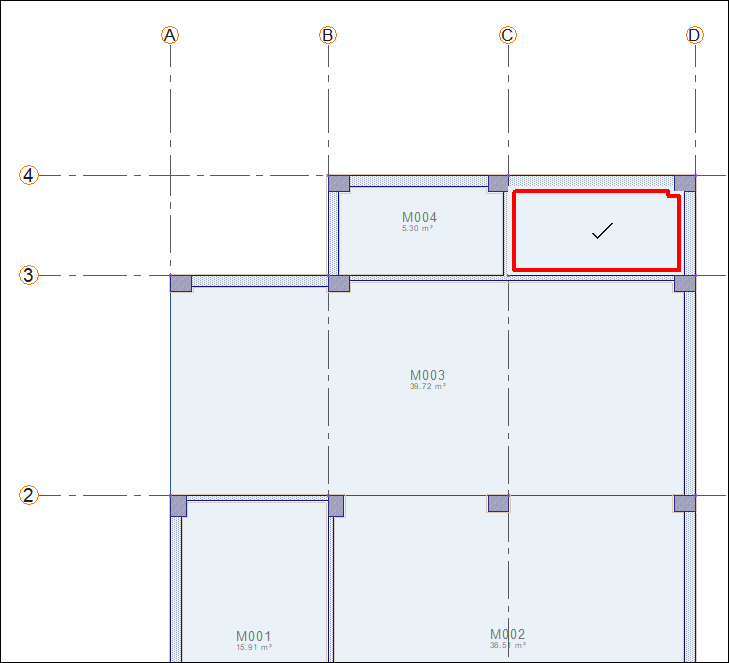
-
The zone will be formed.
-
Press the Esc key on the keyboard to exit the command.
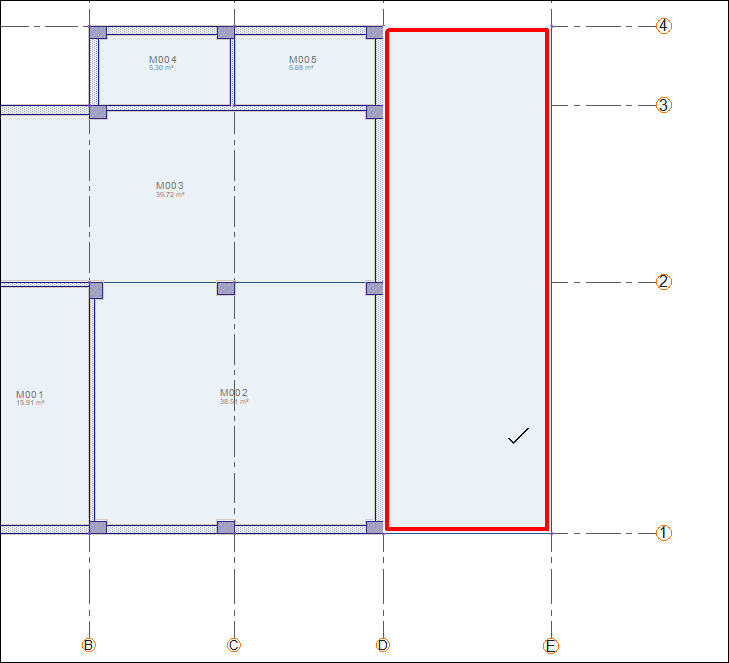
For the patio, create a zone by creating a zone edge and outer borders.
-
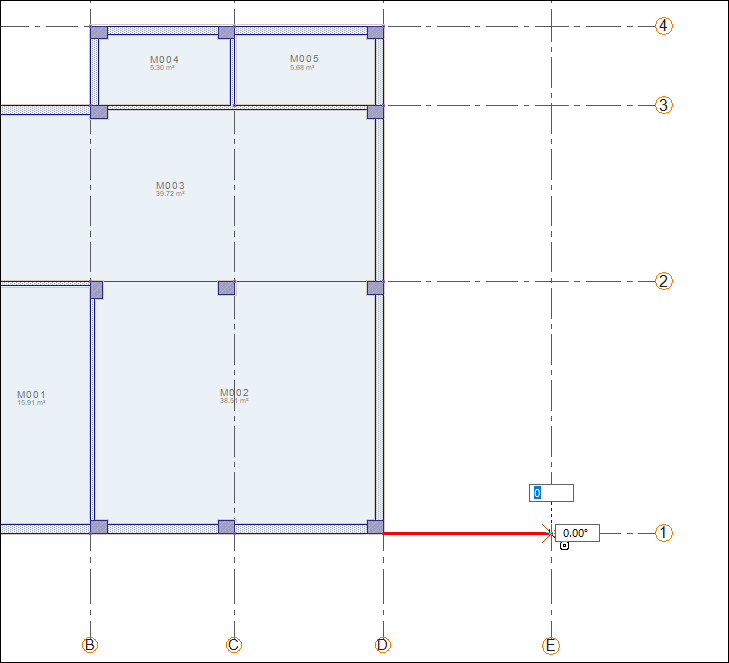
Click on the command zone edge.
-
Click the D-1 intersection as your starting point.
-
Click on the E-1 axis intersection. Zone edge will be formed.
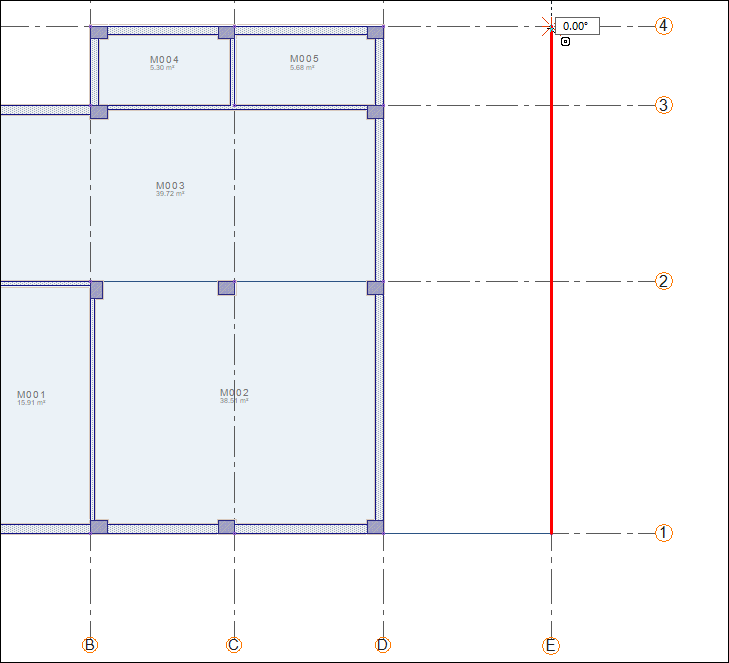
-
Click on the E-4 axis intersection. Zone edge will be formed.
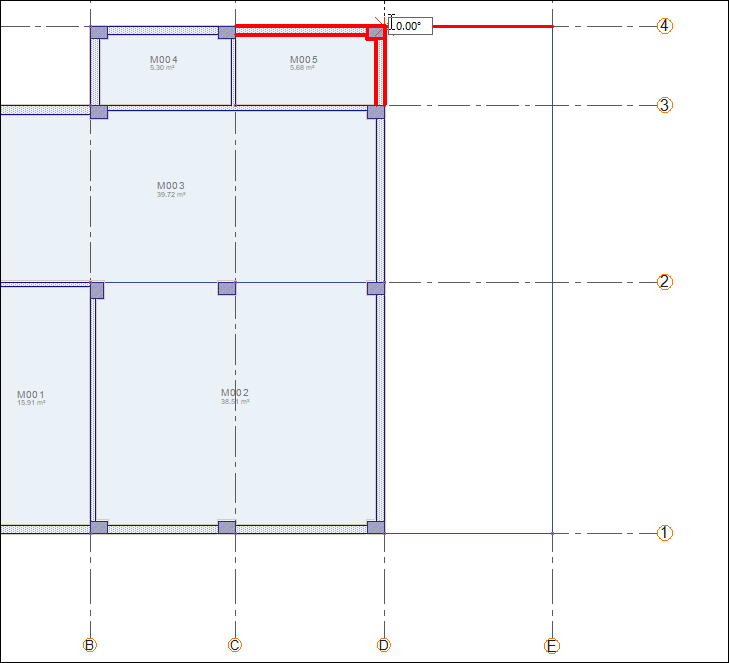
-
Click on the D-4 axis intersection. Zone edge will be formed.
-
Press the Esc key to exit the zone edge command. Click on the zone command.
-
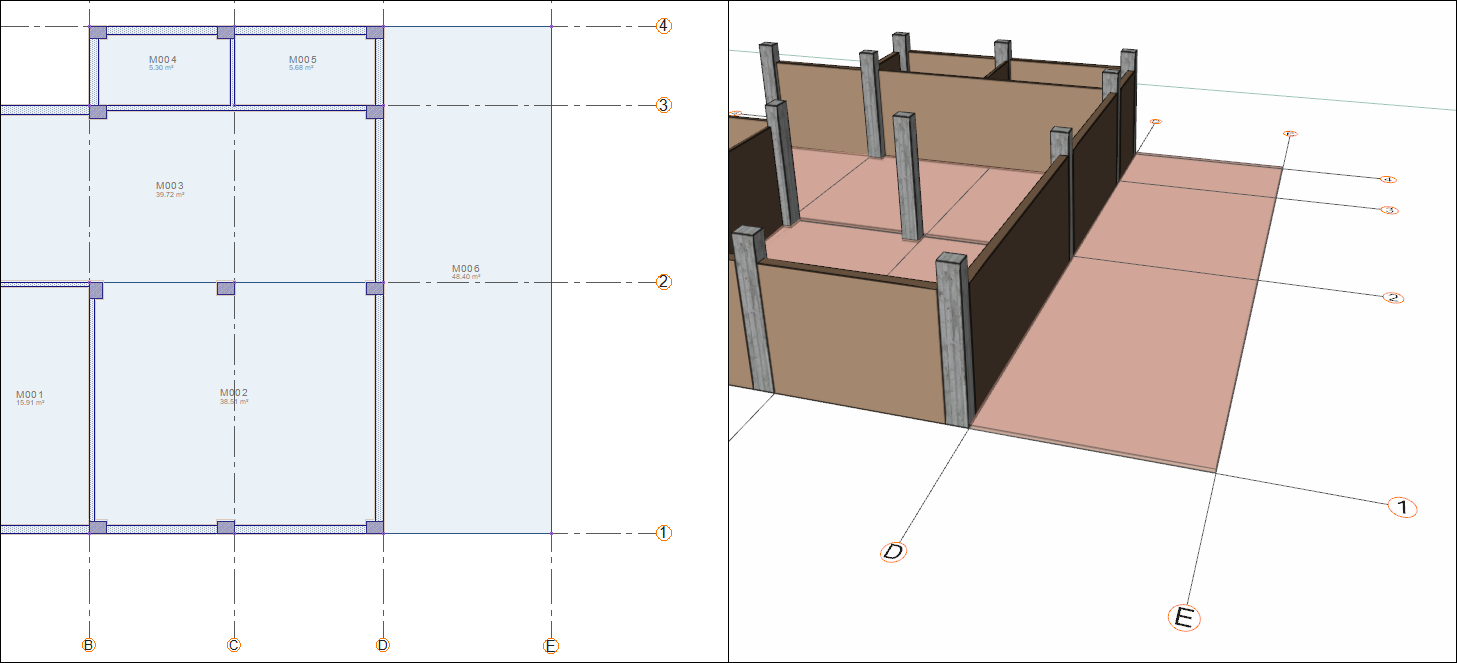
Move your mouse over the closed area that you created with the zone edge and click the left button.
-
The zone will be formed. Press the Esc key on the keyboard to exit the command.
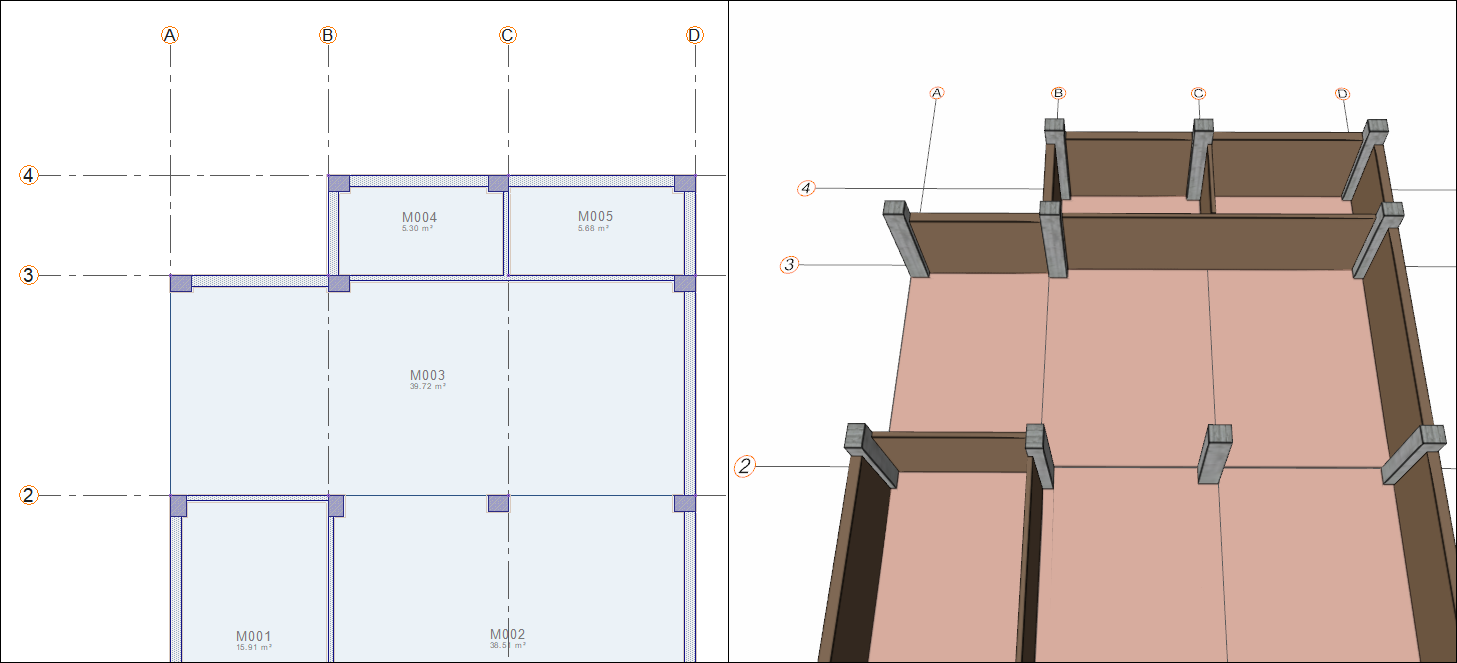
-
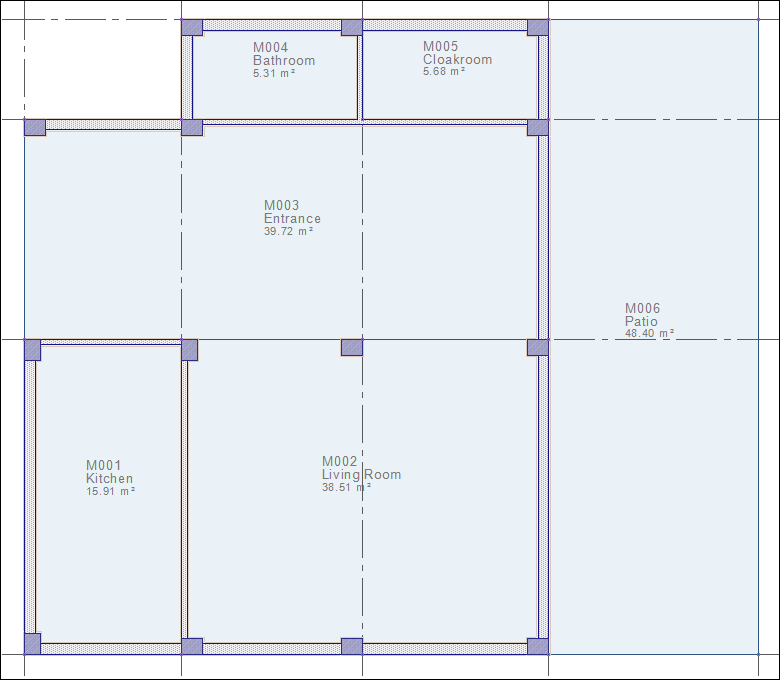
Base story zones completed.

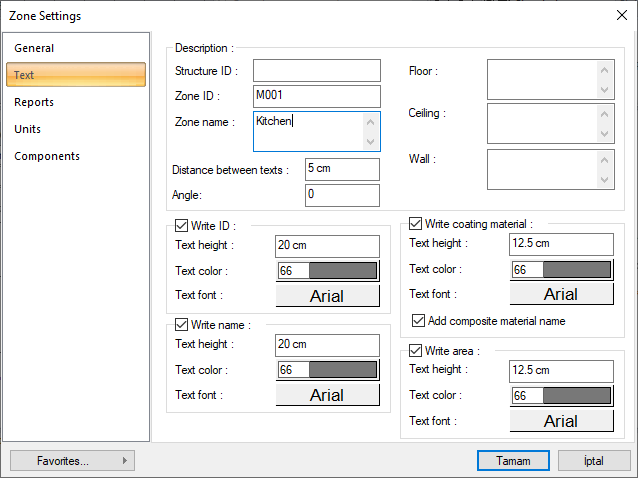
Add zone names to the zones.
-
Move your mouse over the zone labeled M001 and double click.
-
The zone settings dialog will open. Write Kitchen in the zone name line.
-
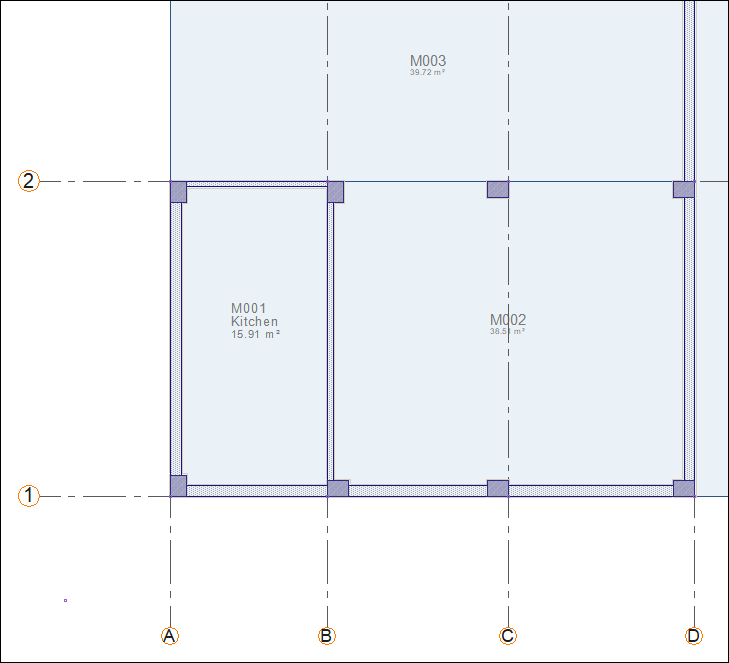
Click the OK button to close the dialog. The zone name will be added to the plan.
-
Name the zone labeled M002 Living Room.
-
Name the zone labeled M003 Entrance.
-
Name the zone labeled M004 Bathroom.
-
Name the zone labeled M005 as Cloakroom.
-
Name the zone labeled M006 Patio.
Follow the steps of the video below.
Next Tutorial