
With the Drop Panel/Pedestal Settings command, settings such as size, drawing, material selection are accessed.
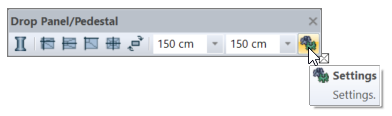
Location of the Drop Panel/Pedestal Settings Dialog
The drop panel/pedestal that appears after the drop panel/pedestal command is run is available in the auxiliary toolbar.
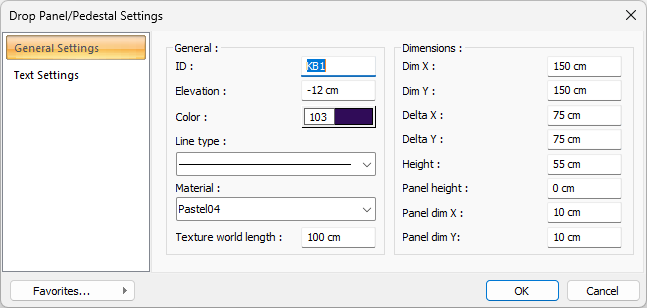
General Settings Tab
|
Specifications |
|---|
|
ID Name of the drop panel/pedestal. When entering the drop panel/pedestal, the drop panel/pedestal name is automatically created by increasing the number at the end of the drop panel/pedestal name. It is possible to change the drop panel/pedestal name after defining the drop panel/pedestal. |
|
Elevation It refers to the elevation of the upper surface of the drop panel/pedestal with respect to the floor ceiling. Negative (-) or positive (+) value can be entered. |
|
Color The drop panel/pedestal is the color of the border lines. The color palette is scrolled by clicking and holding down the left mouse button. The button is released when the wanted color is reached. The color box turns into the selected color. If the left button is clicked with the shift key, or if the right button is clicked, the pen thickness of the relevant color can be adjusted. |
|
Line type Line type of the line forming the drop panel/pedestal is selected in the plan. Clicking the down arrow buttons to the right of the boxes opens the list of line types. From this list, the wanted line type is selected by clicking with the left mouse button. |
|
Material 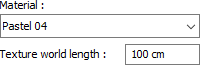
The material to be coated on the drop panel/pedestals in the solid model is selected. The drop panel/pedestal is covered with the selected material and displayed in the solid model like this. Click on the down arrow button with the left mouse button. The appropriate material is selected from the opened material list. If there is no defined item, the list is blank. Adding material is done from the dialog that opens by clicking the Settings/Materials line. |
|
Dim X/Dim Y The dimensions of the drop panel/pedestal are entered. In the ideCAD, Dim X refers to the horizontal dimension (width) of the drop panel/pedestal in the plan and Dim Y denotes the vertical dimension (height) in the plan. drop panel/pedestals can be found in any position (angle) in the plan depending on the columns to which they are connected. |
|
Delta X/Delta Y X and Y alignment are entered. Alignment is given according to the upper left corner of the drop panel/pedestal. When delta X and Y are zero, the upper left corner of the drop panel/pedestal coincides with the column node. When a positive (+) value is entered for delta X, the drop panel/pedestal shifts horizontally to the left. If a negative (-) value is entered, it shifts to the right. If a positive (+) value is entered for delta Y, the drop panel/pedestal scrolls vertically upward, if a negative (-) value is entered, downward. |
|
Height Vertical (z direction) height of the drop panel/pedestal. |
|
Panel height The height (thickness) of the horizontal panel to be placed on the drop panel/pedestal. |
|
Panel dim X / Panel dim Y The size of the panel to be added to the drop panel/pedestal in the X and Y directions. For example; If the drop panel/pedestal X dimension 1.5 is entered and 0.2 is entered in the Panel Dimension X, the dimension of the Panel in the X direction will be 1.5 + 0.2 = 1.7 meters. |
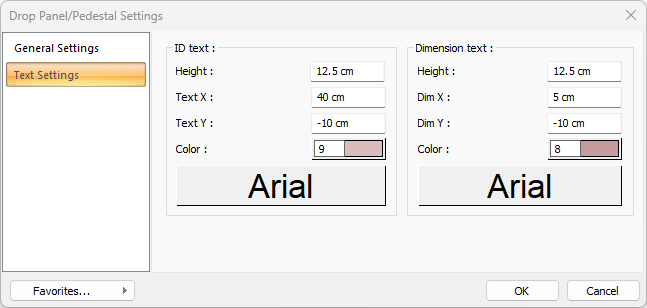
Text Settings Tab
|
Specifications |
|---|
|
ID text 
The height of the column ID text is entered. The color box is slid over the color palette that is opened by clicking with the left mouse button and holding down the button. The button is released when the desired color is reached. The color box turns into the selected color. If clicked together with the Shift key, the pen thickness of the relevant color can be adjusted. If the button just below is clicked, the Font Settings dialog opens. From this dialog, the drop panel/pedestal ID Text, font is set. Articles are written horizontally. |
|
Dimension text 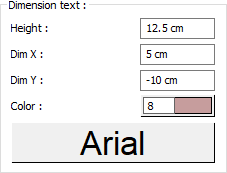
The height of the drop panel/pedestal size text is entered. The color box is slid over the color palette that is opened by clicking with the left mouse button and holding down the button. The button is released when the desired color is reached. The color box turns into the selected color. If clicked together with the Shift key, the pen thickness of the relevant color can be adjusted. If the button just below is clicked, the Font Settings dialog opens. From this dialog, the drop panel/pedestal Size Text, font is set. Articles are written horizontally. |
|
Text X/Text Y X and Y coordinates are entered according to the drop panel/pedestal upper left corner of the Column Title Name text. Text If the X value is positive, the name text will move to the left, if it is negative, it will move to the right. Text scrolls up if the Y value is positive, and down if it is negative. |
|
Dim X/Dim Y X and Y coordinates are entered according to the upper right corner of the drop panel/pedestal size text. If the dimension X value is positive, the dimension text shifts to the left, if it is negative, it shifts to the right. If the dimension Y value is positive, the dimension text will scroll up, and if it is negative, it will scroll down. |
Next Topic