
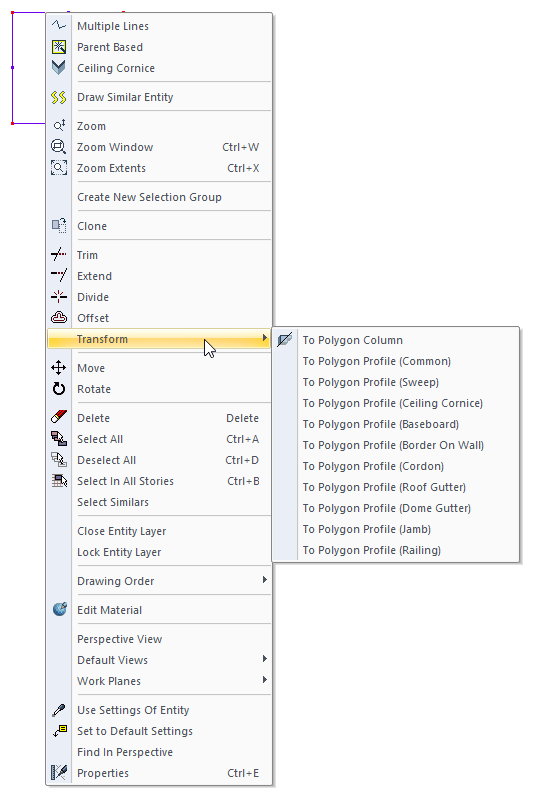
With the Transform/To Polygon Profile command, jambs, baseboards, ceiling cornice etc. can created. A closed area is created with primitive objects to be used in sweeps and a drawn section is transform into a sweep. During transformation, the sweep is opened and the new profile is saved there.
Location of Transform/To Polygon Profile
You can access the Transform/To Polygon Profile command from the right click menu. Transform/To Polygon Profile command; to polygon profile (common), to polygon profile (sweep), to polygon profile (ceiling cornice), to polygon profile (baseboard), to polygon profile (border on wall), to polygon profile (cordon), to polygon profile (roof gutter), to polygon profile (dome gutter), to polygon profile (jamb) andto polygon profile (railing) options.
Usage Steps
For example, to create a profile of 2x2 cm;
-
Turn on the Ortho mode of the program . (First of all, zoom extent factor so that you can easily see an area of 2cmx2cm. You can do this with the middle mouse button)
-
Click the Multiple Lines icon in the ribbon menu.
-
Click a point in the drawing area.
-
In the coordinate box, type 2 cm on the L line, press Enter and draw a 2 cm line segment in the horizontal direction to the right.
-
In the coordinate box, type 2 cm on the L line and press Enter and draw a 2 cm line segment in the vertical direction.
-
In the coordinate box, type 2 cm on the L line and press Enter and draw a 2 cm line segment to the left in the horizontal direction.
-
And finally click the first point.
-
There will be a 2x2 cm box. We will save this box as a profile.
-
Select the entire box and click the right mouse button with the mouse pointer over the box.
-
Click the Transform/To Polygon Profile(Common) line from the menu that opens .
-
The Profile Settings dialog will open.
-
Type 2 cm x 2 cm in the profile name, click the OK button to close the profile settings dialog.
|
Usage step |
|---|
|
Creating the first point for the profile 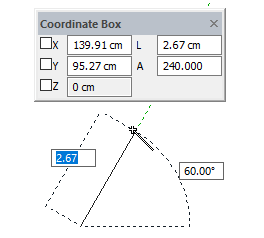
|
|
Determining the length of the edge - Entering the value 2 by pressing the L key and pressing the enter key 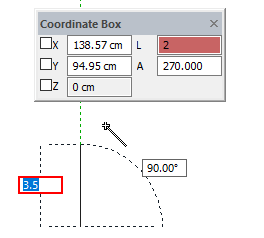
|
|
Clicking the left mouse button to create the first edge and determine the second edge length - Press the L key to enter the value 2 and press the enter key 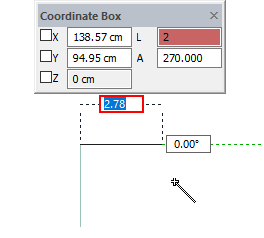
|
|
Creating the second edge by clicking the left mouse button and determining the length of the third edge - Entering the value 2 by pressing the L key and pressing the enter key 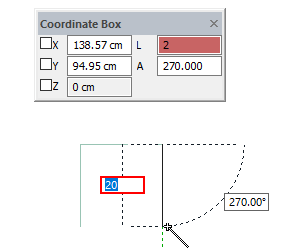
|
|
Clicking the left mouse button to create the third edge and click the first point for the last edge 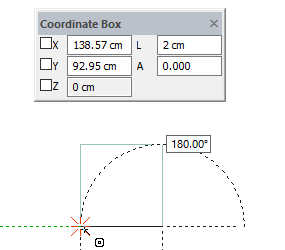
|
|
The formation of a 2x2 cm box 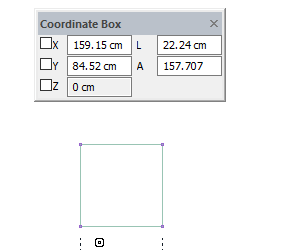
|
|
Clicking the Transform/To Polygon Profile (Common) line by selecting the box and clicking the right mouse button 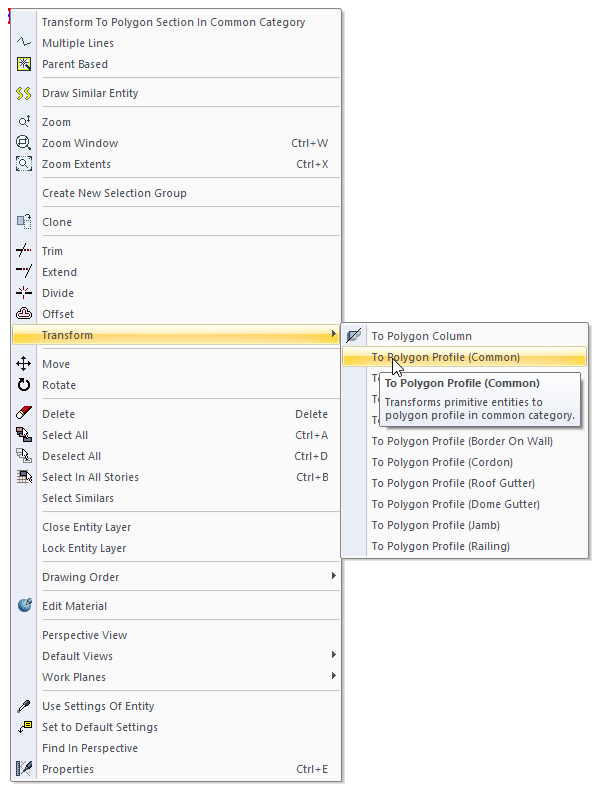
|
|
Naming the profile settings and completing the registration by clicking the OK button 
|
Next Topic