
The Trim to Roof command is used to cut walls, columns, 3D library objects, doors/windows and/or slabs at the roof border. With trim to roof command, wall heights are brought up to the roof. No height adjustment is required. The drawn walls need to cut the roof.
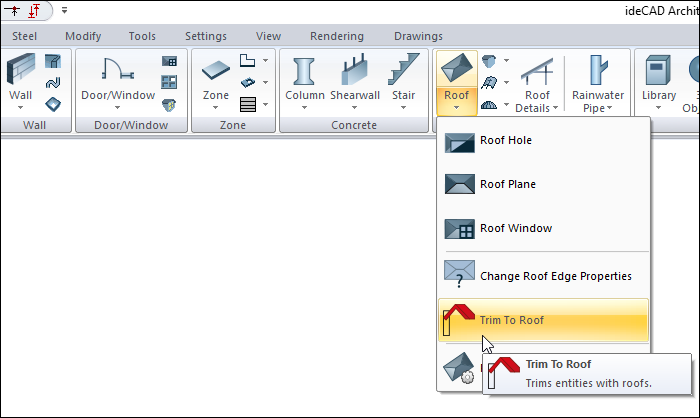
Location of Trim to Roof Command
You can access it under the heading of the Ribbon menu, Home tab, Roof.
Cut With Roof Toolbar
|
Icons |
|---|
|
New trim group Adds new trim group. |
|
Add roof Adds roof to the trim group. |
|
Add entity Adds an object to the trim group. |
|
Delete group Deletes the trim group. |
|
Trim group list Lists the available trim groups. |
|
Trim settings Opens the roof trimming settings dialog. |
Usage Steps
For this process:
-
Click the Trim to Roof icon in the ribbon menu . The Trim to Roof toolbar will open.
-
Run the New Trim Group command by clicking the New Trim Group icon on the far left in the trim to roof toolbar .
-
Select the roof by clicking it with the left mouse button. You can choose more than one roof.
-
Click the right mouse button.
-
Select the objects whose height you want to trim to the roof.
-
Click the right mouse button. The Roof Trimming Settings dialog will be displayed. After the desired settings are made, click the OK button.
-
The objects you selected will be cut. The process performed will also appear in 3D windows, sections and views.
|
Usage step |
|---|
|
Before trim to roof 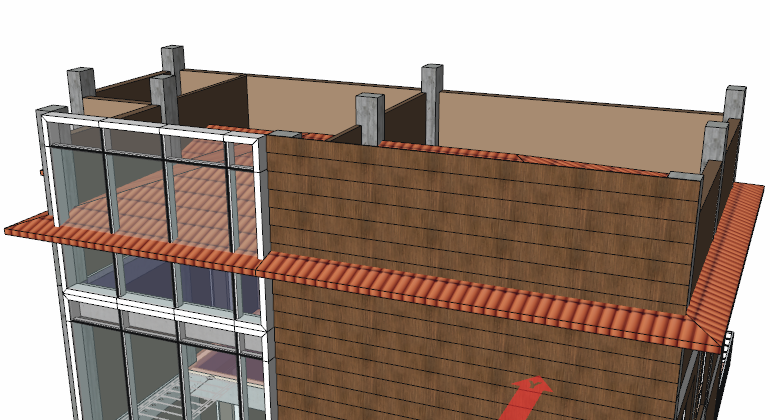
|
|
Choosing the roof 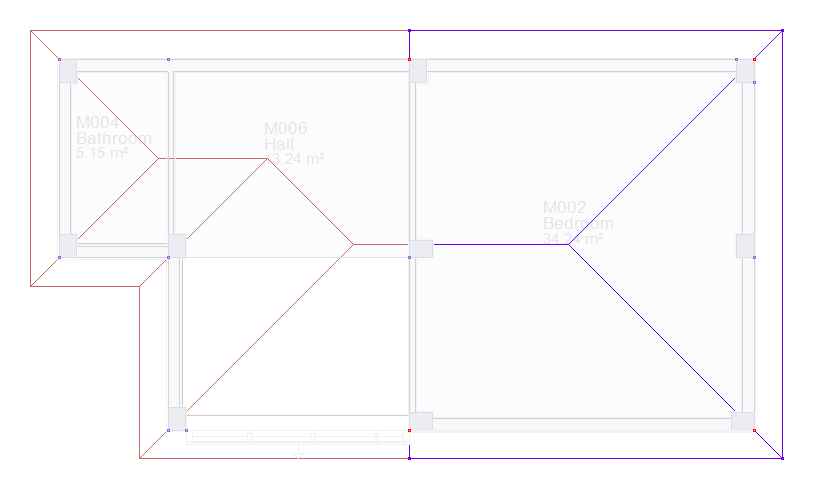
|
|
Selection of objects to be trim 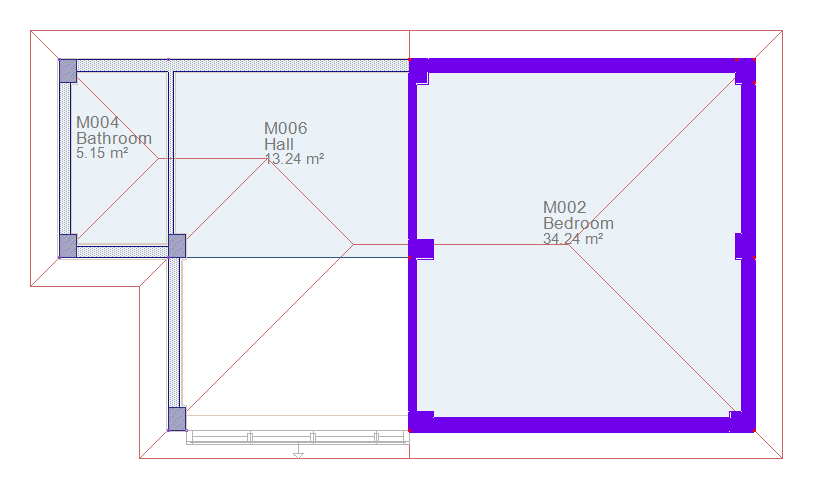
|
|
Making the settings 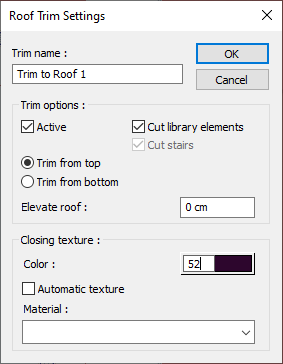
|
|
Trim to roof 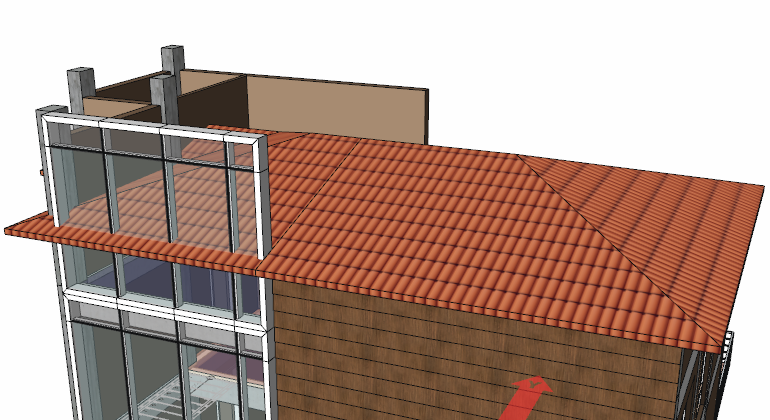
|
Adding or Removing Roofs From the Existing Trim Group
To add or remove roofs to the existing trim group;
-
Click the Trim to Roof icon in the ribbon menu . The Trim to Roof toolbar will open.
-
From here, select the trim group you want to add or remove from the available trim group list and click the Add Roof icon.
-
In the drawing area, roofs or roofs in the relevant group will be selected.
-
If you are going to add a roof, select the relevant roof by clicking the left mouse button.
-
If you are going to remove the roof, deselect it by clicking the relevant roof with the left mouse button.
-
Click the right mouse button. The process will be completed.
|
Usage step |
|---|
|
Selected roofs appear after entering the add roof command
|
|
Selecting the roof to be added to the trim group 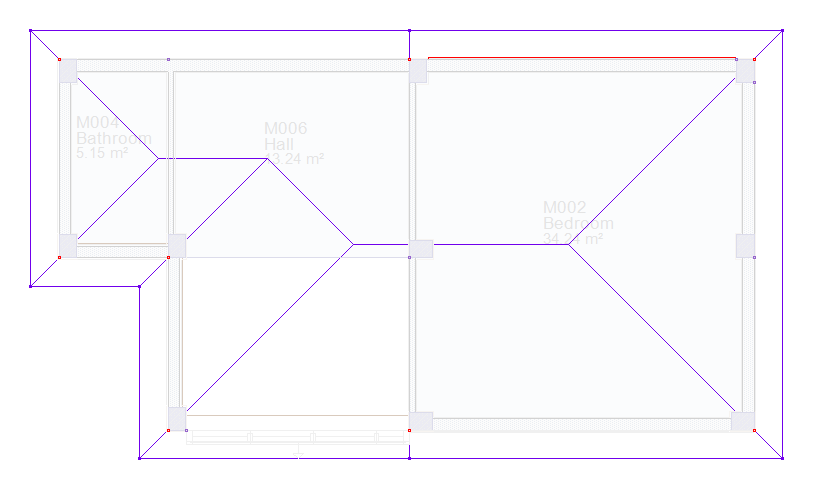
|
Adding or Removing Entity From the Existing Trim Group
To add or remove objects from the existing trim group;
-
Click the Trim to Roof icon in the ribbon menu . The Trim to Roof toolbar will open.
-
From here, select the trim group you want to add or remove from the available trim group list and click the Add Entity icon.
-
In the drawing area, objects included in the related group will be selected.
-
If you are going to add an object, select the relevant object by clicking the left mouse button.
-
If you are going to remove an object, deselect it by clicking the relevant object with the left mouse button.
-
Click the right mouse button. The process will be completed.
|
Usage step |
|---|
|
Before adding an object to the trim group
|
|
Selected objects appear after entering the add object command
|
|
Selecting the objects to be added to the trim group 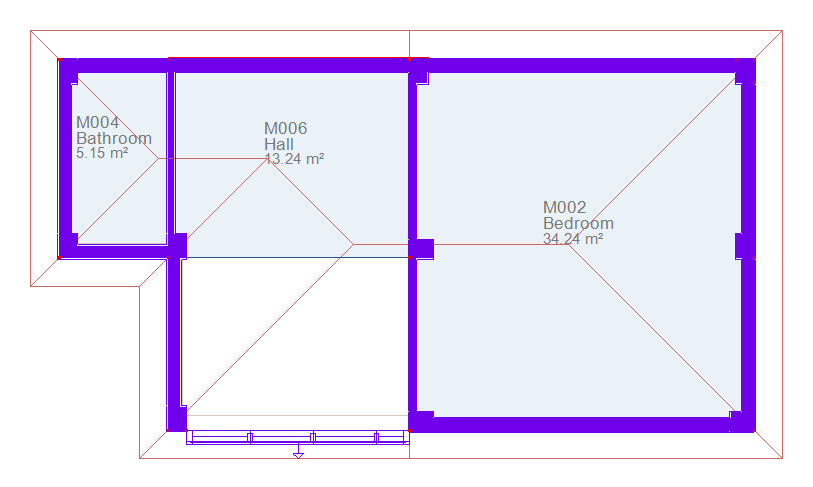
|
|
After adding the object to the trim group 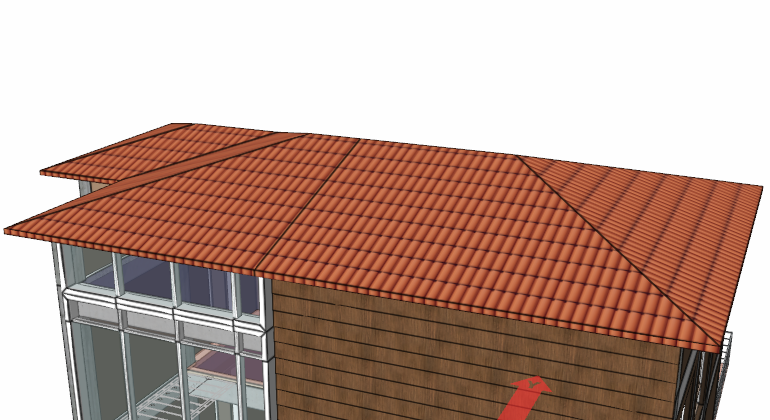
|
Deleting the Trim Group
Roof trim groups can be deleted by clicking the Delete Group icon on the Trim to Roof toolbar .
-
Click the Trim to Roof icon. The trim to roof toolbar will open.
-
From here, select the trim group you want to delete from the current trim group list and click the Delete Group icon.
-
When the Delete Group icon is clicked, "Selected items will be deleted. Are you sure?" A warning is sent to the user.
-
If the answer is yes to the warning, the trim group named on the Trim to Roof toolbar is deleted.
-
The trim effect on objects included in the deleted group disappears.
|
Process step |
|---|
|
Before deleting the trim group
|
|
Warning 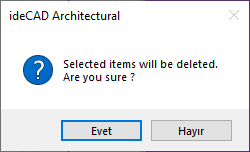
|
|
After deleting the trim group
|
Next Topic