
With the polygon column command, drawing can be made by selecting one of the polygon columns created before. If wanted, a new polygon column can be defined. There are 2 methods to create a new polygon column; Polygon column dialog and command to transform to polygon column.
Let's create the following L polygon column using these two methods.

The Polygon Column Dialog Method
Location of Polygon Column Dialog
Polygon Column Dialog can be found after clicking the Polygon Column button in the Column Settings dialog.
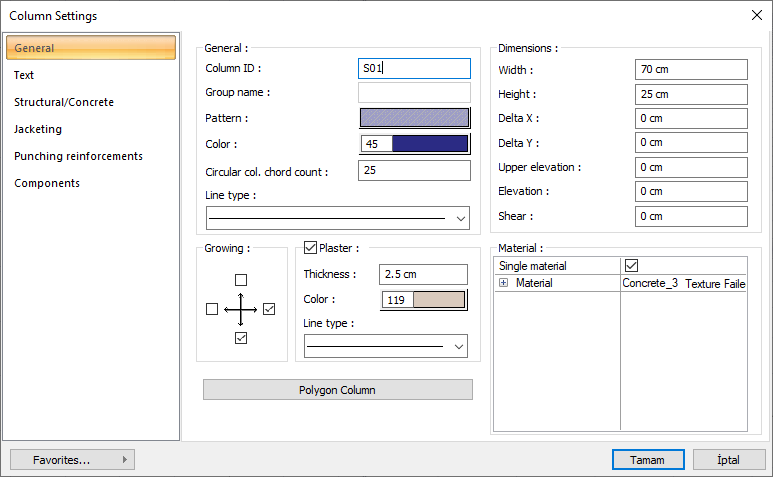
Polygon Column Dialog

|
Specifications |
|---|
|
Design window 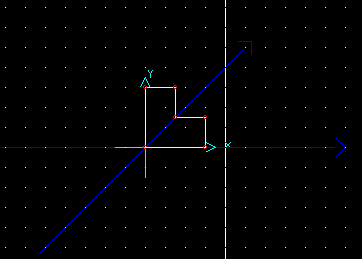
The image of the polygon column is monitored. Editing is made on the polygon column by clicking the node points. |
|
X / Y While polygon column corner points are moved, point coordinates can be entered from the X and Y boxes. |
|
Origin Origin button is used to change the origin of the polygon column. |
|
Minor axis angle The polygon column can be at any angle in the plan. Therefore, when defining the polygon column, it will be of great advantage to determine the corner points according to a coordinate system at the angle in question. The minor axis angle serves to determine the angle of this coordinate system. Used if the "Use minor axis" box is checked. The coordinate set and grid system are rotated counterclockwise by the angle entered. The X and Y values to be entered are also taken into account according to this system. |
|
Column ID The polygon being studied is the name of the column. Only a name or a phrase can be entered to define the polygon column for the user. It is not used in drawings. |
|
Grid 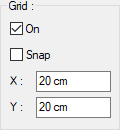
These are the grid related parameters in the design window. If the On box is checked, the grid is displayed in the design window. If Snap is checked, the cursor jumps to grid points in the design window. In this way, polygon columns can be easily created by skipping grid points without entering coordinate values. |
|
Zoom 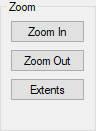
The Zoom In and Zoom Out buttons enlarge and reduce the image in the design window. The Extents button displays the area within the drawing boundaries. When the zoom button is clicked and the cursor is dragged over the design window, it is seen that the shape of the cursor has changed. |
|
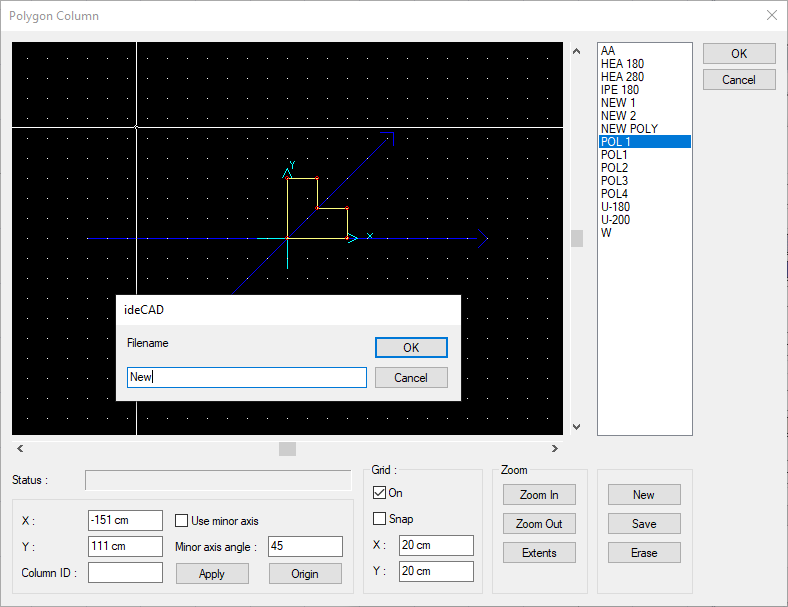
New When the new button is clicked, a dialog will appear. The ideCAD asks for a name for the column file to be opened. When the name is entered and the OK button is clicked, a new column view opens in the design window. The entered name is also placed in the column name list. |
|
Save Clicking it opens a dialog. When a name is entered here and the OK button is clicked, the (active) column seen in the design window is saved to the polygon column library and takes its place in the column name list. The saved column can be reused in all projects as long as it is not deleted from the library. |
|
Erase It deletes the selected (active) column in the column list that appears on the design screen from the polygon column library. When clicked "Do you really want to delete the column?" The question appears on the screen. If the question is answered by clicking the yes button, the column is deleted. It is not possible to recover the deleted column. |
|
Status Status about the operations performed in the design window are given in this line. |
Usage Steps
-
Click on the polygon column icon in the ribbon menu.
-
The column toolbar will open. Click the settings icon from here.
-
Click on the Polygon Column button in the column settings dialog that opens .
-
The polygon column dialog will be displayed. The selected polygon column will appear in the design window.
-
According to the x and values in the design window grid section, the distances between the grids are 20 cm. You can change these values if you want. These values are important as we will benefit from grids during design.
-
Click the New button and name your polygon column.
-
Your new polygon column will be displayed. To design the polygon column more comfortably, you can get closer to your polygon column by clicking the zoom in button.

-
A polygon column has a node at each corner. Move your mouse over one of these nodes and click the left button. You will have caught the node.
-
When you move your cursor over the screen, the joint also moves.
-
To delete a joint on a column, move your cursor over the joint you want to delete and click the left button of your mouse to capture. Move this node over one of the closest joints and click. So you delete the node.
-
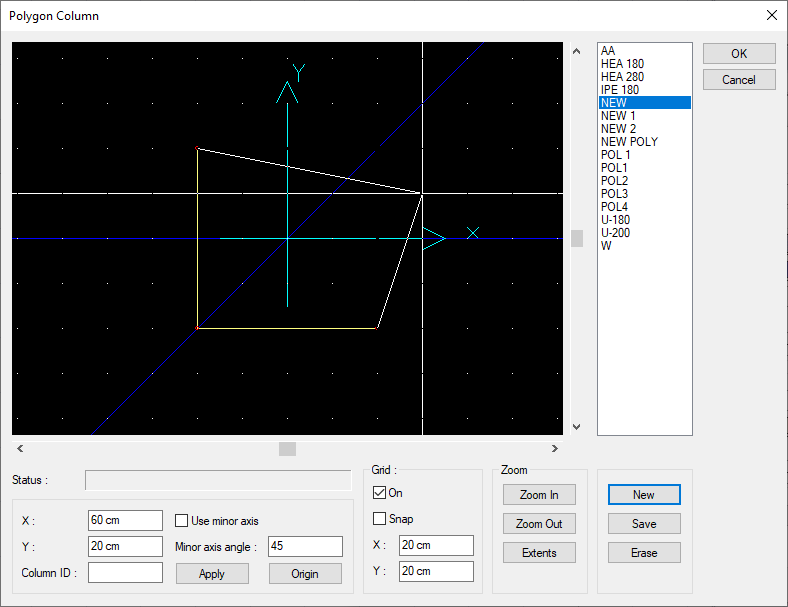
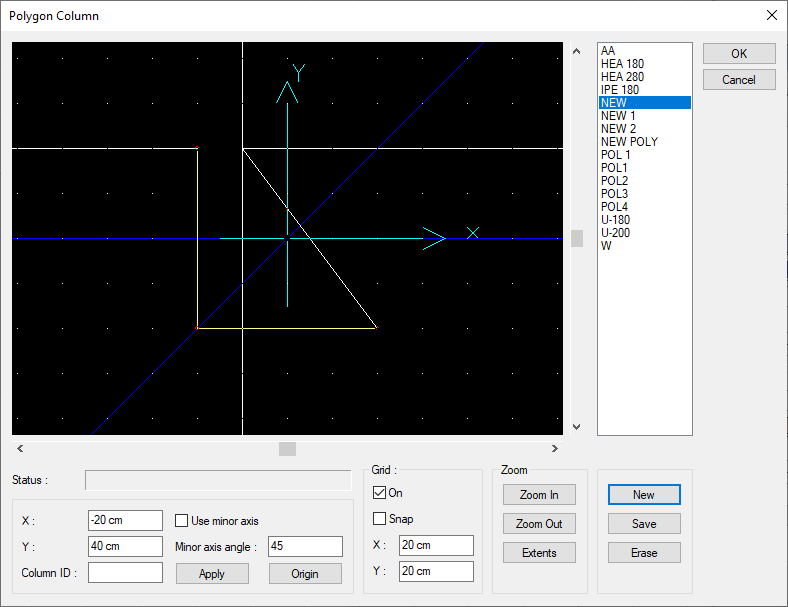
Double click on the column edge to create a new joint on either side of the column. A new node is formed where you click. You can move this node anywhere you want.
-
To convert the triangle form to an L shape, point and double click on the curved triangle of the triangle. Place your new node in the grid to the right of the top corner of the triangle (grid spacing was 20 cm).
-
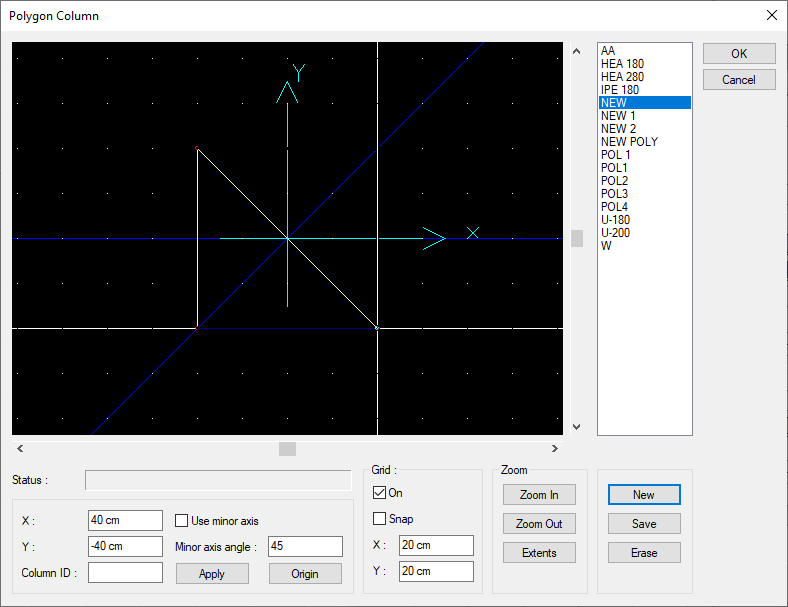
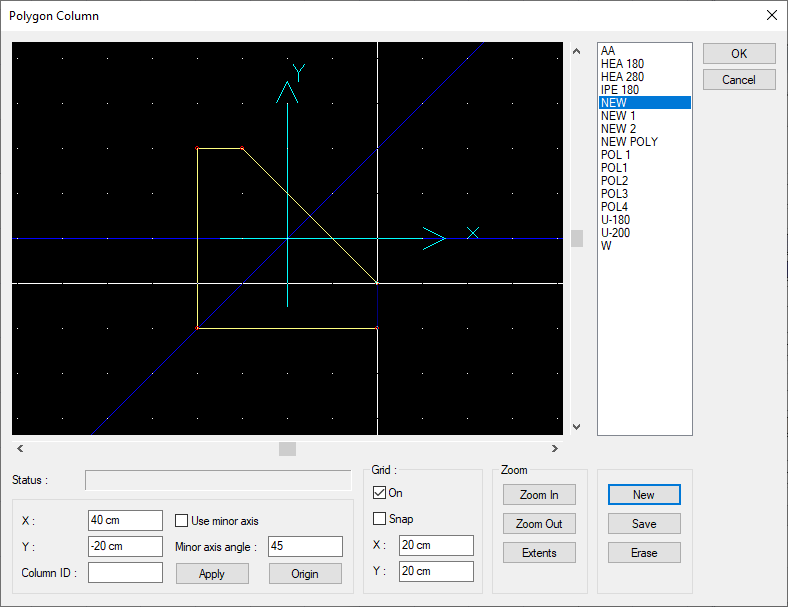
Create a new node for the lower branch of the L column by double-clicking on the beveled edge. Place it on the grid above the lower corner (grid spacing was 20 cm).
-
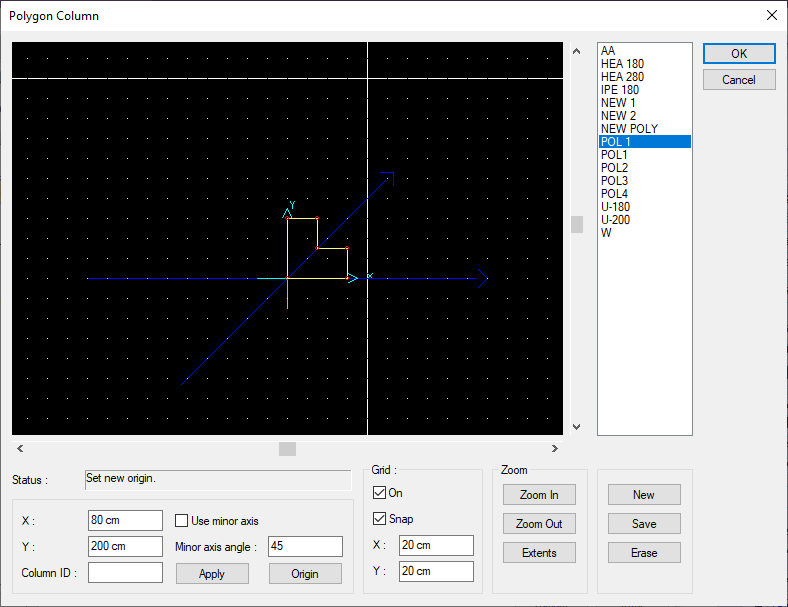
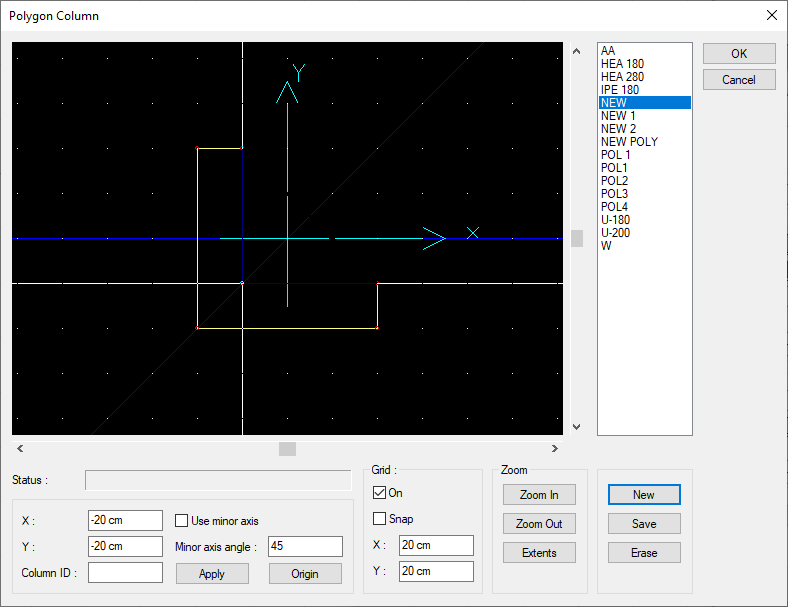
Create a new node for the last time and place it so that your shape is the inner corner of your L column. Your polygon column will be completed.
-
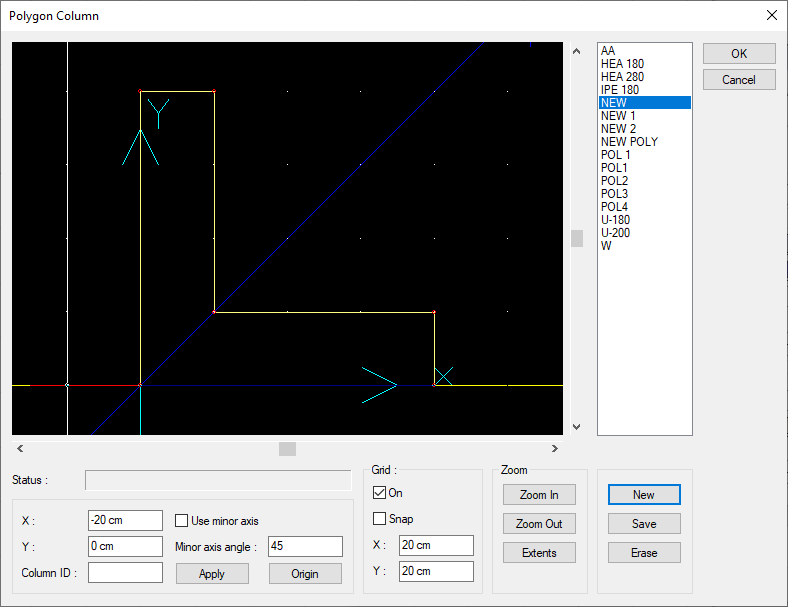
You can set the reference point to be taken when placing the column with the Origin button. Click the Origin button and select your new origin point by clicking the lower left corner of your column.
-
Click the OK button to close the dialogs. When you come to the drawing screen, you can place your polygon column.
Transform to Polygon Column Command Method
One of the practical methods to draw a polygon column is the command to transform to polygon column. Transform a polygon column contour created with a line into a polygon column.
Location of Transform to Polygon Column Command
You can access the Convert line in the list that opens by selecting the column drawing and clicking the right mouse button.
Usage Steps
-
Click the multiple line icon from the ribbon menu.
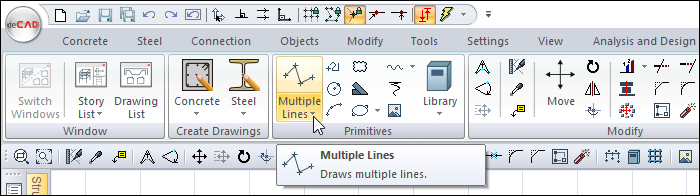
-
First create the contour of the polygon column with the multiple line.
-
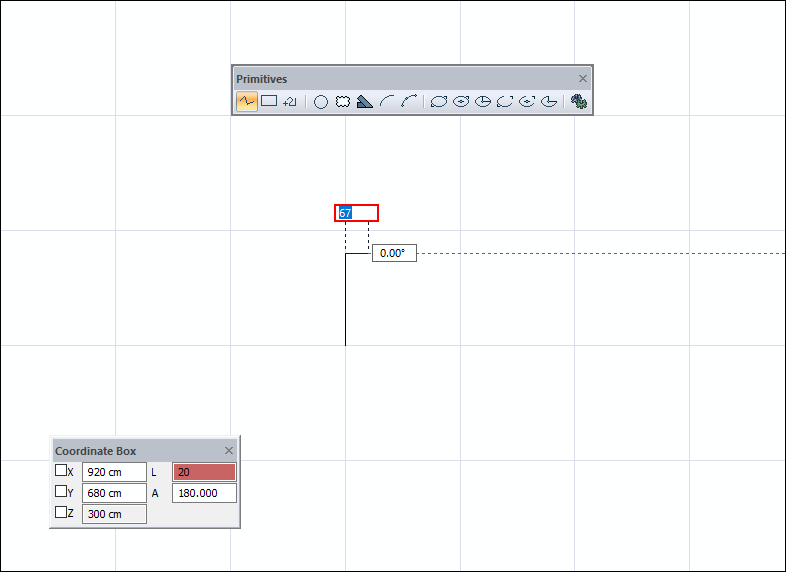
Click anywhere in the drawing area with the left mouse button. The first point of the line will be determined.
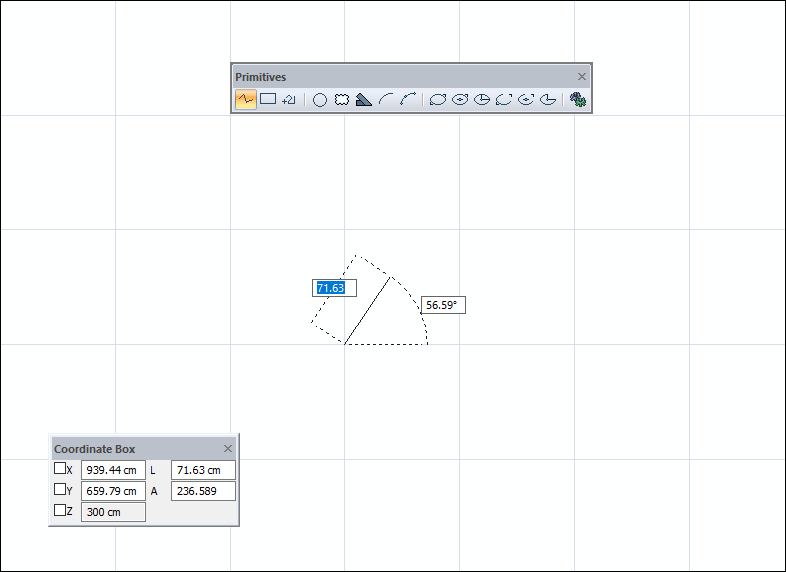
-
Press the L key. Type 80 and hit enter. The L row will be colored red and the cursor will be locked to 80 cm.
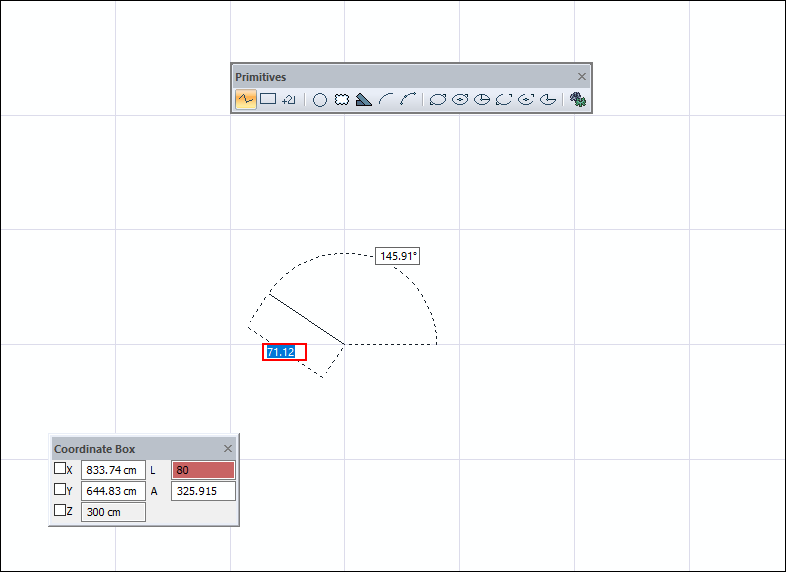
-
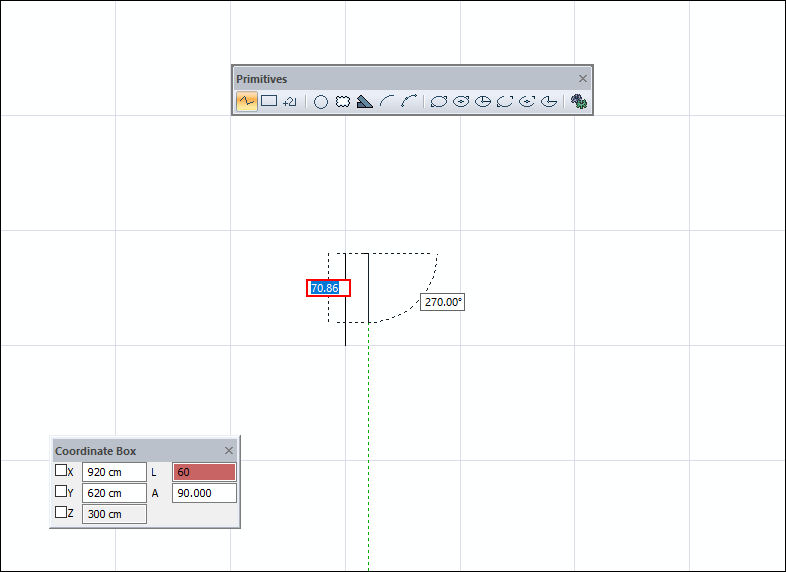
Hold down the Shift key and move the cursor up and click the left mouse button. The second point of the line will be determined.
-
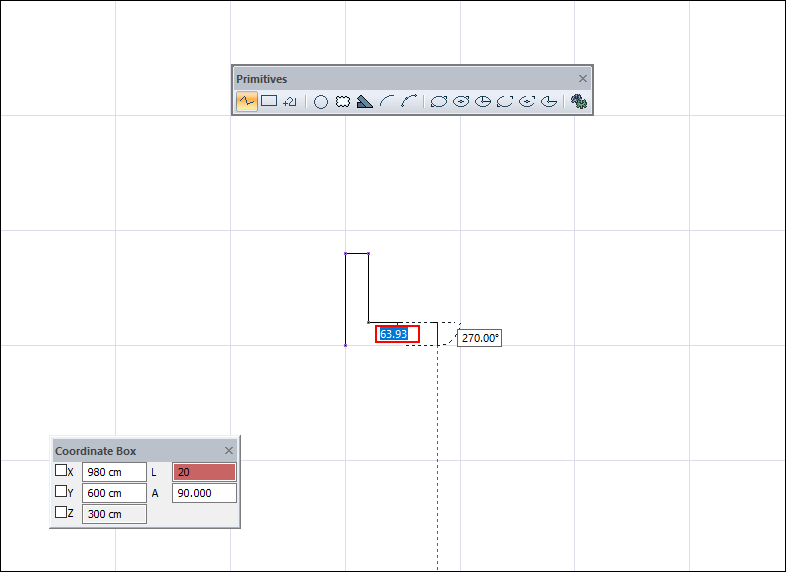
Press L and type 20 and hit enter. Hold down the Shift key and move the cursor to the right. Click the left mouse button.
-
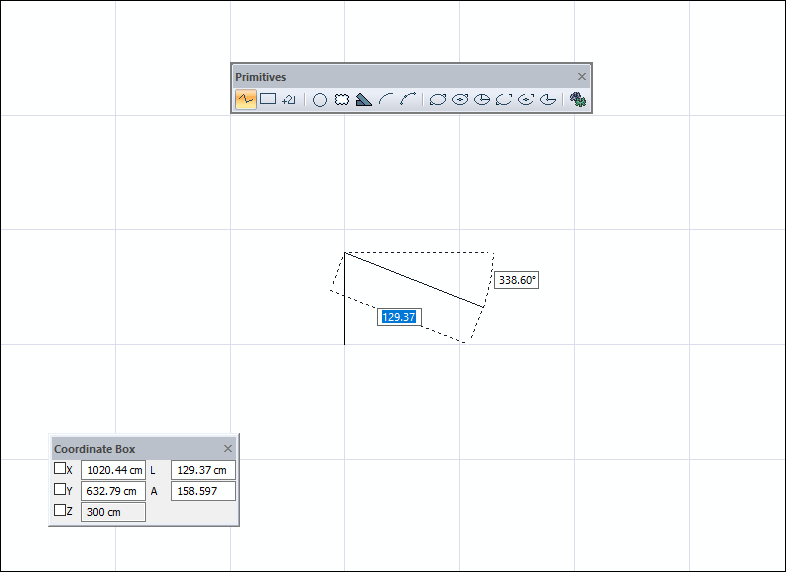
Press L and type 60 and hit enter. Hold down the Shift key and move the cursor down. Click the left mouse button.
-
Press L and type 60 and hit enter. Hold down the Shift key and move the cursor to the right. Click the left mouse button.
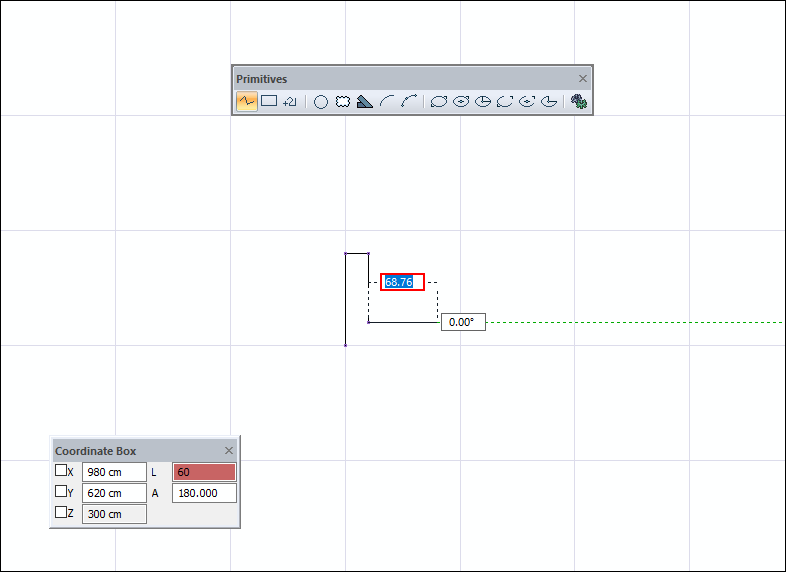
-
Press L and type 20 and hit enter. Hold down the Shift key and move the cursor down. Click the left mouse button.
-
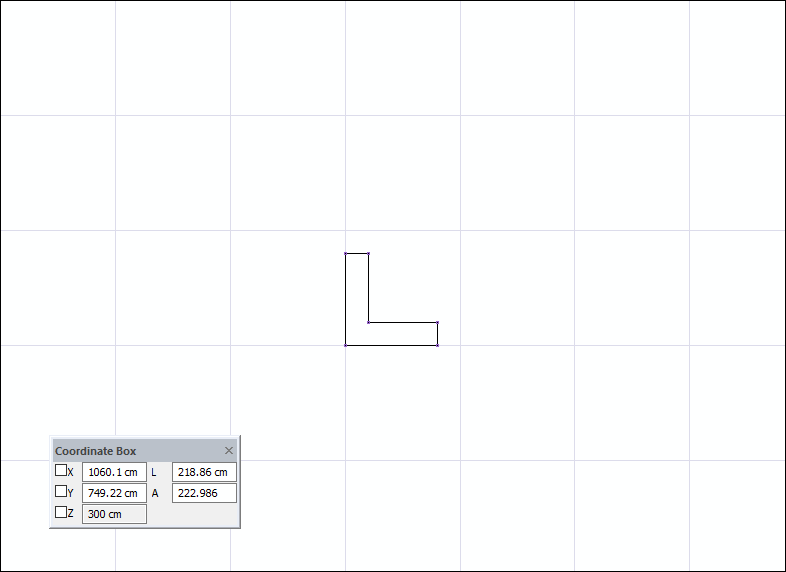
Move the cursor to the point where you started first, and when the cursor changes shape, left click. Press the esc key on the keyboard to exit the command.
-
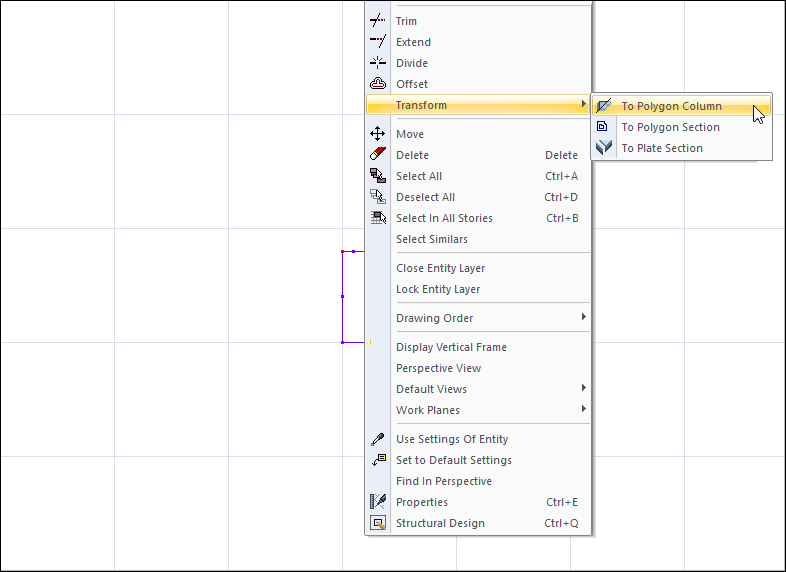
Select all the lines you have created. Move the mouse over your lines and click the right button.
-
Click the Transform/To Polygon Column row from the drop-down list .
-
Your polygon column will be formed.

Next Topic