
Create the upper story zones in this section.
|
Previous steps have been followed in the project file named Create the Upper Story Zones. You can download the file and follow the steps given in this title on the project. |
-
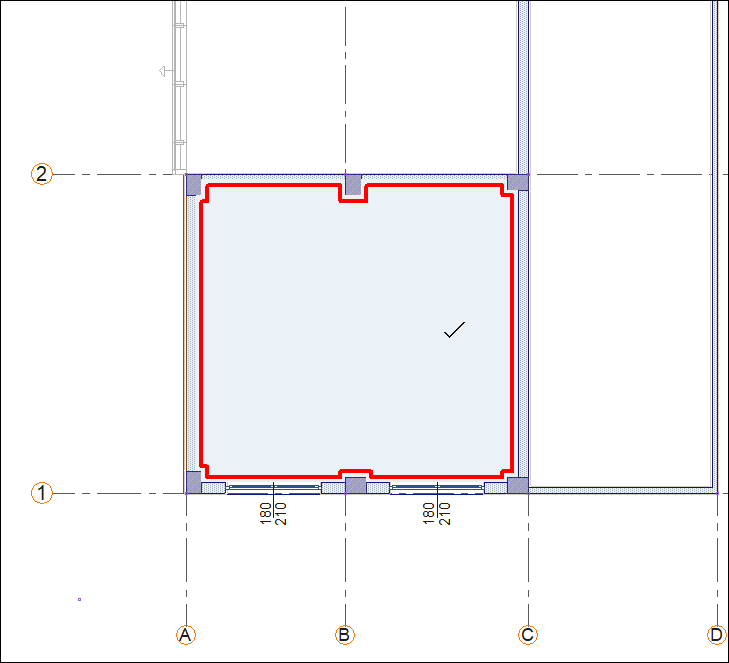
Click the zone command.
-
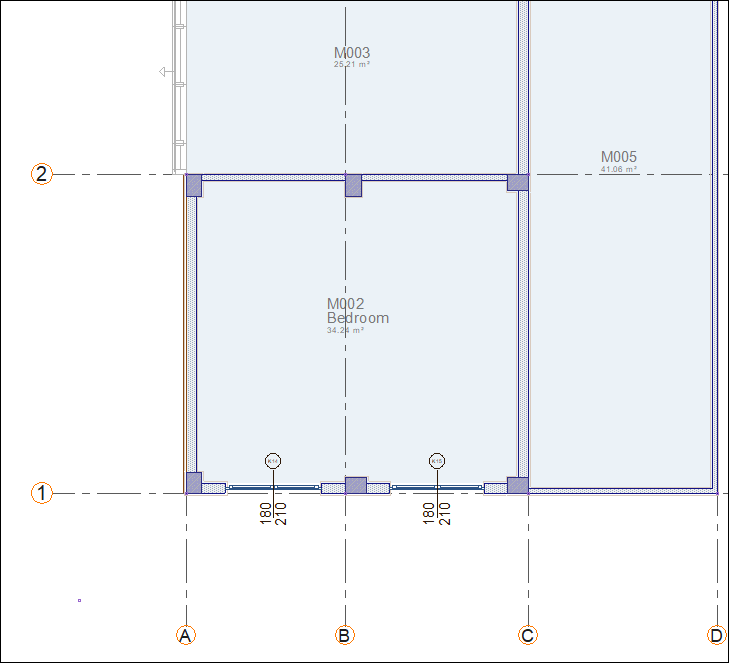
Move your mouse over the area delimited by 1-2 and A-C axes and click the left button.
-
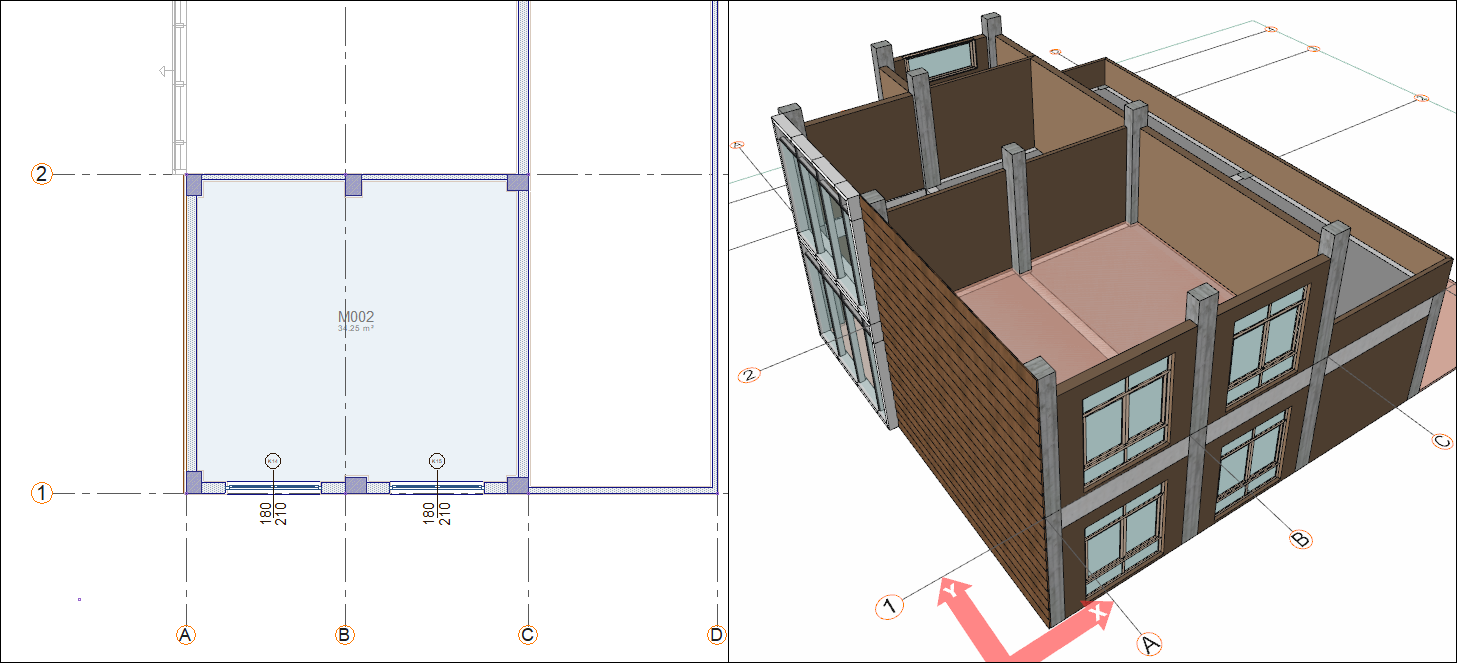
The zone will be formed.
-
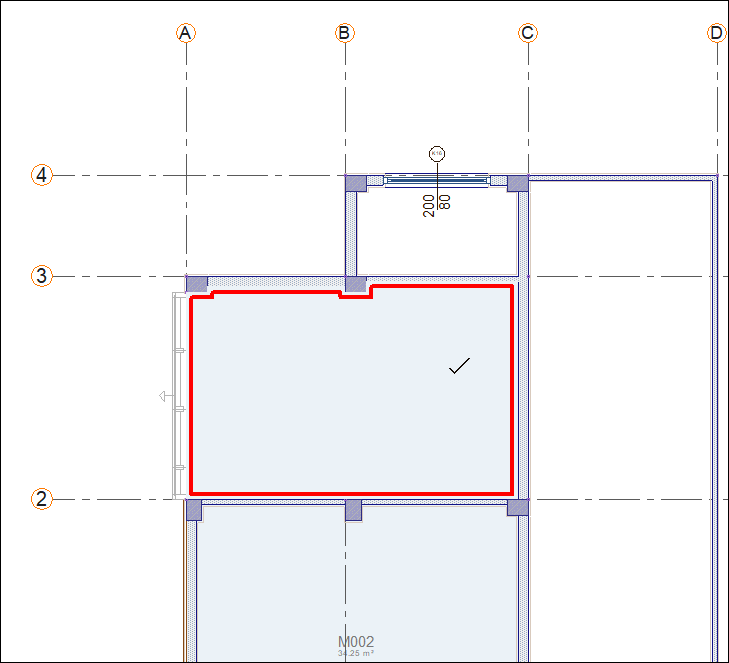
Move your mouse over the area delimited by axes 2-3 and A-C and click the left button.
-
The zone will be formed.
-
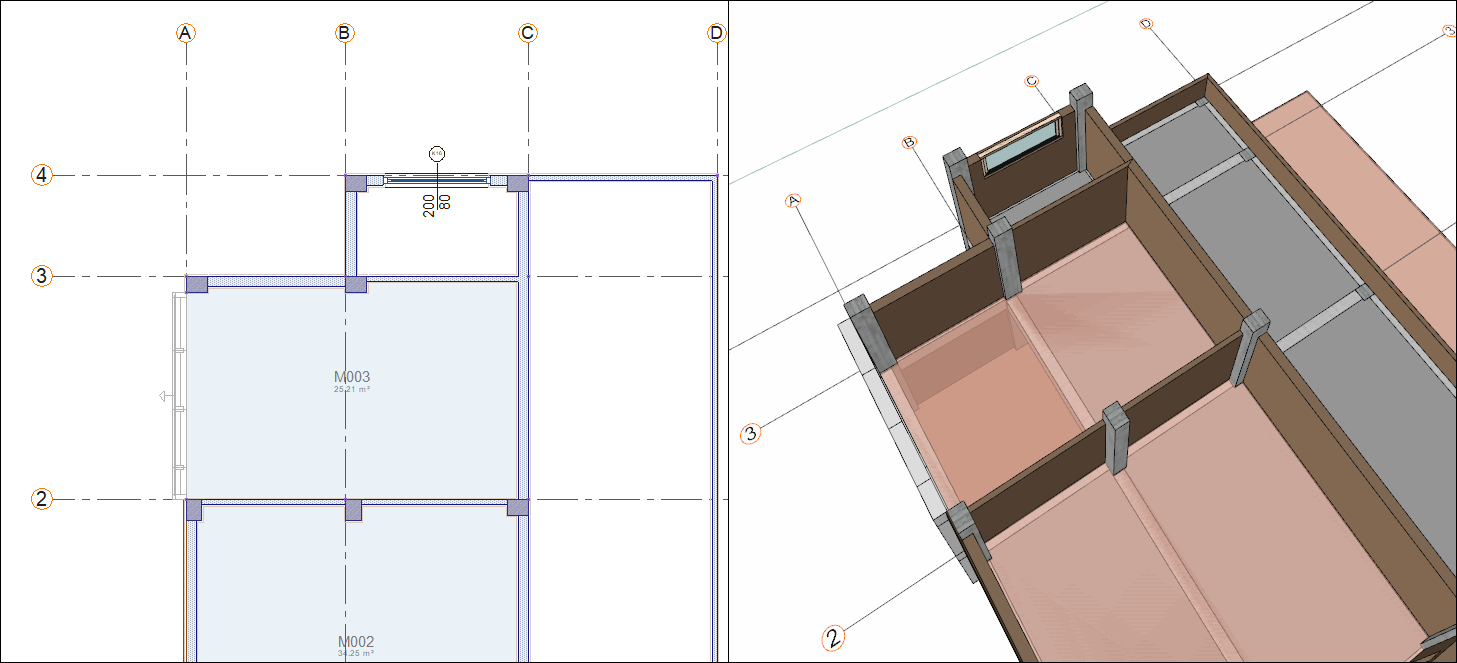
Move your mouse over the area delimited by axes 3-4 and B-C and click the left button.
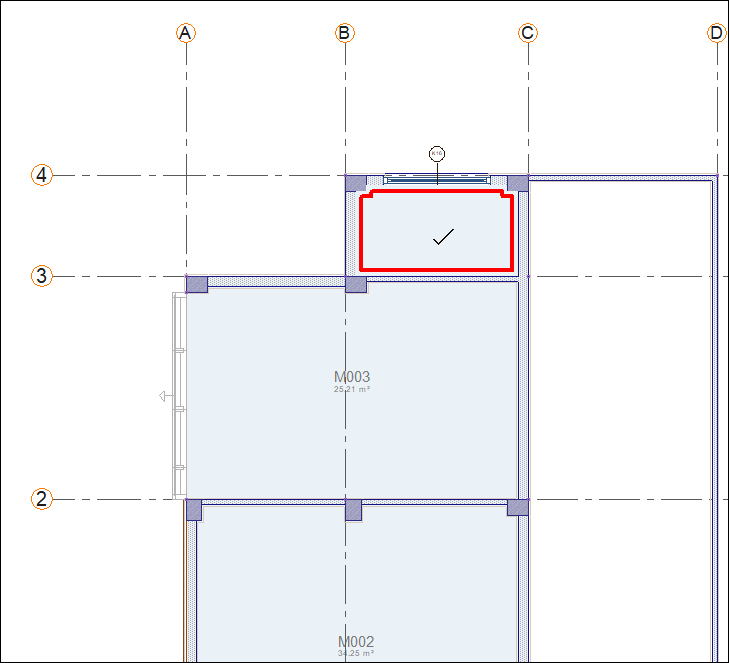
-
The zone will be formed.

-
Move your mouse over the area delimited by axes 1-4 and C-D and click the left button.
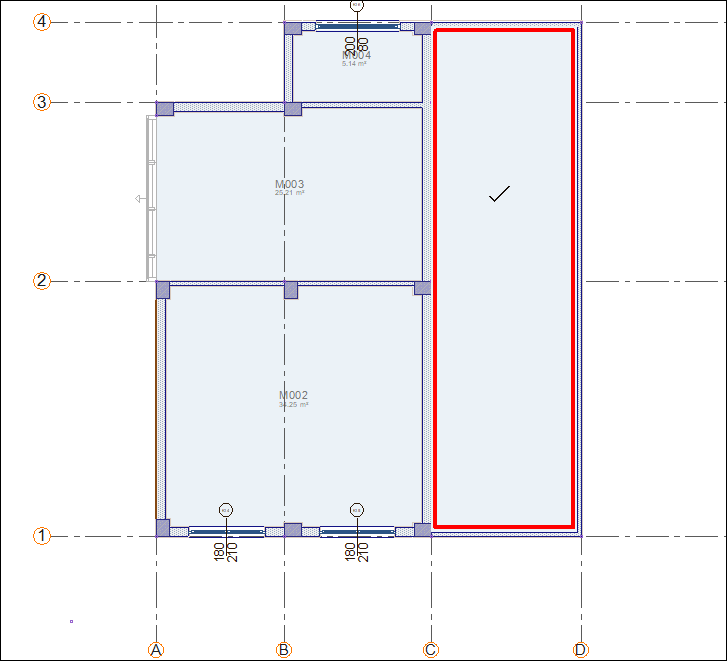
-
The zone will be formed.
-
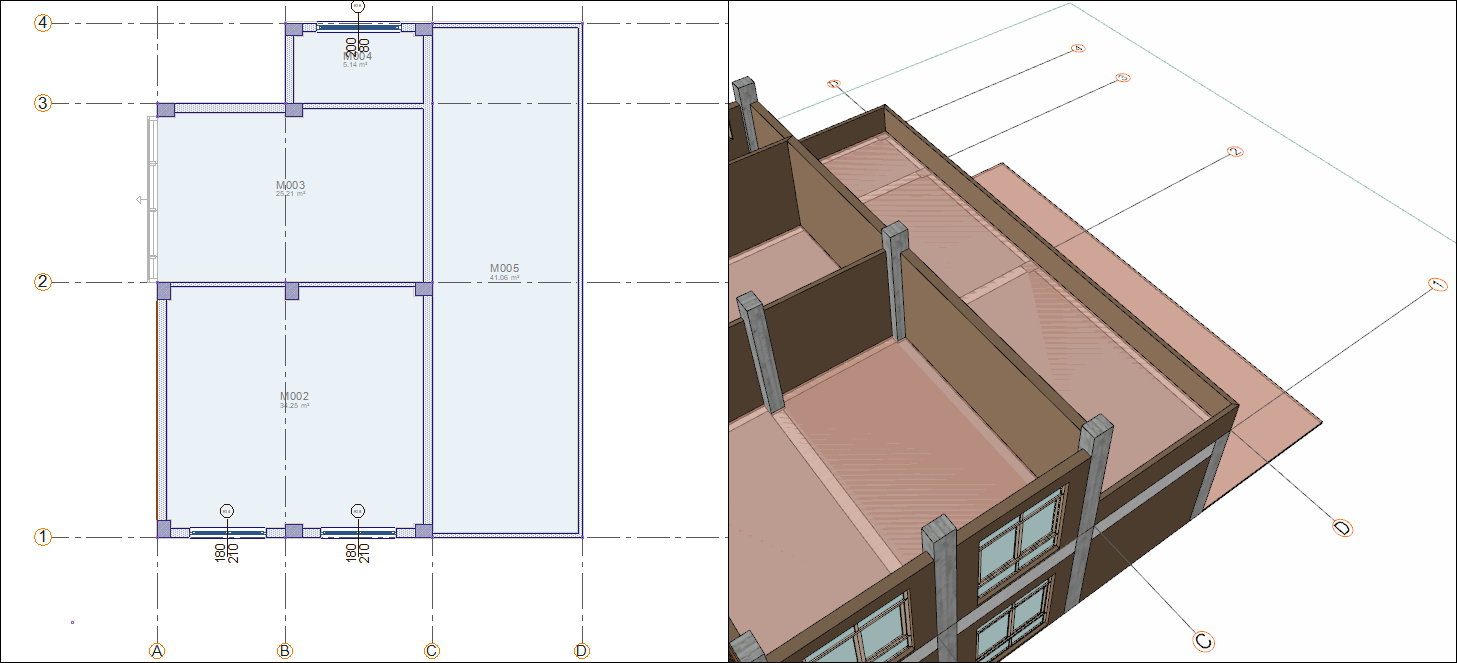
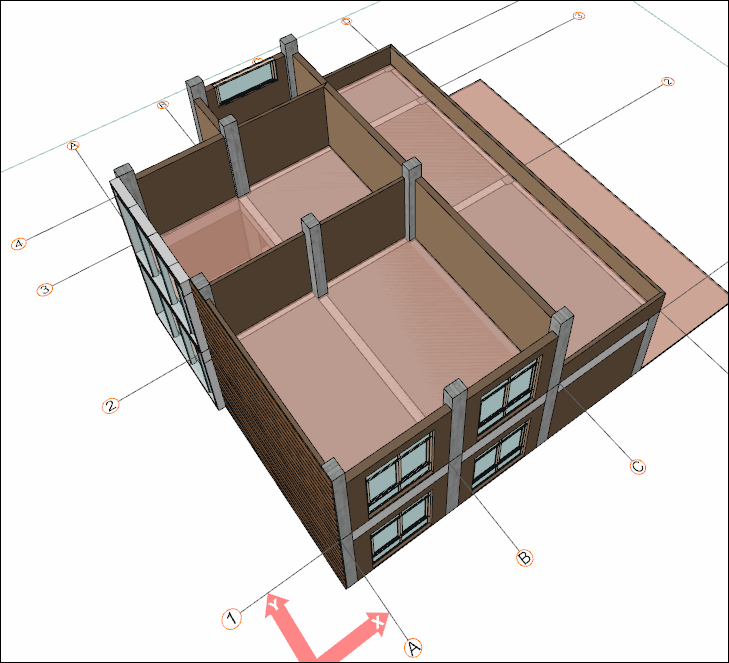
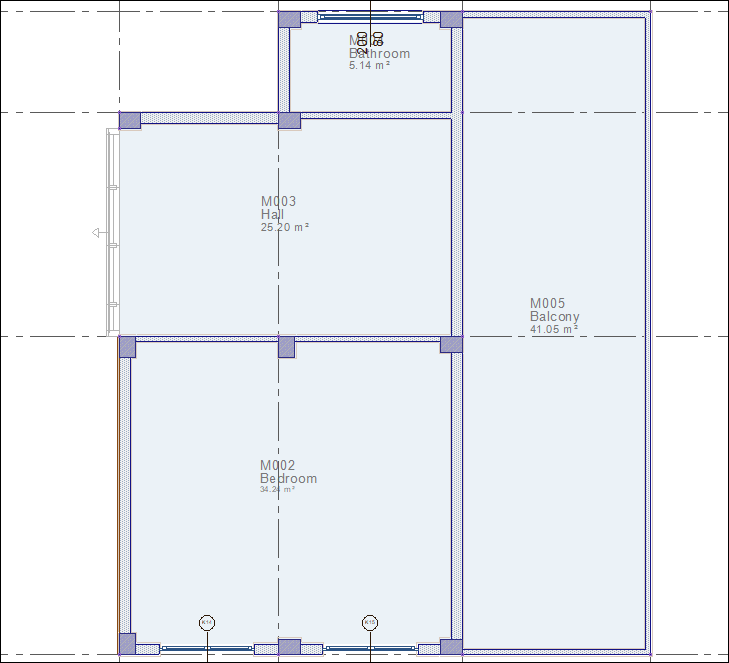
Press the Esc key on the keyboard and exit the command. The upper story zones have been completed.
Add zone names to the zones.
-
Move your mouse over the zone labeled M002 and double click.
-
The zone settings dialog will open. In the zone name line type Bedroom.
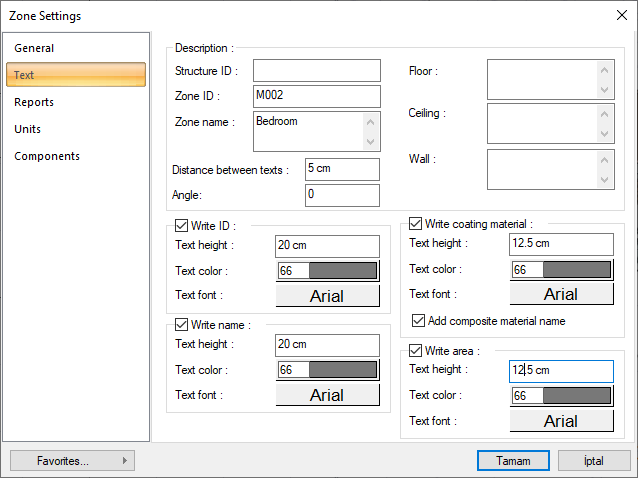
-
Click the OK button to close the dialog. The zone name will be added to the plan.
-
Name the zone labeled M003 as Hall.
-
Name the zone labeled M004 Bathroom.
-
Name the zone with the label M005 as Balcony.
Follow the steps of the video below.
Next Tutorial