
With the auto label entities command, the entire structure is named at once or only selected object/object groups. Each object group has separate naming settings. Settings are arranged in accordance with the architectural and structural project.
Location of Auto Label Entities Command
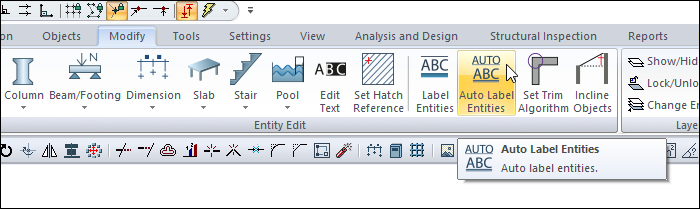
You can access the name object command under the ribbon menu Modify tab Entity Edit title.
Auto Label Options
|
Specifications |
|---|
|
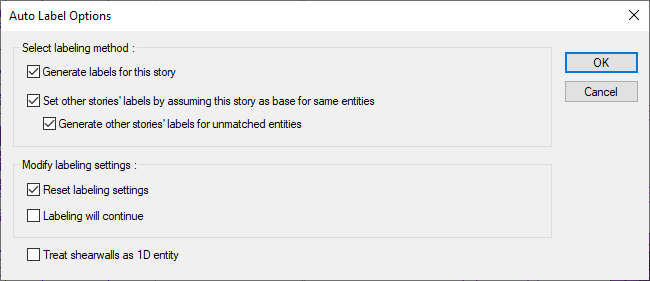
Select labeling method

With the “Generate labels for this story” option, it only names the objects on the working floor. With the “Set othe stories' labels by assuming this story as base for same entities” option, it names the elements on the other floors to be the same as the elements on the floor being studied. With the “Generate other stories' labels for unmathced entities”, element on the other stories are checked. |
|
Modify labeling settings 
While labeling with reset, all names of the selected elements return to the project default. Labelling will continue at the end of the process, stores the names given to the elements in memory and reuses them in new naming. |
|
Treat shearwalls as 1D entity Name the shearwalls in one direction, regardless of the direction, when the shearwalls come. |
Auto Label Objects Settings
|
Specifications |
|---|
|
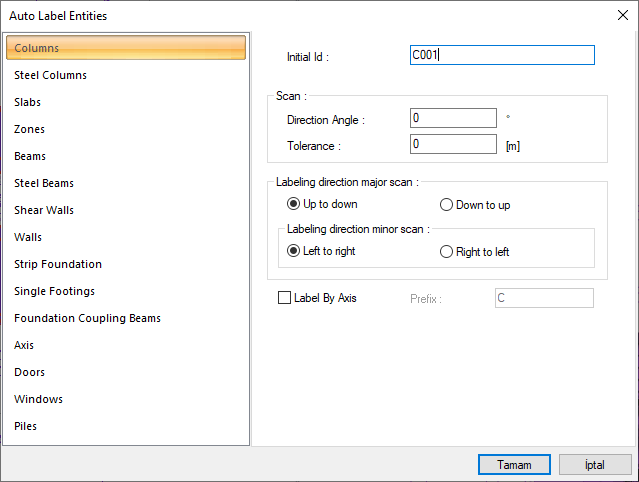
Entity list 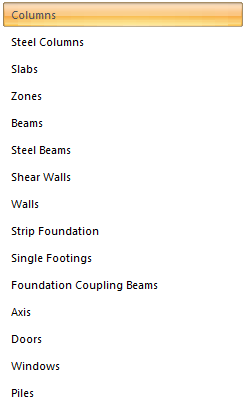
Naming settings are opened by selecting the objects from the list. |
|
Initial ID The initial (first) name of the object to be named is entered. For example, if S1 is given, the objects are named as S1, S2, S3 while processing. |
|
Scan 
In an angle system with the angle option, if you want to make a naming according to the angle, the relevant angle value is entered on this line. For example, in a system connected by 45 degree axes, the value 45 is entered in this line to make a name that takes 45 degrees into account. While naming with the Tolerance option, it determines which of the objects that are close to each other will be selected first, with the tolerance entered on this line. The closest object remaining within the length value entered in this line is named first. |
|
Labeling directions major/minor scan 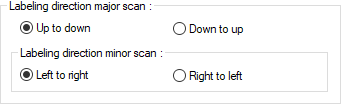
The direction and direction in which the naming process will be done is selected first. |
|
Label by axis With this option that is valid for columns, you can name the columns with the names of the axis passing through the column. For example, A and 1 axes are defined in the column. If the prefix S is given, the column is named SA1. |
Usage Steps
-
Click the Auto Label Entities icon in the ribbon menu .
-
The naming method and naming scheme settings are set in the auto label options dialog.
-
Select the objects you want to name.
-
Enter the first name (P1, K1, P13, K4 etc.) to be used for naming in the Auto label entities dialog. Select naming criteria and main direction and click the OK button.
-
Selected objects will be named automatically according to their direction preferences.
|
Usage step |
|---|
|
Before auto label entities 
|
|
After auto label entities (The main direction is from bottom to top, the other direction is from right to left) 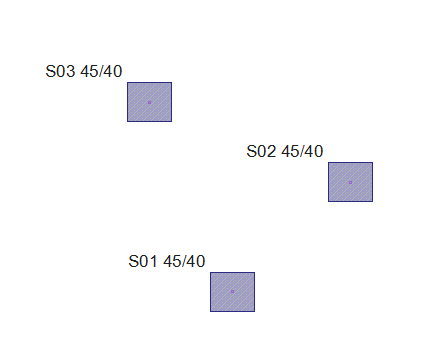
|
Next Topic
Related Topics