
To add a second ramp area to the landing;
-
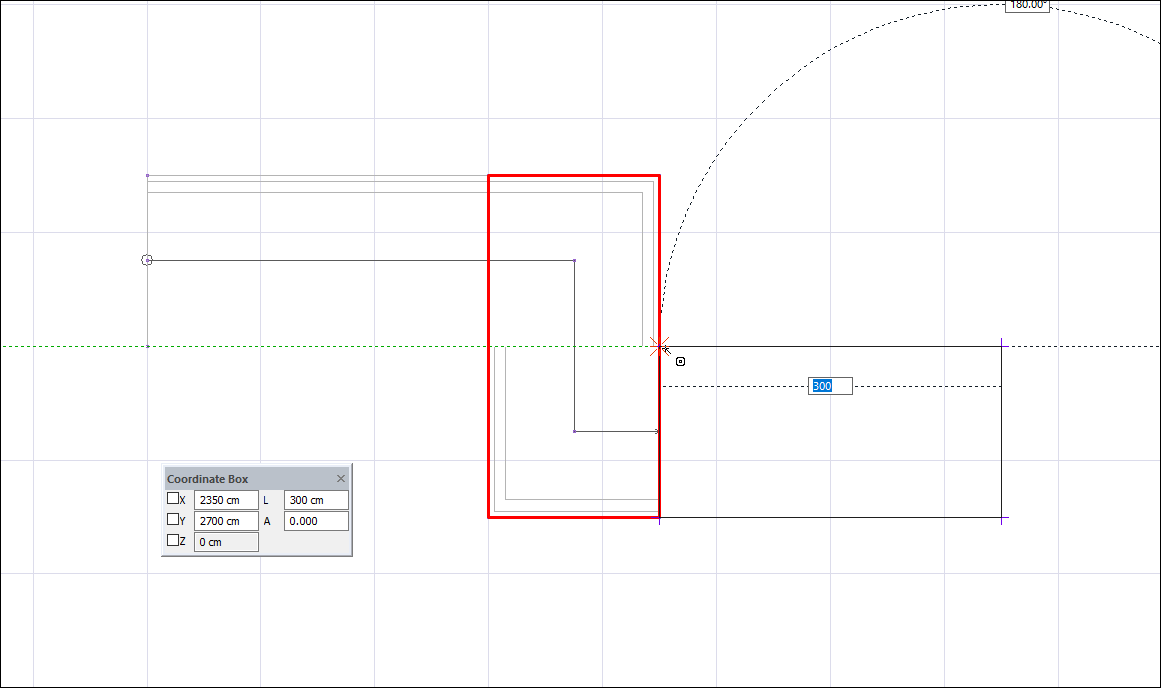
With the path command, draw the second ramp area taking into account the landing outer boundaries.
-
For the width of the ramp area, click on the points created for the second ramp area on the landing.

-
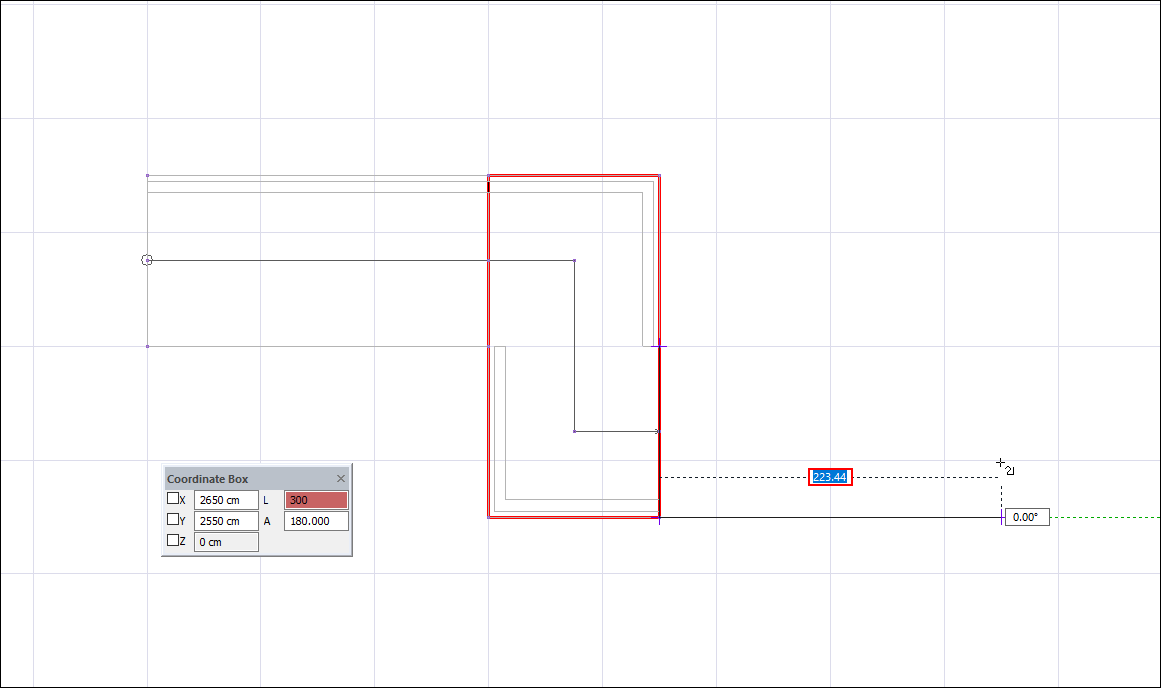
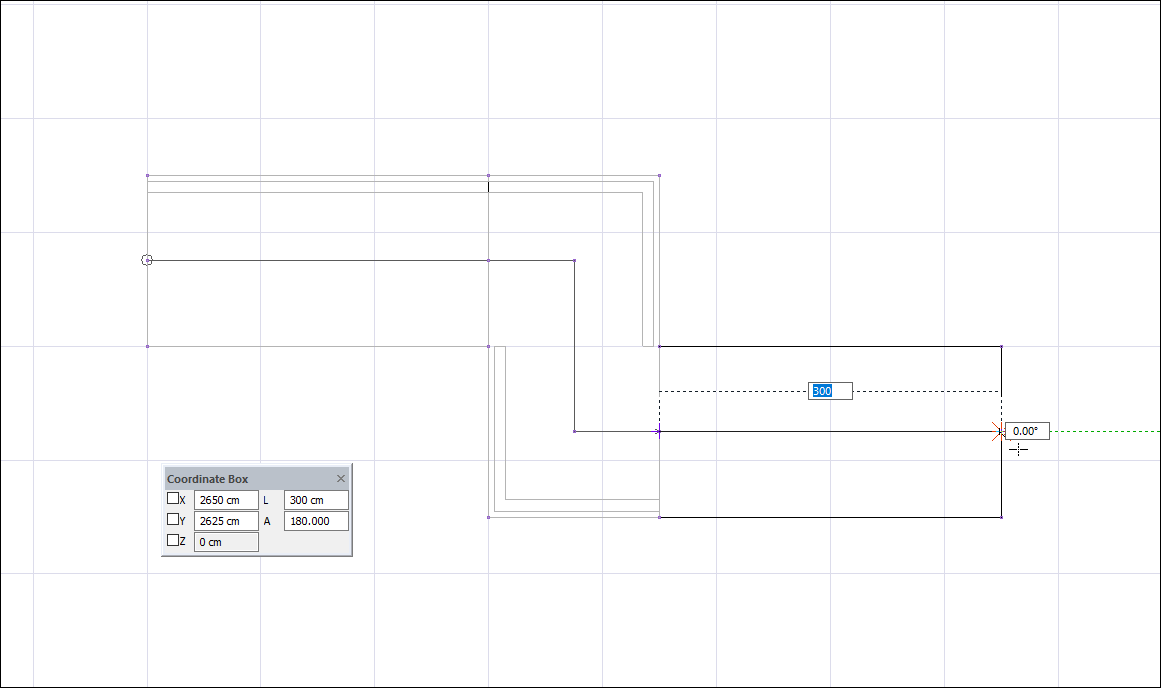
Press L on the keyboard to enter the length of the ramp area . Enter 300 (cm) as the length value and press Enter.
-
Create the length of the ramp area by clicking the left mouse button.
-
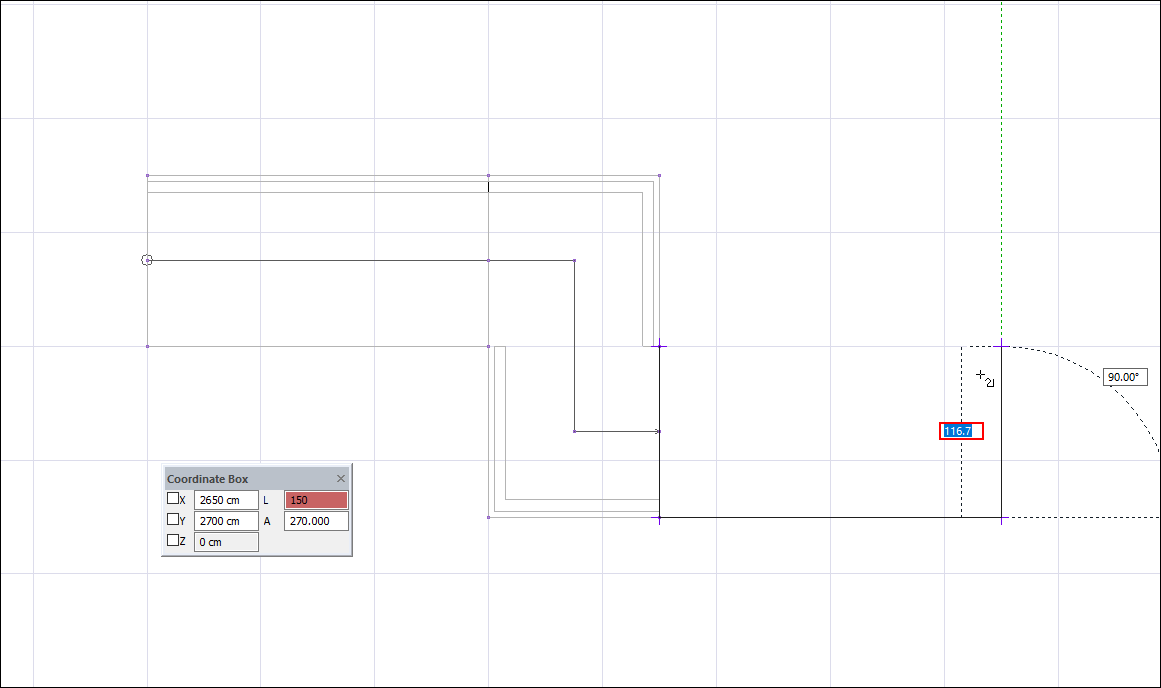
Press L on the keyboard to enter the width of the ramp area . Enter 150 (cm) as the length value and press Enter.
-
Click the left mouse button to determine the width of the stair flight.
-
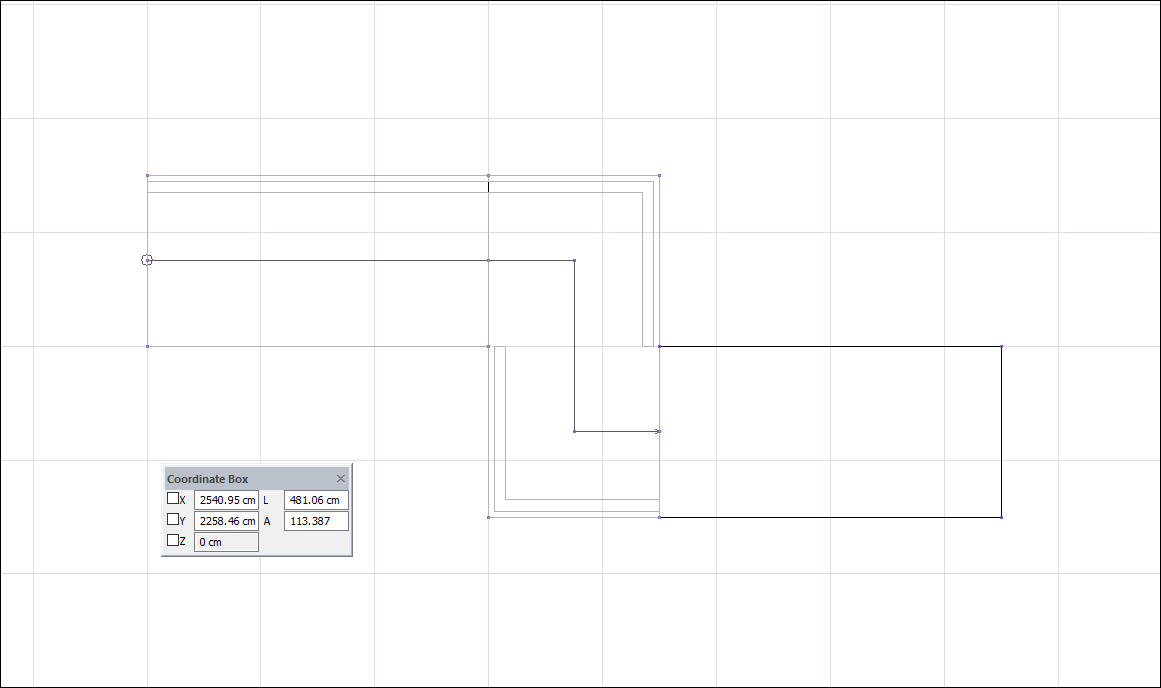
Click the start point to complete the ramp area.
-
There will be a ramp area boundary.
-
With the path command, draw the travel line starting from the point where the travel line of the landing ends.
-
Click the Add Stair Area icon in the ribbon menu .
-
The ramp created in the first stages is selected.

-
Click on the closed area you have created, the ramp outer contour. Then click on the travel line you have drawn.
-
The stair areas dialog will open. Edit the geometric parameters regarding the ramp in the dialog. You can enter 60 cm in stair height. You can rearrange these settings after creating the ramp.
-
Since this area will be the ramp area, the "Type" will remain selected as the stair.
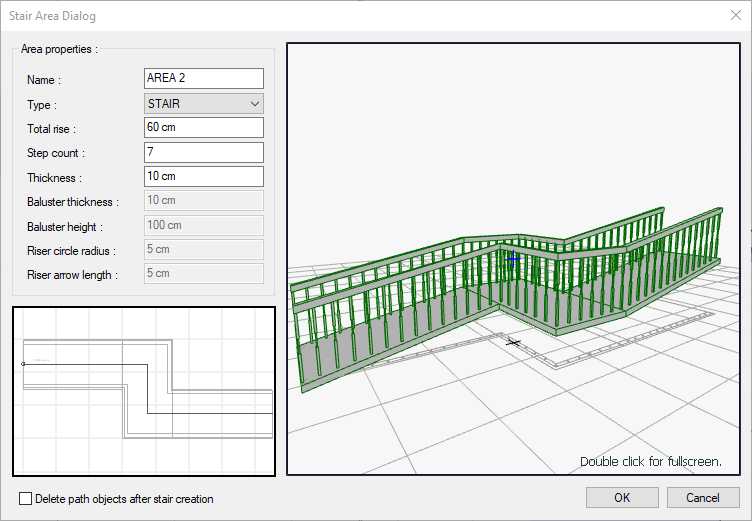
-
Finish the process by clicking the OK button.
-
A ramp will occur.
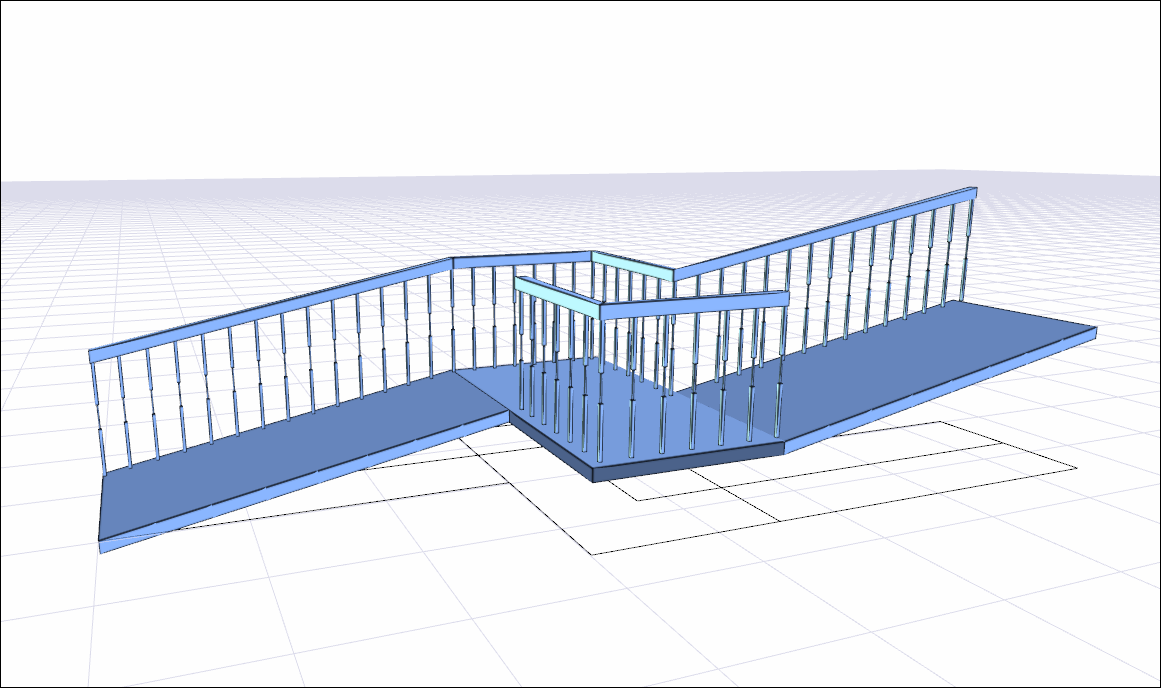
You can make the invisible rails of the ramp visible or hide them completely with the "Hide Railing" command.
Next Topic