
Create the base story doors in this section.
|
The previous steps have been implemented in the project file named Place Doors. You can download the file and follow the steps given in this title on the project. |
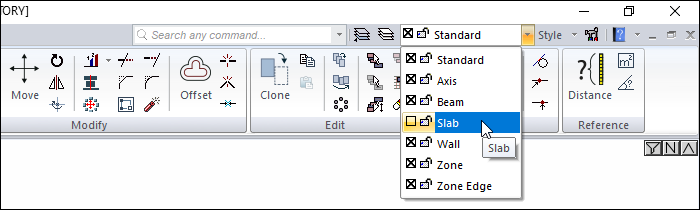
To follow the doors on the perspective screen, uncheck the slab layer from the layer list.
-
Click on the door/window command.
-
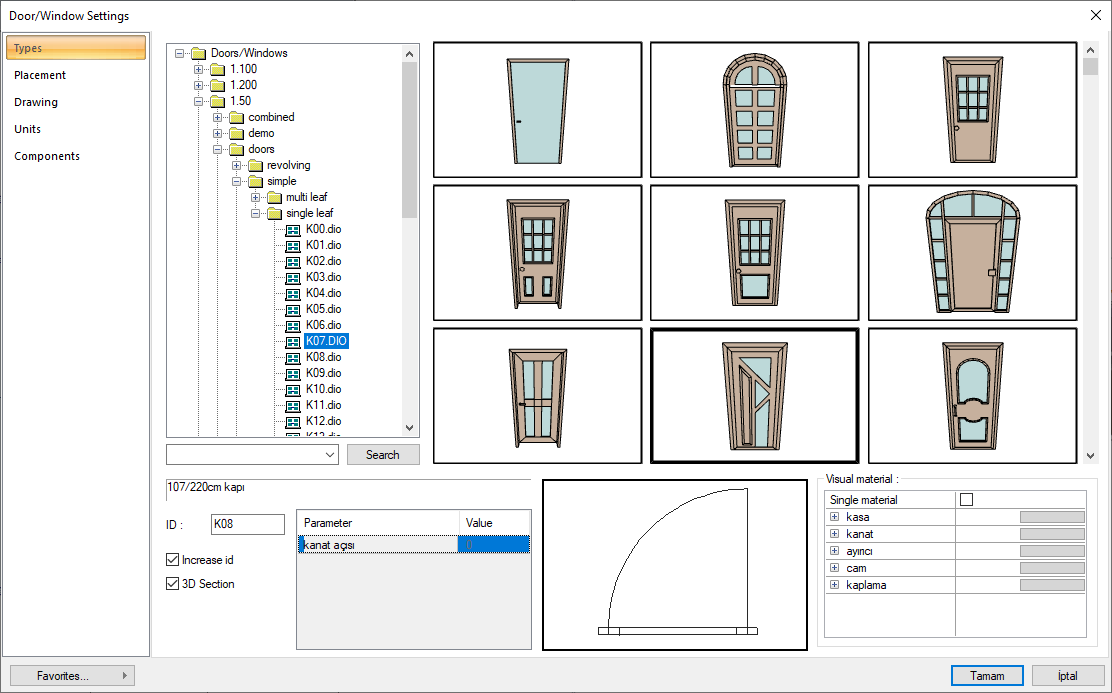
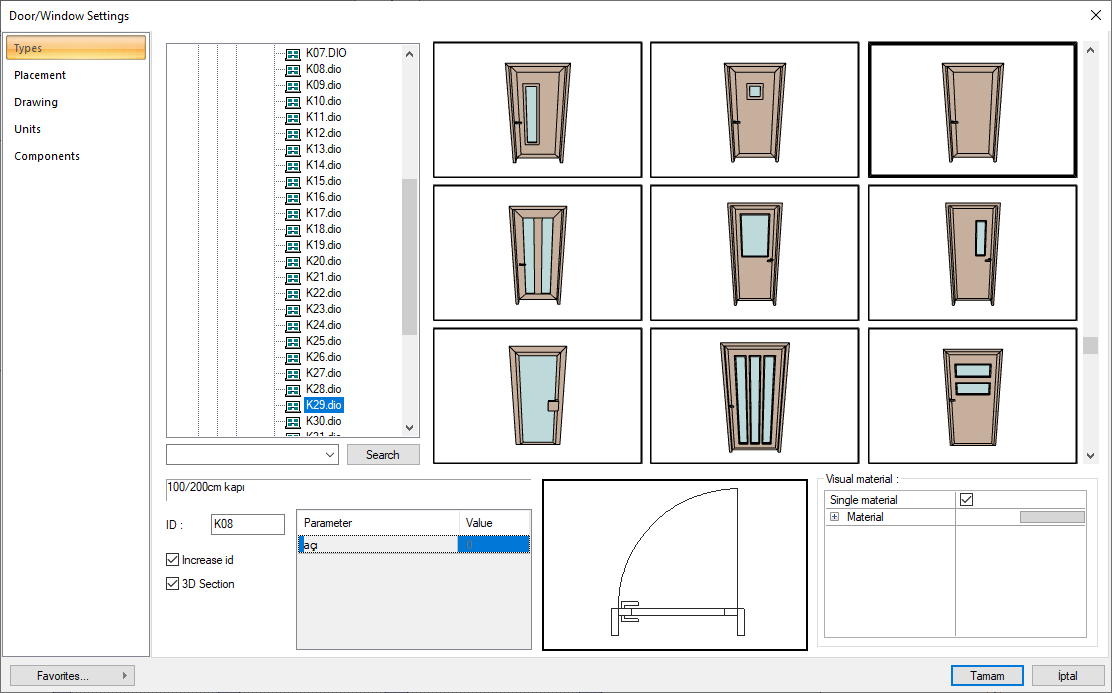
Click the settings icon from the door/window toolbar.
-
In the types tab, select the line 1.50/doors/simple/single leaf/K07.DIO from the list.
-
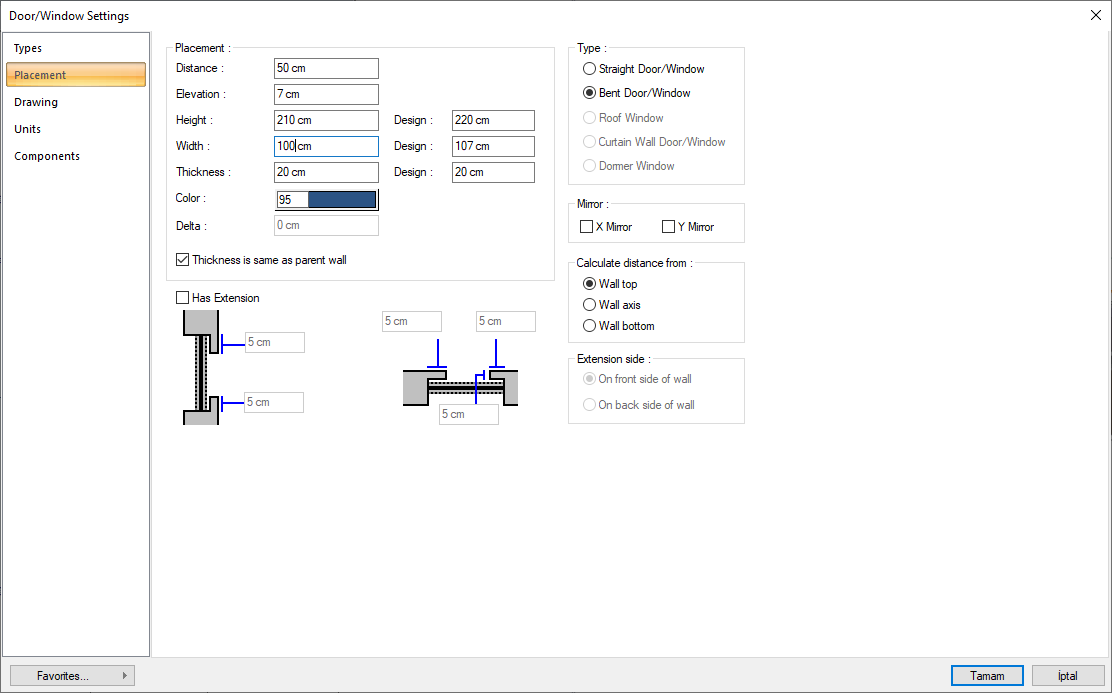
In the placement tab, set the height value to 210 cm and the width to 100 cm. Click the OK button to close the dialog.
-
Check the use distance option in the door/window toolbar and enter 0 in the value box.
-
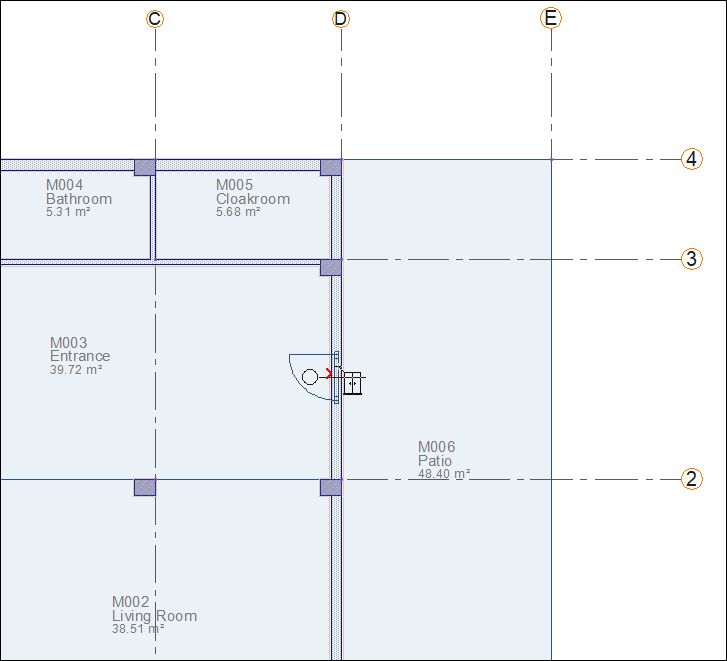
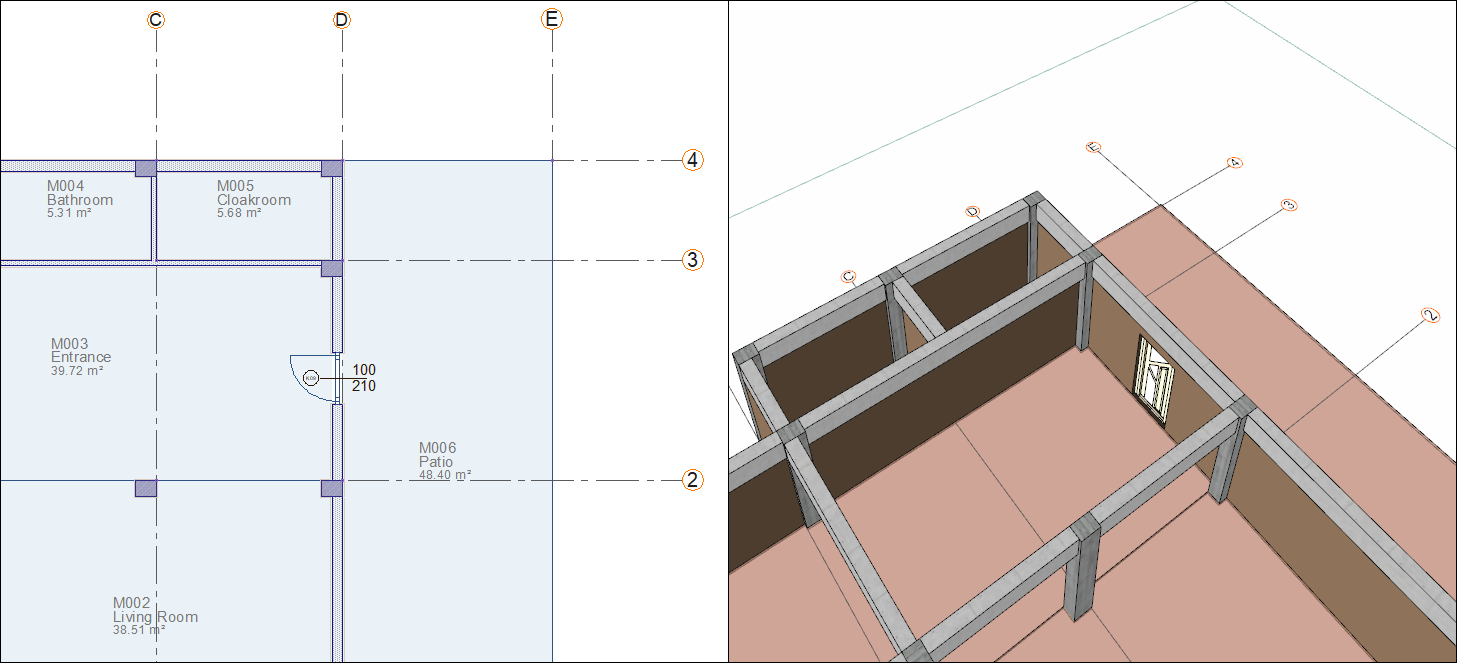
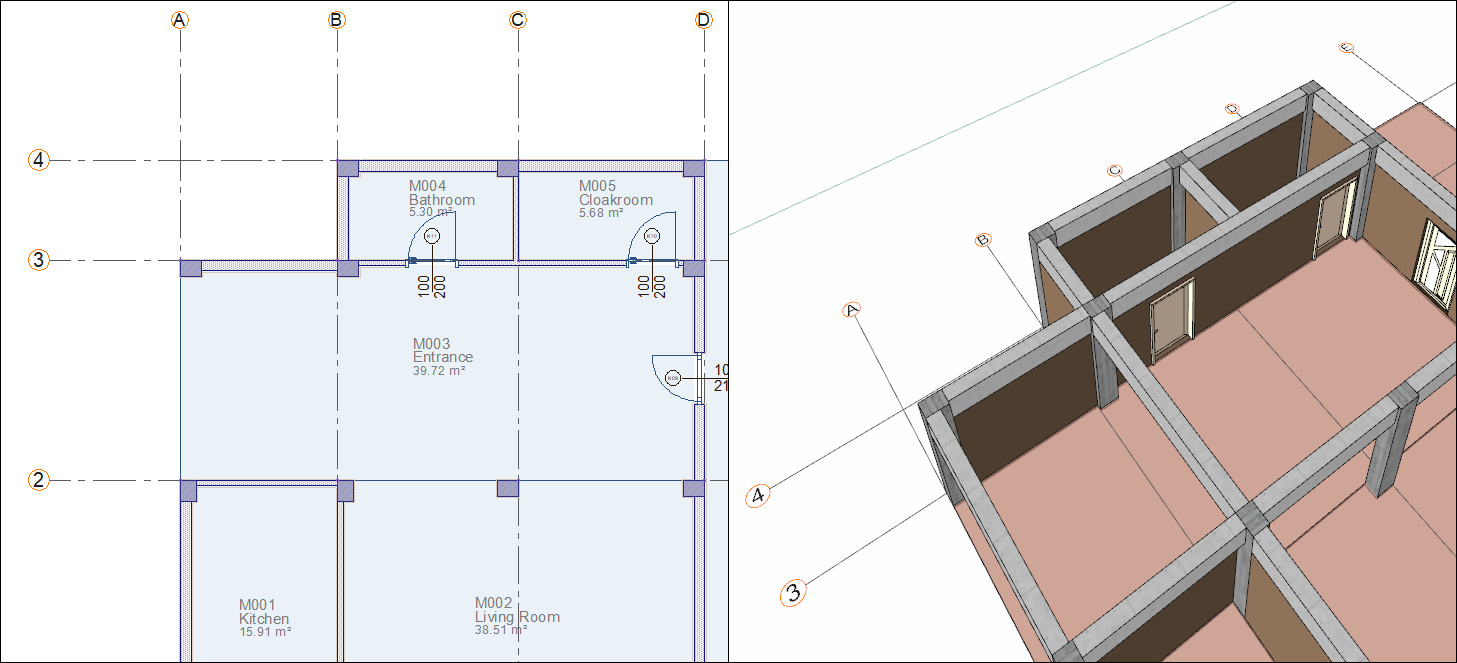
Move your mouse on the D axis to the middle of the wall bounded by the axes 2 and 3.
-
A red arrow will pop up and the door will be placed in the middle of the wall.
-
Click the left mouse button. The door will be formed.
-
Click the settings icon from the door/window toolbar.
-
Select 1.50/doors/simple/single leaf/K29.dio from the list in the types tab.
-
In the placement tab, set the height value to 210 cm and the width to 90 cm. Click the OK button to close the dialog.
-
In the door/window toolbar, enter 10 in the value box.
-
Move your mouse to the D axis side of the wall delimited by axes C and D on the 3 axis.
-
A red arrow will appear and the door will be placed 10 cm beyond the starting point of the wall.
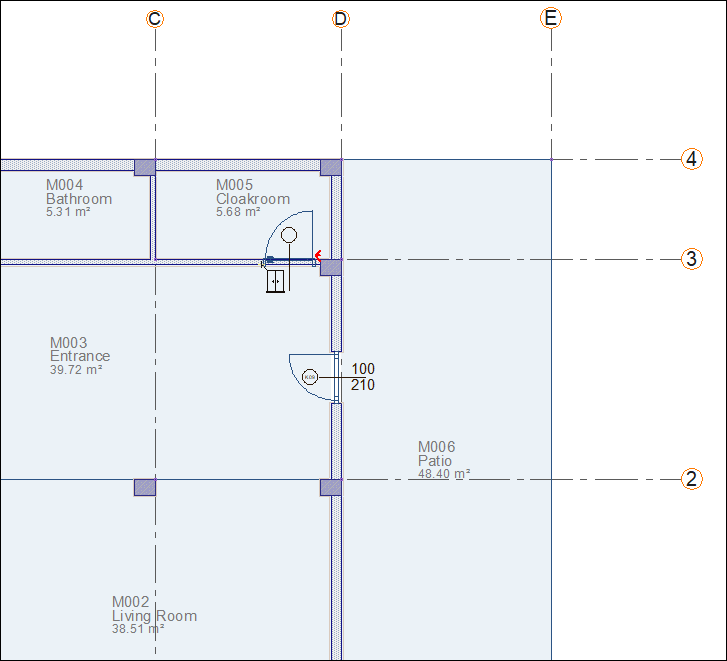
-
Click the left mouse button. The door will be formed.

-
Enter 90 in the value box on the door/window toolbar.
-
Move your mouse to the B axis side of the wall delimited by axes B and C on its 3 axis
-
A red arrow will pop up and the door will be placed 90 cm from the column.
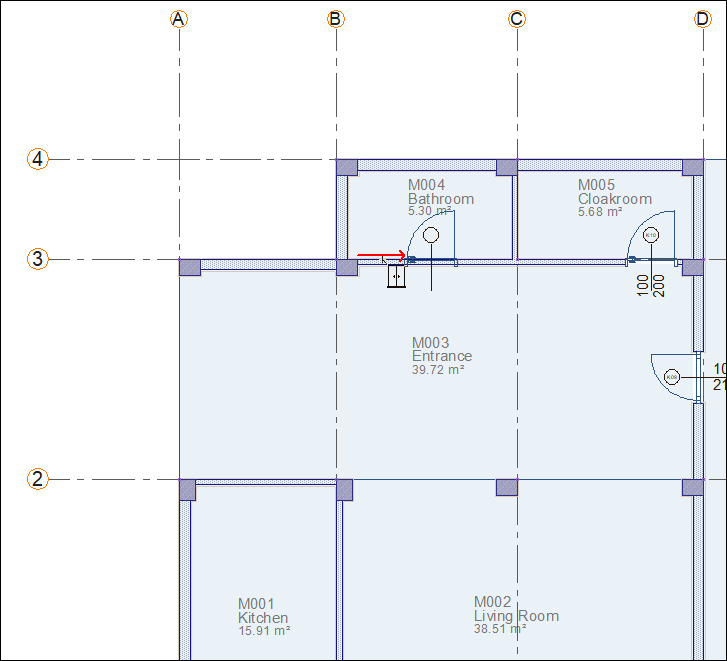
-
Click the left mouse button. The door will be formed.
-
In the door/window toolbar, enter 0 in the value box.
-
Move your mouse on the B axis to the middle of the wall bounded by axes 1 and 2.
-
A red arrow will pop out and the door will be placed in the middle of the wall.
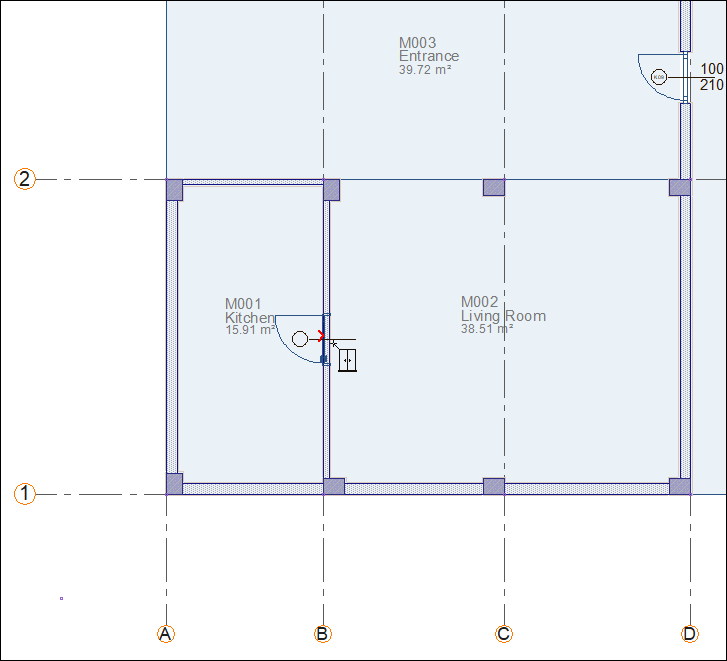
-
Press the 3 key on the keyboard. The symmetry of the door will be taken.
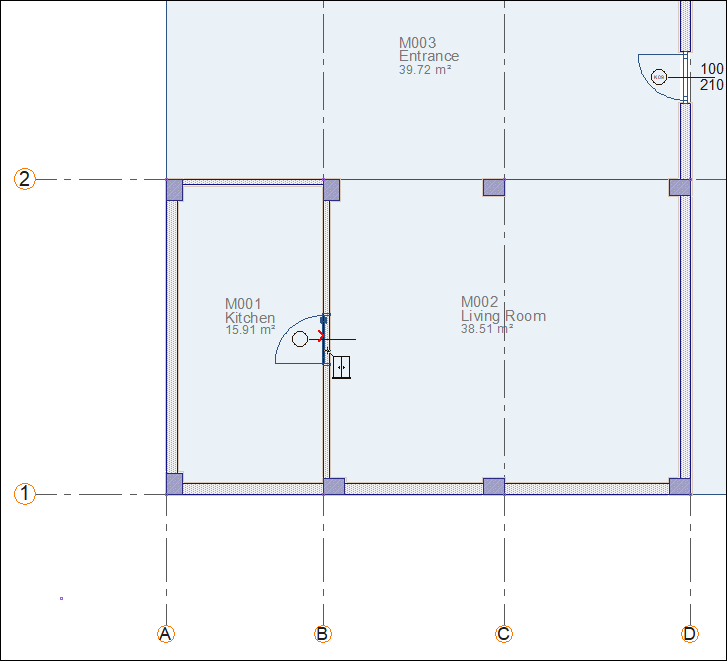
-
Click the left mouse button. The door will be formed.
-
Click the settings icon from the door/window toolbar.
-
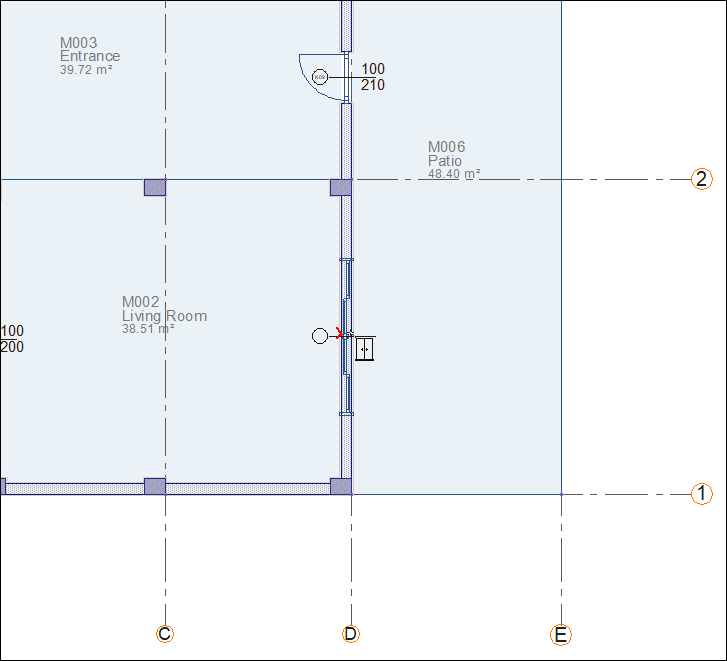
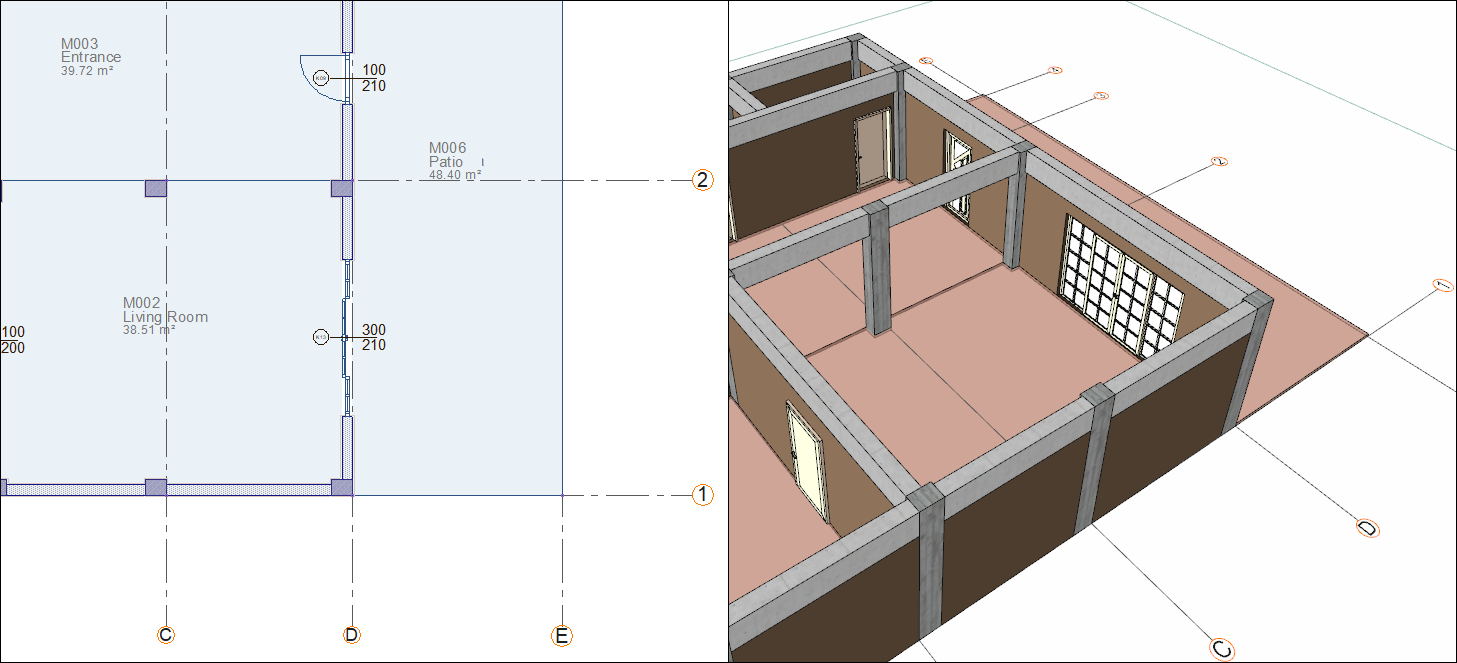
In the types tab select the line 1.50/doors/sliding/Sk01.dio from the list.

-
In the placement tab, set the height value to 210 cm and the width to 300 cm. Click the OK button to close the dialog.
-
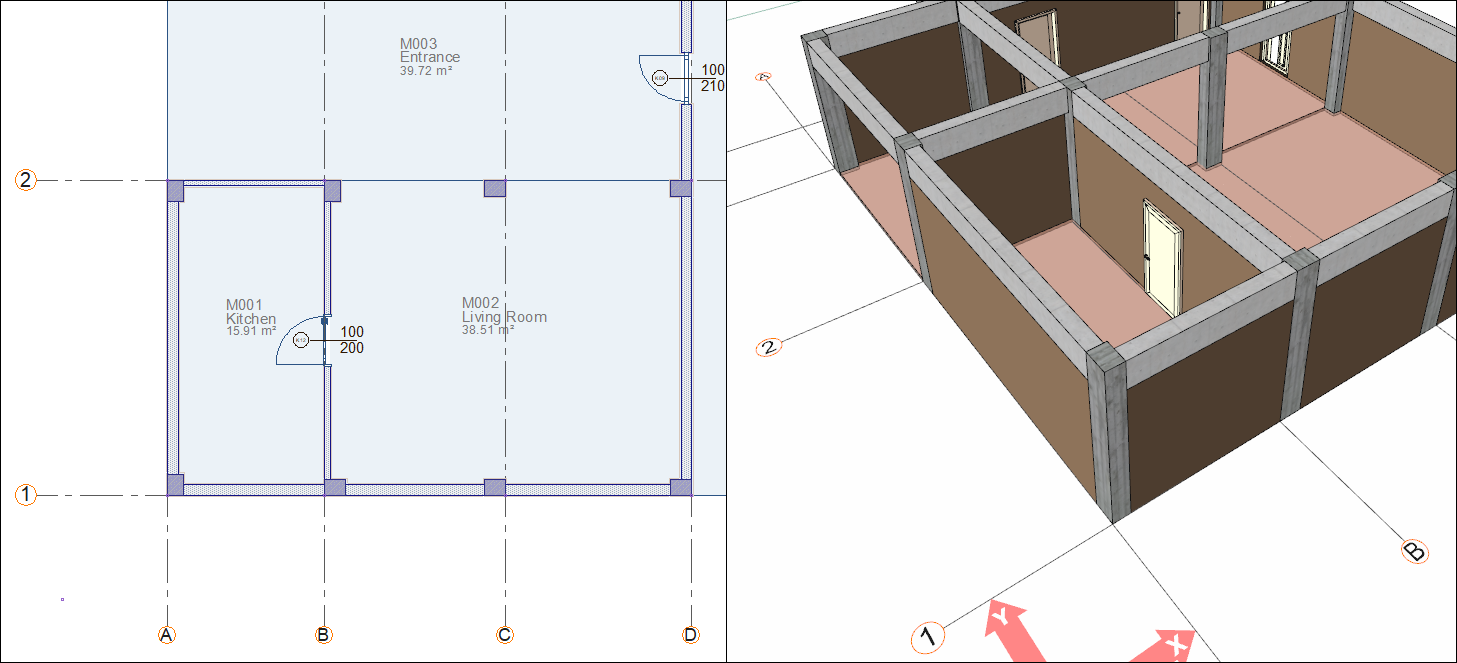
Move your mouse on the D axis to the middle of the wall bounded by axes 1 and 2.
-
A red arrow will pop out and the door will be placed in the middle of the wall.
-
Click the left mouse button. The door will be formed.
-
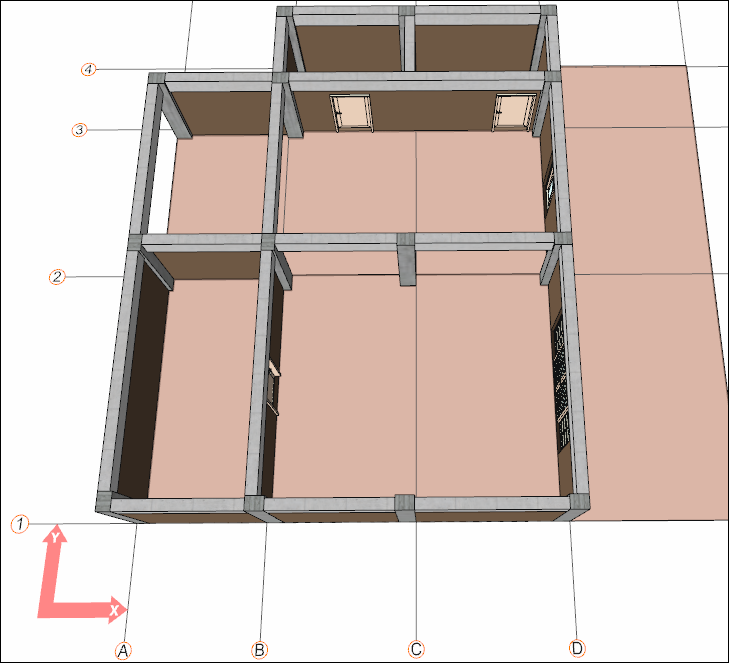
Press the Esc key on the keyboard to exit the command. Base story doors are completed.
Follow the steps of the video below.
Next Tutorial