
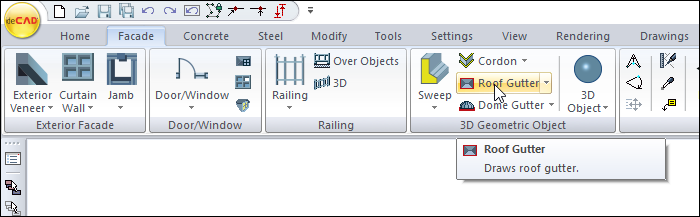
Roof gutter command creates a roof gutter object by default, with a selected profile.
Location of Roof Gutter Command
You can access it under the 3D Geometric Objects title of the Ribbon menu, Facade tab.
Sweep Toolbar
|
Icons |
|---|
|
Sweep Draws a continuous form object according to the selected section. |
|
Ceiling cornice Draws a ceiling cornice object. |
|
Baseboard Draws a baseboard object. |
|
Border on wall Draws a border on the wall object. |
|
Cordon Draws a cordon object. |
|
Roof gutter Draws a gutter around the roof object. |
|
Dome gutter Draws a gutter around the dome object. |
|
Parent based Draws asweep while adhering to the contour of an object like zone etc. |
|
Sweep operations Opens an auxiliary toolbar with commands for changing sweep. |
|
Section list It is the list that allows the section of the sweep to be determined. A profile is selected from the list while drawing the object. |
|
Profiles Displays the folder of profiles saved in the project or to disk and allows sweep. |
|
Settings Displays the settings of the sweep. |
Usage Steps
-
Click the Roof Gutter icon from the Sweep toolbar .
-
The Parent Based mode in the toolbar is automatically active.
-
At the same time, the profiles to be used in the Roof Gutter object are listed in the Section box.
-
If wanted, a different profile can be selected from the Section box.
-
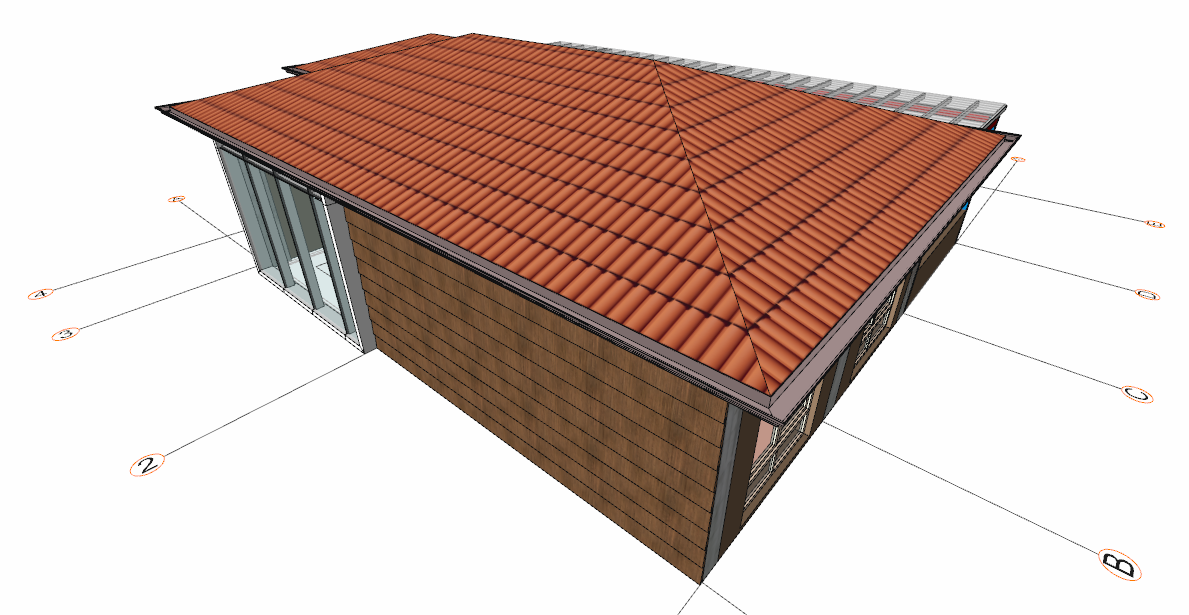
Move the mouse over the roof and left click.
-
Roof Gutter will form around the roof.
|
Usage step |
|---|
|
Bring the mouse over the roof 
|
|
Creating the roof gutter by clicking the left mouse button 

|
Next Topic