
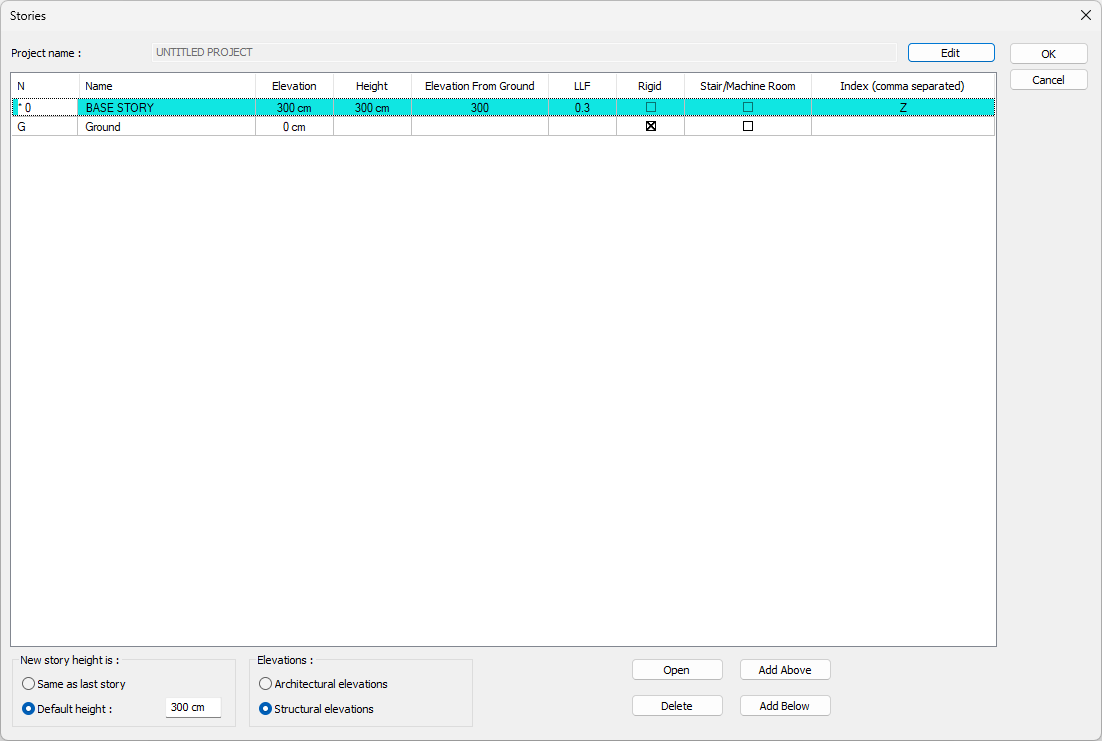
Story information is located in separate windows. There are as many story windows in a project. When a new project is opened with the default template, the base story window appears on the screen. The name of this story is Base, its base level is zero, its height is 300 cm, its live load participation coefficient (LLF) is 0.3, it is not rigid floor and its index is Z letter.
When adding new stories to the project or changing the height, elevation, name information, live load participation coefficient, stiffness of the stories, the definition and index of the attic;
-
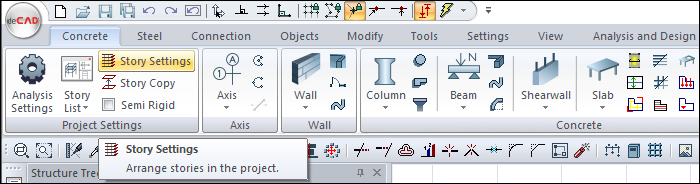
Click on the Concrete/Project Settings/Story Settings icon in the ribbon menu.
-
Stories dialog appears. The project name shown here should not be confused with the file name where the project is stored. It has nothing to do with the project file name given when saving the project. Project Settings
-
When the Add Above button is clicked with the left mouse button, a story is added on the selected story.
-
If the Add Below button is clicked, a story is added under the active story. In this way, the project can be opened as many stories as desired.
-
The story height of the newly added stories can be defined in the "New story height" section. When "Default height" is checked, the height of the opened story is taken as the value that can be defined next to the default height line. If the line "Same as last story" is marked, the height of the opened story is taken to be the same as the last story opened.
-
In order to delete an existing story, the relevant story line is selected by clicking the left button of the mouse and the Delete button is clicked. “You cannot cancel this process. Do you want to continue? ” warning comes. If the question is confirmed, the selected story is deleted. Care should be taken when wiping stories. Because if there are data entered on the deleted story, these data will be deleted together with the story. This process is irreversible. The master story(zero numbered story) cannot be deleted.
-
Clicking the OK button will exit the dialog.
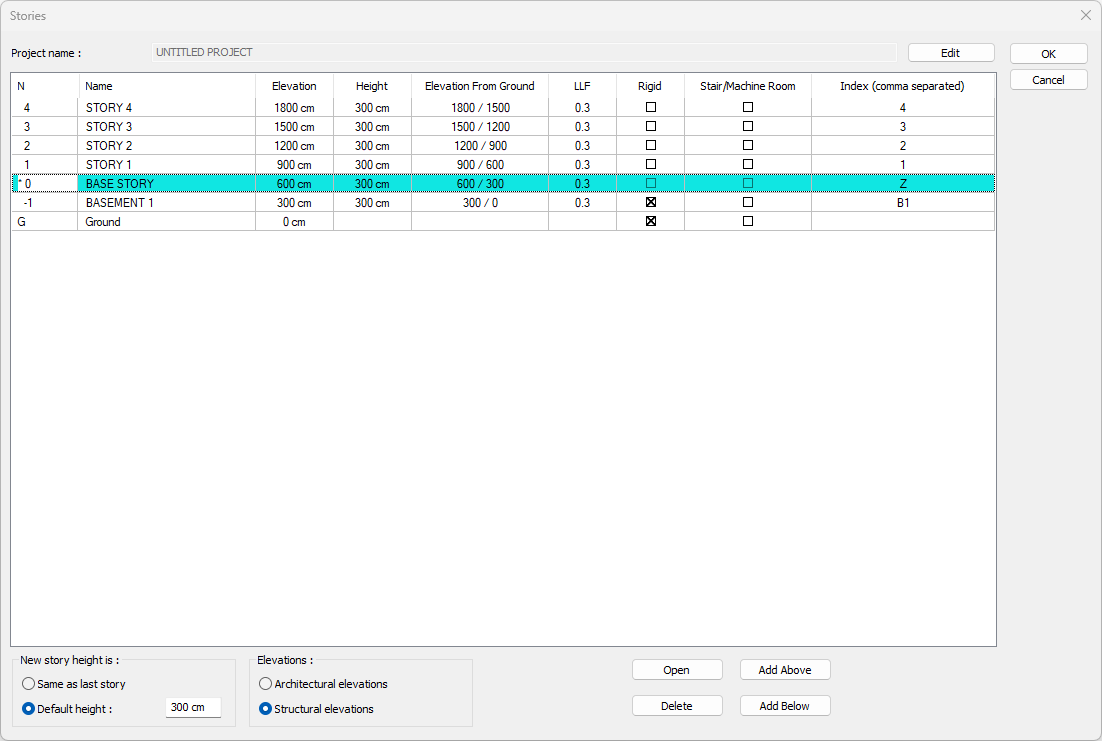
As you add stories to the project, the program automatically gives the name, elevation, height, index and LLF values to these stories. As the upper story is added, the story names increase as Story 1, Story 2, Story 3. The story names added below are also increased as Basement 1, Basement 2, Basement 3. Each story opened is given a height value equal to the default height. Story elevation are arranged by assuming the master floor (zero numbered story) story level as zero. This automatically arranged name, story height, story elevation LLF values and indices can be changed by the user.
The cursor is placed on the box to be changed and the left mouse button is clicked. The old name or value is deleted and the new value is written. When story heights or when the elevation of any story is changed, other levels are automatically adjusted in connection with this change. Elevation values indicate the story elevations if the architectural elevations option is active, and the ceiling elevation if the structural elevations option is active.
If there is more than one rigid diaphragm in a story, to separate the indices of the objects belonging to these diaphragms within the story; In the index column of the relevant story, the indices as much as the aperture number are written by using commas in between. (Ex: for 1st floor; such as 1A, 1B, 1C)
To indicate that any story is rigid in one direction, it is sufficient to mark the Rigid box of the relevant story. To uncheck a story marked as rigid, you must check the box on the bottom line. If you do not have any rigid stories in your building, it will be enough to click on the boxes in the Elevation from ground row. The elevation from ground line does not represent a story and this line cannot be intervened by the user.
While calculating the building height Hn in terms of earthquake calculation according to Article 3.3.1.3 of TBDY 2018 , the elevator tower, engine room, stair house and similar small-mass structures above the roof slab may not be included. In this case, the Stair/Machine Room box should be checked for the story that is not wanted to be included in the building height while making the earthquake calculation.
The values on the left in the basic upper level column indicate the total height of the story ceiling or story according to the Structural or Architectural elevation options. The values on the right indicate the total heights above and below the rigid story according to the rigid story assumptions.
Objects to be entered into story windows can be divided into three parts according to their location on the story.
-
Objects on the story (wall, foundation, zone, door-window, etc.)
-
Objects on the story ceiling (beam, slab, etc.),
-
Objects on both the story and ceiling (columns, axes, etc.).
In the program, the story base is called "Architectural Plan Mode" and the story ceiling is called "Structural Plan Mode". Objects on the story can be entered in the architectural plan mode. It is not possible to enter these objects in pattern layout mode. The opposite is true for story ceiling objects. Objects such as columns, axes and lines can be entered in both drawing modes. In Architectural Plan Mode, click the View/Mode/ Structural Design Mode icon in the ribbon menu to switch to Structural Plan Mode . This can also be done by pressing Shift + Tab on the keyboard.
Next Topic
Related Topics