
Before drawing the railing, the railing types are selected and used from the library. In addition, for the railing types that are not available in the library, new railing types are created. A typical railing, the shape of which is shown below, will be created step by step, and the basic logic of creating a new railing type will be revealed.
Creating Railing Type 1
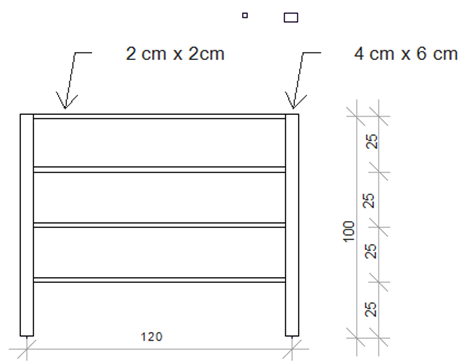
There are 4 handrails of 2x2 cm and two railing profiles of 6x4 cm in the selected railing type. Create profiles in 2x2 cm and 6x4 cm dimensions and save them in the archive.
Resetting the Railing
-
Click the Railing Settings icon in the ribbon menu .
-
The Railing Settings dialog will open. Switch to the Railing Unit Settings Tab.
-
Click the Reset Railing button at the bottom of the dialog. This action will clear the dialog.
|
Usage step |
|---|
|
Clicking the reset railing button 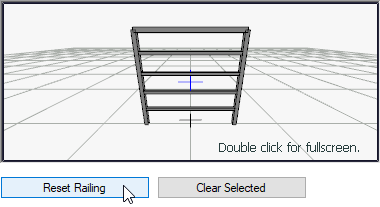
|
|
Resetting the railing 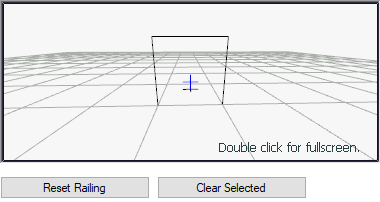
|
Creating Railing Profiles
-
In the baluster profiles table, go to the first row named N = 1 and click the profile column.
-
Select the 4x6 cm sized profile that we previously defined and saved to the archive from the drop-down list.
-
In the baluster profile table, go to the second row named N = 2.
-
In the Distance column, type a value of 1.2, the distance between the two rails.
-
Click on the profile column and select the 4x6 cm profile from the list.
-
The second baluster will be formed. The image of the railing can be viewed on the right in the dialog.
|
Usage step |
|---|
|
Choosing the profile of N = 1 line as 4x6 cm 
|
|
Writing 1,2 as the distance value for the line N = 2 
|
|
Choosing the profile for the line N = 2 as 4x6 cm 
|
|
Formation of balusters 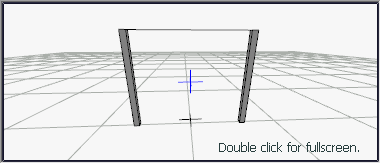
|
Creating Rail Profiles
-
In the rail profiles table, in the first row named N = 1, make the height 1 meter and click the profile column.
-
Select the 2x2 cm sized profile that we previously defined and saved to the archive from the drop-down list.
-
Click the Copy button under the table. The 2nd line will be formed.
-
In line 2, enter 0.75 in height and confirm that 2x2 cm is selected as the profile. (Same happened because we copied the line)
-
Click the Copy button under the table. The 3rd line will be formed.
-
In line 3, write the height 0.50 and confirm that 2x2 cm is selected as the profile.
-
Click the Copy button under the table. The 4th line will be formed.
-
In line 4, enter 0.25 in height and confirm that 2x2 cm is selected as the profile.
-
After this process, the process of creating the rail type is finished. The image of the railing can be viewed on the right in the dialogue.
-
Click the OK button to exit the railing settings.
-
Click the railing command.
-
You can draw the railing you have created by clicking the points in the drawing area.
|
Usage step |
|---|
|
Choosing the profile of N = 1 line as 2x2 cm 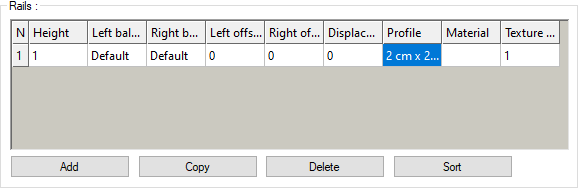
|
|
Clicking the copy button 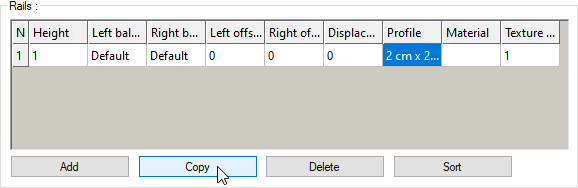
|
|
Writing 0.75 as the height value of the line N = 2 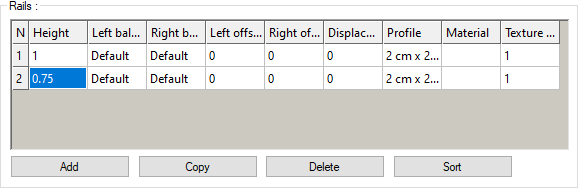
|
|
Clicking the copy button and writing 0.50 as the height value of the N = 3 line. 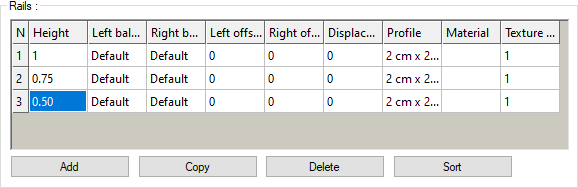
|
|
Clicking the copy button and writing 0.25 as the height value of the N = 4 line. 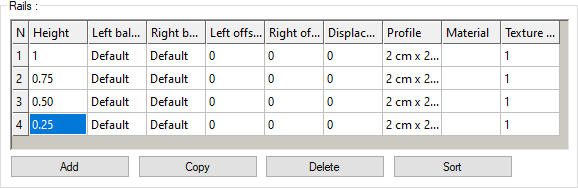
|
|
The formation of rails 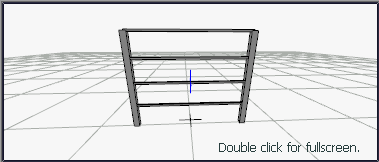
|
Creating Railing Type 2
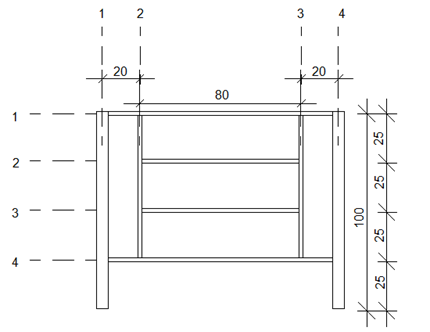
The numbers shown in the figure in the horizontal and vertical directions are the index numbers of the rails and balusters. (These are the values that will appear as N in the table)
Creating Balusters
In the baluster profile table;
-
First, two balusters will be added in between.
-
On the N = 2 line, click the Copy To Front button 2 times to add 2 more railing profiles.
-
Come to the line N = 2 and make the distance value 20 cm. Click on the profile column and select the 2x2 cm profile.
-
Come to the line N = 3 and make the distance value 80 cm. Click on the profile column and select the 2x2 cm profile.
-
Come to the line N = 4 and make the distance value 20 cm.
|
Usage step |
|---|
|
Adding 2 more balusters by clicking the Add Before button 2 times while in the N = 2 line 
|
|
Writing 0.2 as the distance value for the line N = 2 and selecting 2x2 cm as the profile 
|
|
Writing 0.8 as the distance value for the line N = 3 and choosing 2x2 cm as the profile 
|
|
Writing 0.2 as the distance value for the line N = 4 
|
|
Formation of railing 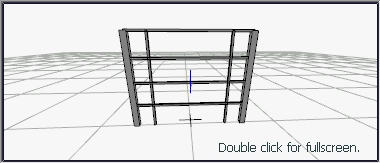
|
Arrangement of Rails
Left/right rails index numbers must be changed to match the figure. These appear in the table by default.
In the rail table;
-
Point to the 2nd rail row.
-
Set the left rail index value to 2 by selecting it from the list. This change means that the rail in the 2nd row will end at the 2nd railing from the left. Likewise, make the Right rail index 3.
-
Come to the 3rd rail row.
-
Select the left rail index value from the list and set the right rail index value to 3.
|
Usage step |
|---|
|
Selecting the left baluster index value as 2 from the list and the right baluster index value from the list when N = 2 line 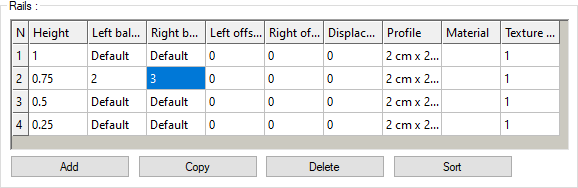
|
|
Selecting the left baluster index value as 2 from the list and the right baluster index value from the list when N = 3 line 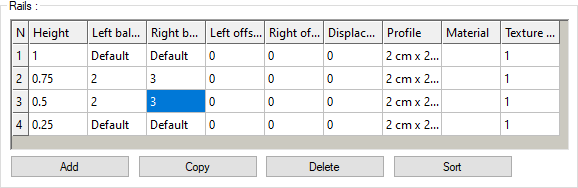
|
|
Change of rails 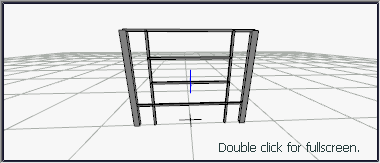
|
Arrangement of Balusters
In the baluster table;
-
Click row 2.
-
Select the base rail index value from the list to set it to 4.
-
Similarly click on row 3.
-
Select the base rail index value from the list to set it to 4.
-
After this process, the process of creating the railing type is finished. The image of the railing can be viewed on the right in the dialogue.
-
Click the OK button to exit the railing settings.
-
Click the railing command.
-
You can draw the railing you have created by clicking the points in the drawing area.
|
Usage step |
|---|
|
Selecting the base rail index value as 4 from the list when in the N = 2 line 
|
|
Selecting the base rail index value as 4 from the list when in the N = 3 line 
|
|
Changing the balusters and completing the railing type 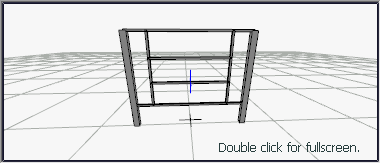
|
Creating Railing Type 3
The construction of a railing with a glass panel in the middle will be explained as the third type. Paneled railing will be obtained by making changes on the railing that we created earlier.
Deleting Rails
First, delete the rails in the 2nd and 3rd rows in the rail table.
-
Move the cursor to line 2. Click the Delete button.
-
Move the cursor back to line 2. Click the Delete button.
|
Usage step |
|---|
|
Clicking the delete button on the N = 2 line 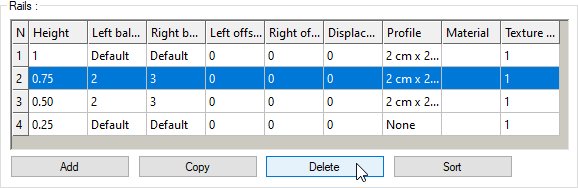
|
|
Clicking the delete button on the N = 3 line 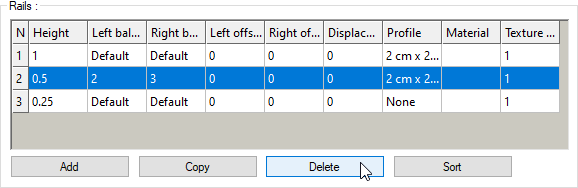
|
|
Changing the railings 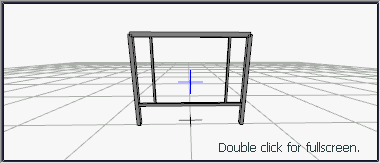
|
Changing Balusters
Change the profile option in rows 2 and 3 in the balusters table.
In the balusters table;
-
Click on the profile column in row 2 and select the row none from the list.
-
Click on the profile column in row 3 and select the row none from the list.
|
Usage step |
|---|
|
Selecting none of the profile for the line N = 2 
|
|
Selecting none of the profile for the line N = 3 
|
|
Changing the railings 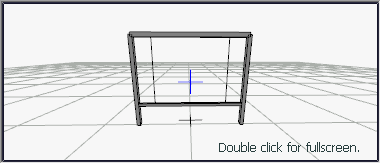
|
Creating the Plate
In the plate table;
-
Add a new plate by clicking the Add button.
-
Click on the base rail index column and select the value 2 from the list.
-
Click on the left baluster index column and select value 2 from the list.
-
Go to the right baluster index column and select 3 from the list
-
Come to the thickness column and give the value 1 cm.
-
Scroll to the Material column and select the Glass material from the list .
-
After this process, the process of creating the railing type is finished. The image of the railing can be viewed on the right in the dialog.
-
Click the OK button to exit the railing settings.
-
Click the railing command.
-
You can draw the railing you have created by clicking the points in the drawing area.
|
Usage step |
|---|
|
Adding the plate by clicking the add button in the plates table 
|
|
Selecting the base rail index value 2 from the list 
|
|
Choosing the left baluster index value 2 from the list 
|
|
Selecting the right baluster index value 3 from the list 
|
|
Giving the thickness value 0.01 and choosing glass as the material 
|
|
Creating the plate and completing the railing type 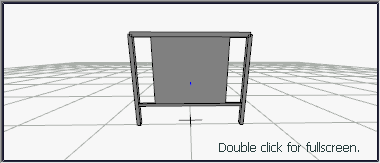
|
Next Topic