
The drop panel/pedestals are drawn with the drop panel/pedestal command. In order to draw a drop panel/pedestal, defined columns are required first. First, columns are drawn and drop panel/pedestals are placed on these columns.
Location of Drop Panel/Pedestal Command
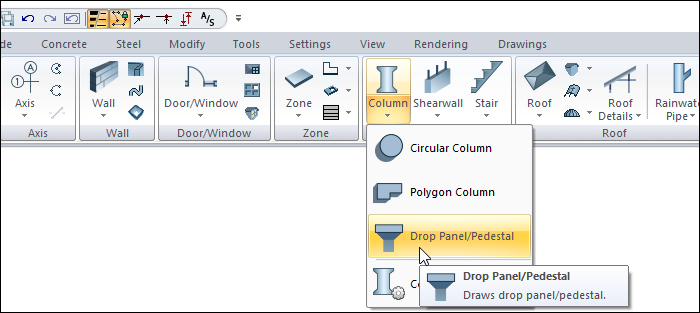
In the Architectural Program
You can access it under the ribbon menu Home tab Concrete title.
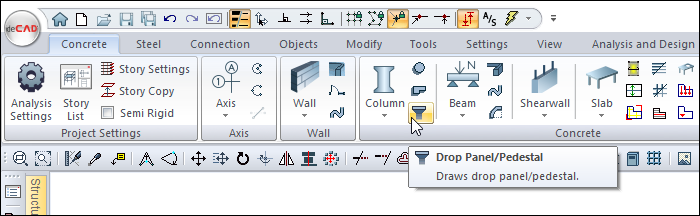
In Structural Program
You can access it under the ribbon menu Concrete tab Concrete title.
Drop Panel/Pedestal Toolbar
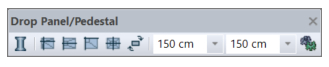
|
Icons |
|---|
|
Rectangular column Runs the drawing column command. With the column command, the drop panel/pedestal toolbar is also closed and the column toolbar appears on the screen. |
|
Default drop panel/pedestal Draws the drop panel/pedestal according to the delta values in the drop panel/pedestal settings. In the mode, 1 key on the keyboard also executes this command. |
|
Edge aligned drop panel/pedestal It is used to define the drop panel/pedestal aside, without entering the drop panel/pedestal settings. In the mode, 2 keys on the keyboard also execute this command. |
|
Corner aligned drop panel/pedestal It is used to define a corner aligned drop panel/pedestal without entering the drop panel/pedestal settings. In the mode, 3 keys on the keyboard also execute this command. |
|
Centered drop panel/pedestal Convenience for centered drop panel/pedestal. In mode, all 4 keys on the keyboard will run this command. |
|
Exchange coordinates Exchanges drop panel/pedestal dimensions. |
|
Drop panel/pedestal dimension boxes Drop panel/pedestal width/height value can be entered here without entering the drop panel/pedestal settings. |
|
Settings Opens the Drop Panel/Pedestal Settings dialog. Various parameters related to the column head can be set here. |
Usage Step
To draw the drop panel/pedestal:
-
Click the drop panel/pedestal icon from the ribbon menu.
-
The drop panel/pedestal toolbar will open.
-
You can define the drop panel/pedestal by holding from different points by using the alignment buttons on the drop panel/pedestal toolbar. From bottom to top; there are default, edge aligned, corner aligned, centered aligned drop panel/pedestal options.
-
Depending on the alignment you choose, your nodes will be formed. In the picture below, the drop panel/pedestal placements according to different alignment types with the nodes in the same direction.
-
Choose the type of alignment that's right for you.
-
The preview of your drop panel/pedestal will move with the movement of your mouse.
-
Drag the mouse cursor over the column where you want to place the drop panel/pedestal and click the left mouse button. The preview of your drop panel/pedestal will be fixed.
-
Enter the drop panel/pedestal dimensions in the support dimensions boxes in the drop panel/pedestal toolbar. As you enter the value, the preview of your drop panel/pedestal will change.
-
If the X and Y dimensions of the drop panel/pedestals are different from each other, you can invert the dimensions at this stage by clicking the invert dimensions icon from the drop panel/pedestal toolbar or by pressing the space key on the keyboard.
-
When you click the left mouse button a second time, the drop panel/pedestal will be placed.
|
Usage step |
|---|
|
Selection of aligned type from drop panel/pedestal toolbar - default, edge aligned, corner aligned, centered aligned 
|
|
Drop panel/pedestal preview movement with mouse movement 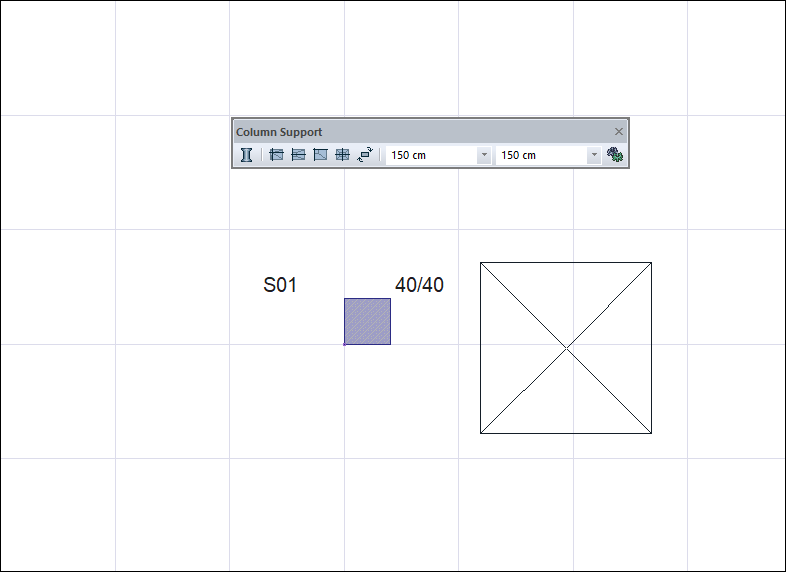
|
|
Selecting the column to be placed by clicking the left mouse button 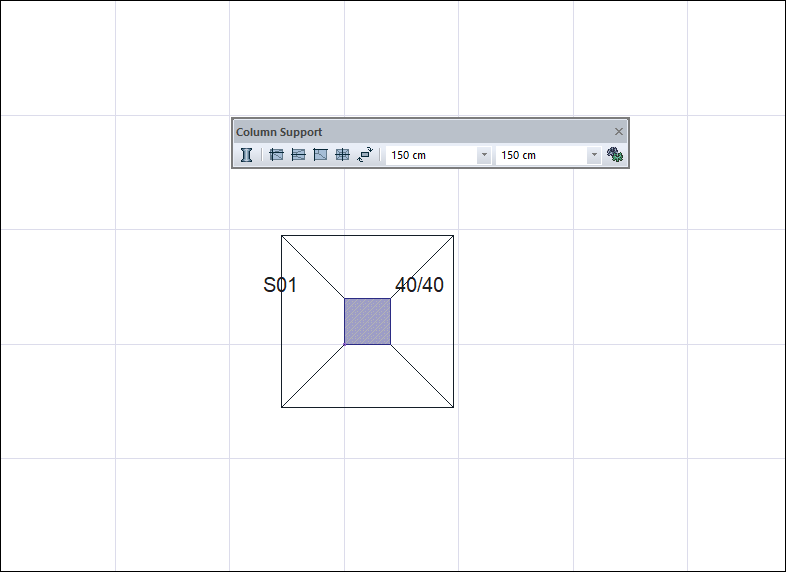
|
|
Changing drop panel/pedestal dimensions 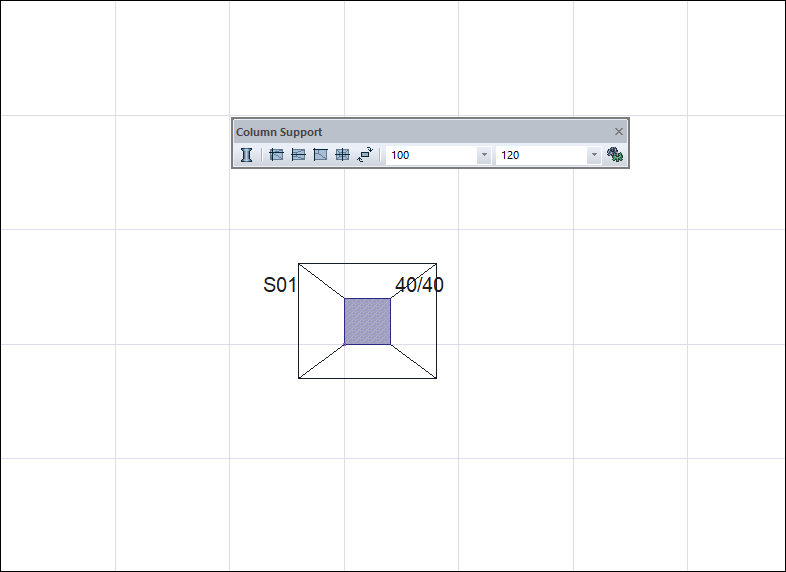
|
|
Change of dimensions by pressing the spacebar on the keyboard 
|
|
Creating drop panel/pedestal by clicking the left mouse button 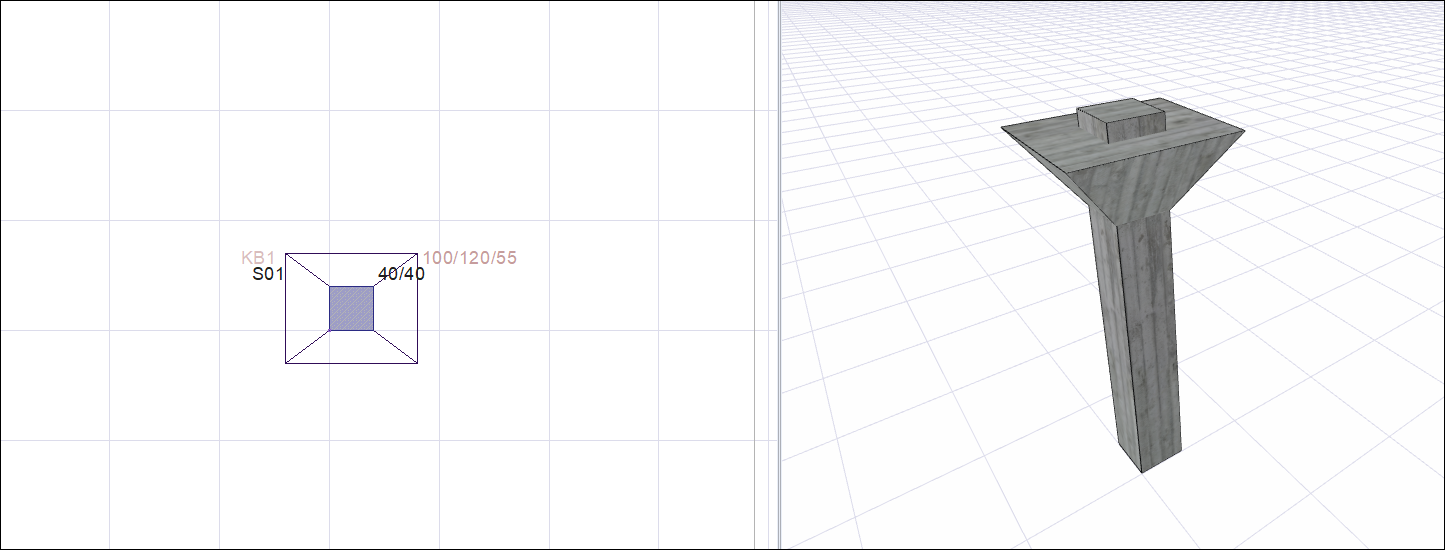
|
Next Topic