
The following are the steps and settings for a example of ground area calculation on a property defined by a property polygon.
-
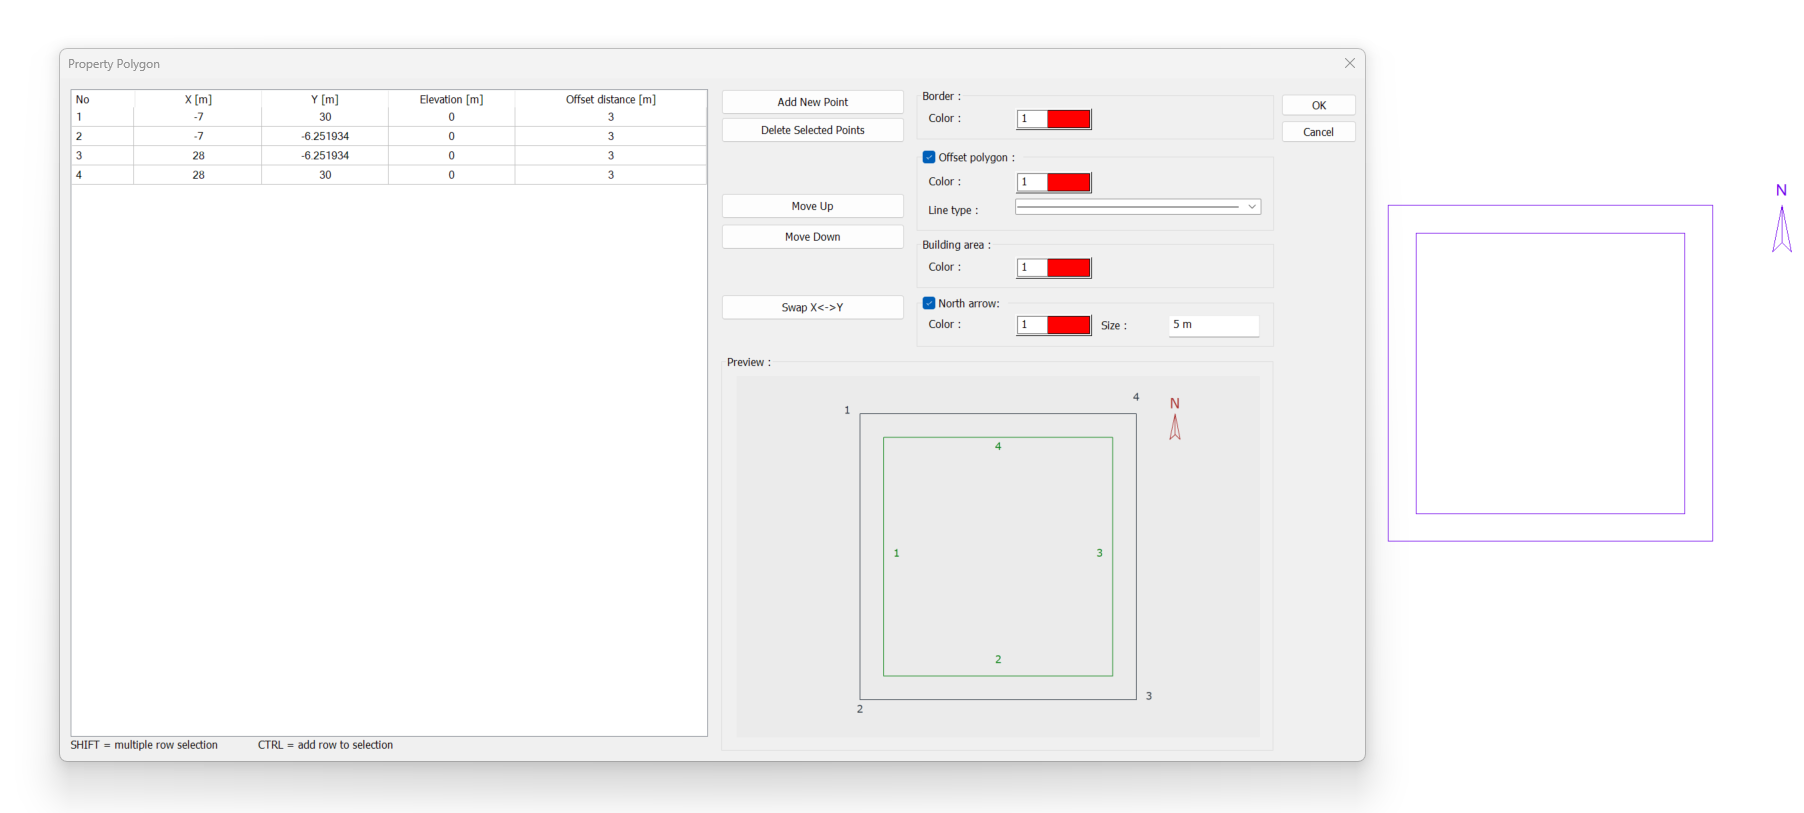
Property boundaries are created with the define property polygon command according to the coordinate values in the application sketch.
-
The created property boundary is used in the ground area calculation.
-
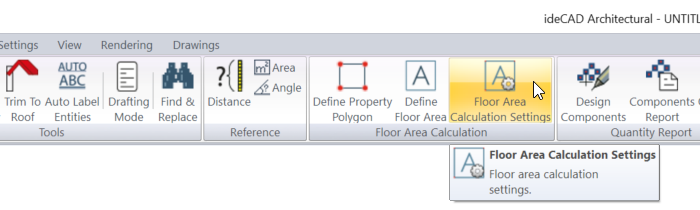
Click on the Floor Area Calculation Settings command.
-
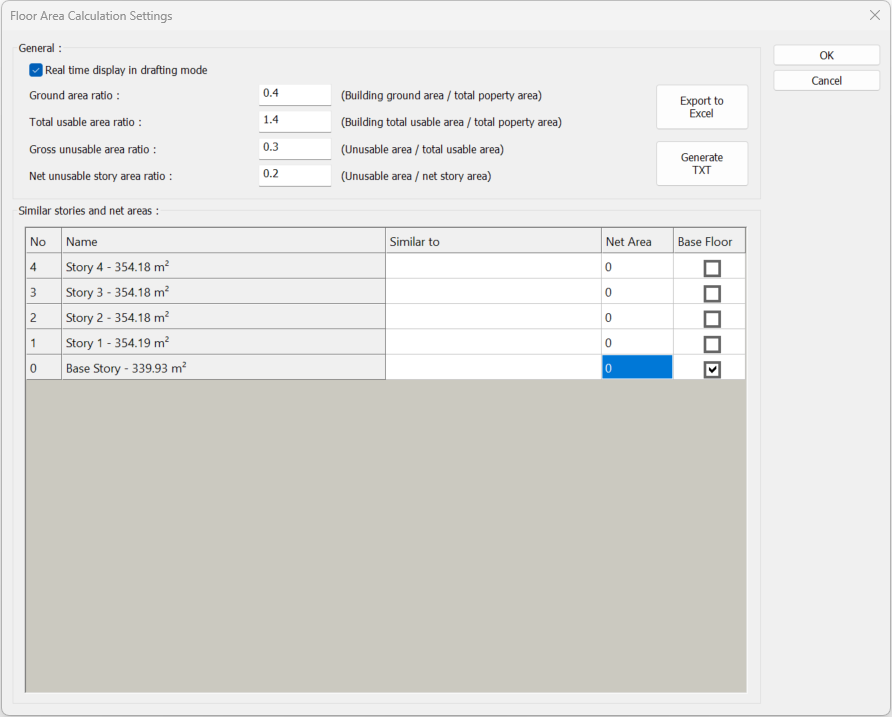
The floor area calculation settings dialog opens.
-
The ground area ratio (TAKS) specified in the zoning status is entered in the ground area ratio row. From the list, the story to be used as the basis for the ground area calculation is selected.
-
The dialog is closed by clicking the OK button.
-
Click on the Define floor area command.

-
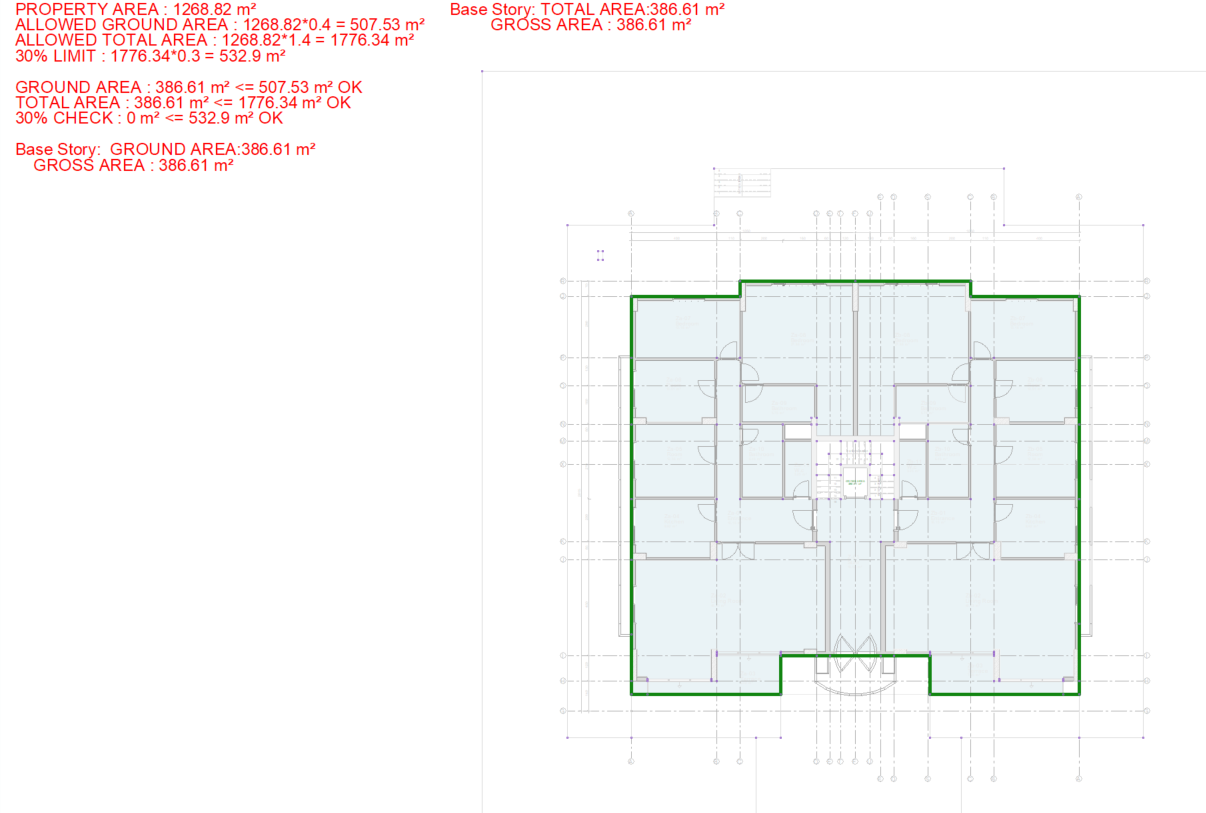
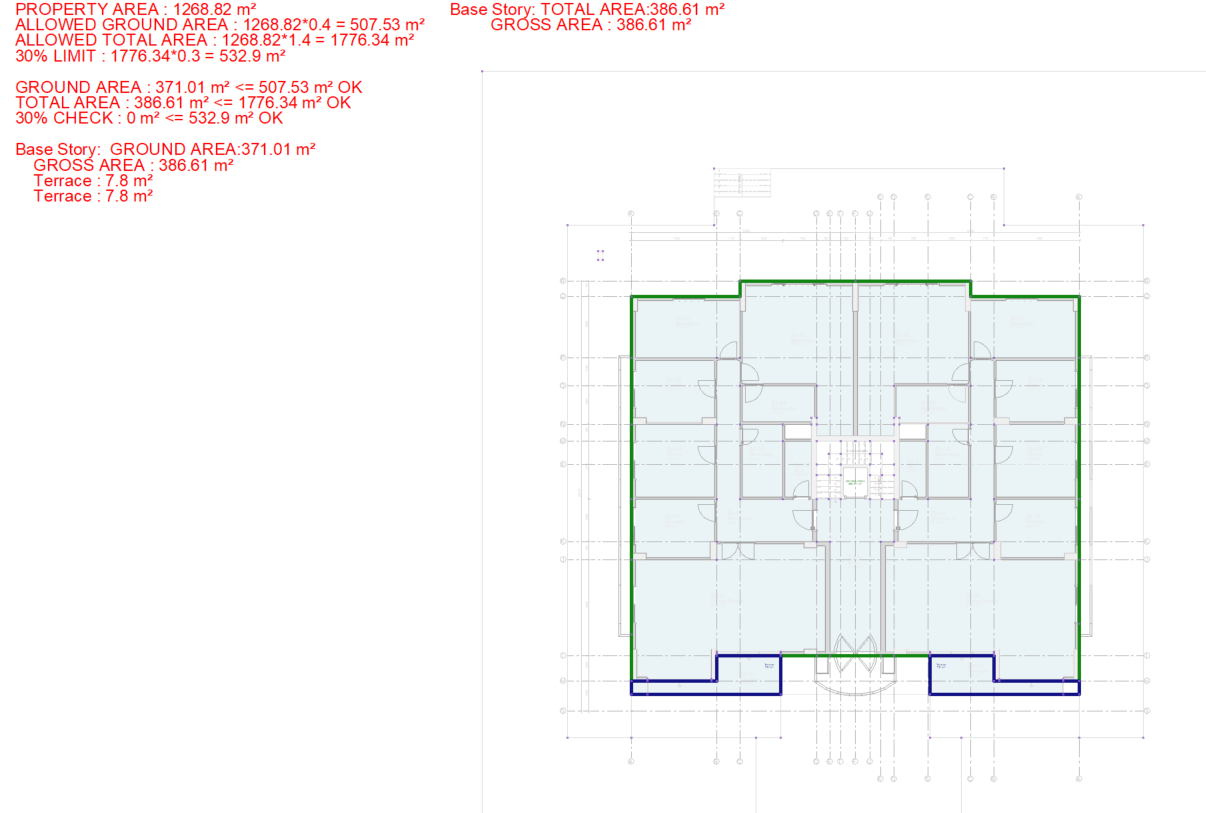
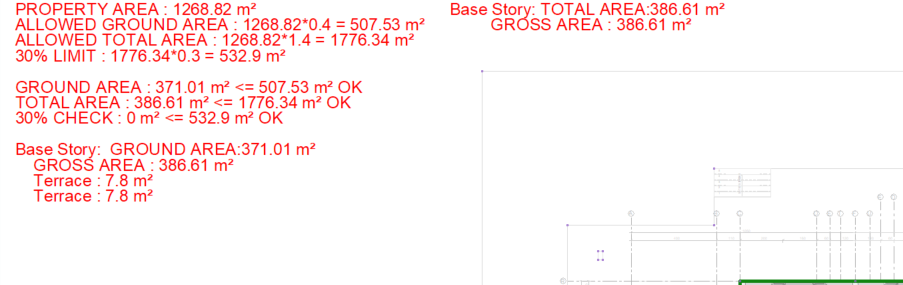
To calculate the ground area, a floor area polygon is used to define the enclosed area that completes the footprint of the building. When the enclosed area is defined, the area in square meters information will appear at the center of the polygon. It will also be reflected in the calculation preview.
-
Use floor area polygons to define terrace parts included in the base area. If you prefer, terraces can be left out of the boundary while defining the ground area.

-
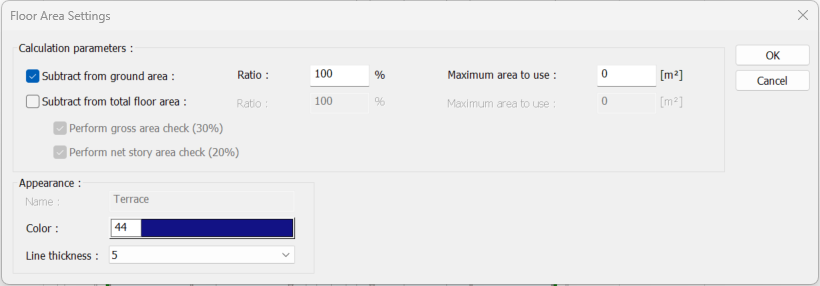
Configure the settings for the floor area polygon defined for terraces. By default, the subtract from total floor area option will be selected when the area is first created.
-
To see the control only in the ground area calculation, uncheck the subtract from total floor area option.
-
When the dialog is closed by clicking the OK button, the calculation preview will be updated according to the settings made.
-
Compliance status is checked through the ground area control.
Next Topic