
In this section, create the base story columns.
|
Previous steps have been followed in the project file named Create the Columns. You can download the file and follow the steps given in this title on the project. |
-
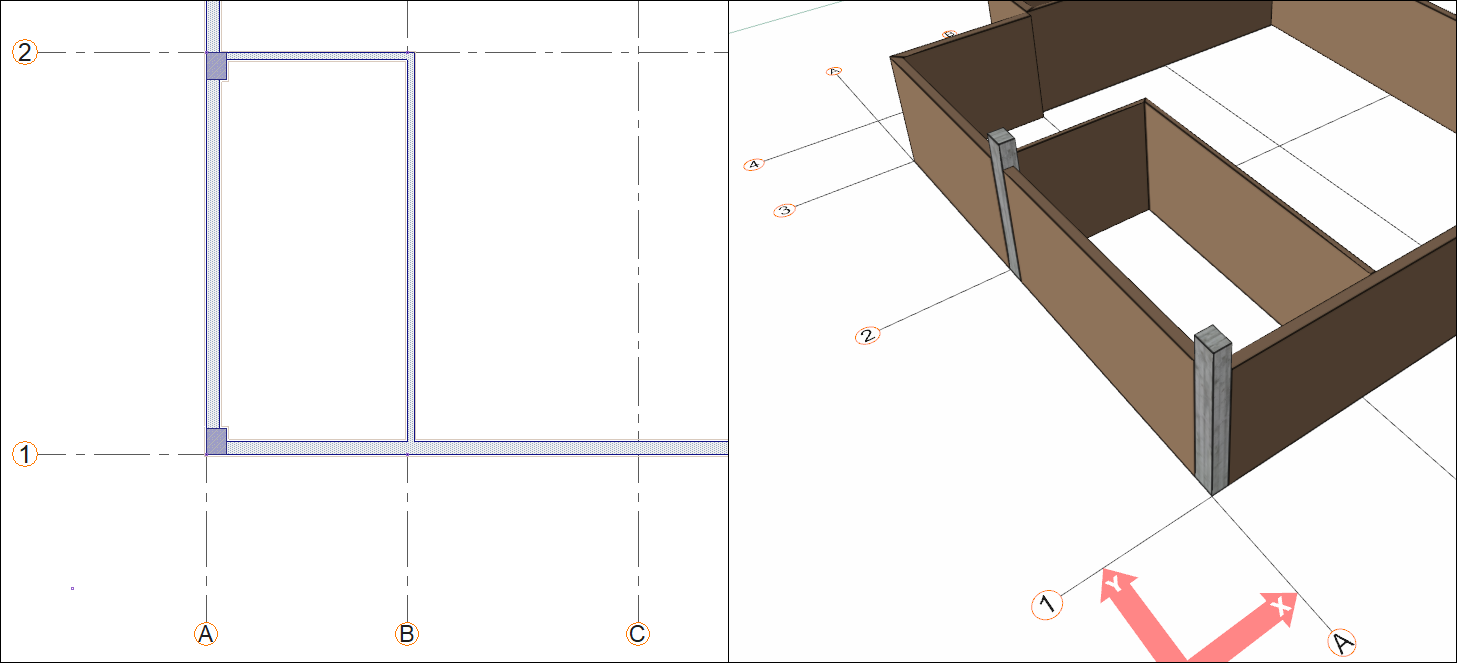
Click on the column command. From the column toolbar, select the corner aligned column option.
-
Enter 40cm/30cm as the value in the toolbar.
-
Click on A-1 axis intersection. Rotate the column so that the 40 cm side of the column is on axis A and click the left button to place.

-
Click on the A-2 axis intersection. Take the symmetry of the column with the spacebar.
-
Rotate the column so that the 40 cm side of the column is on axis A and place it.
-
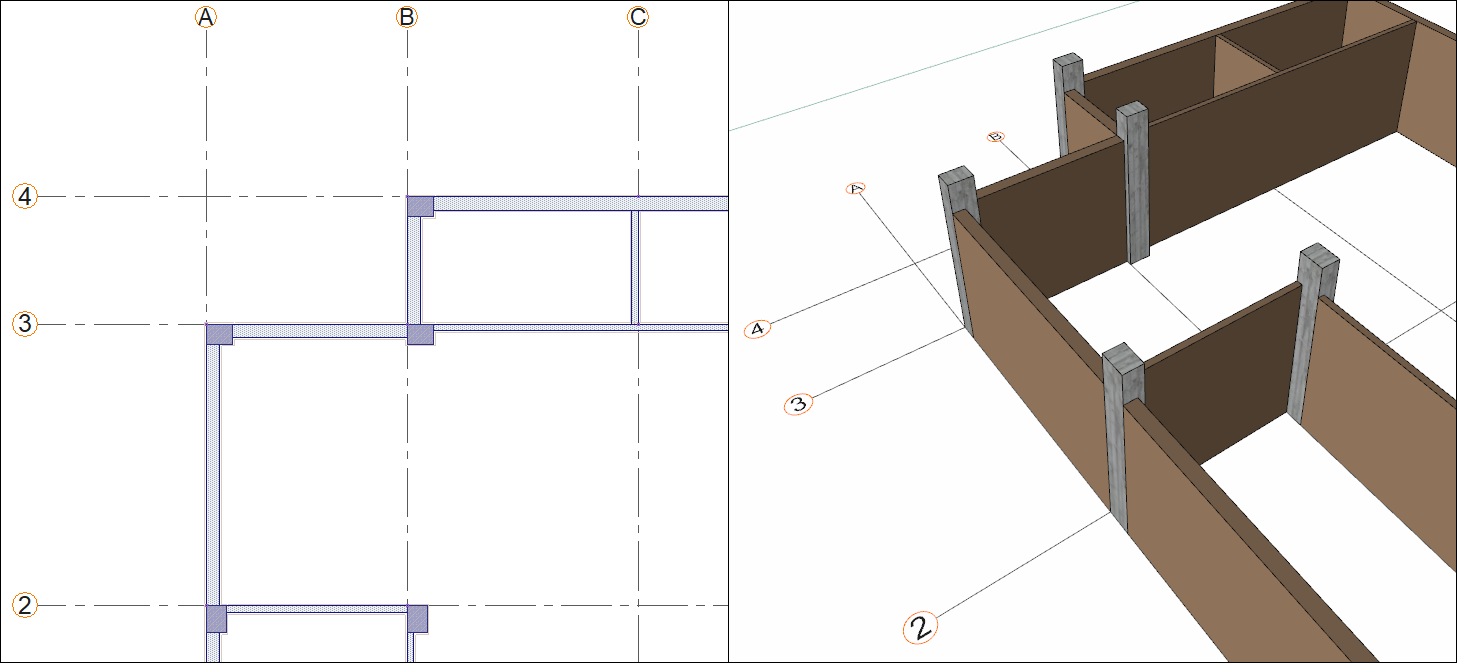
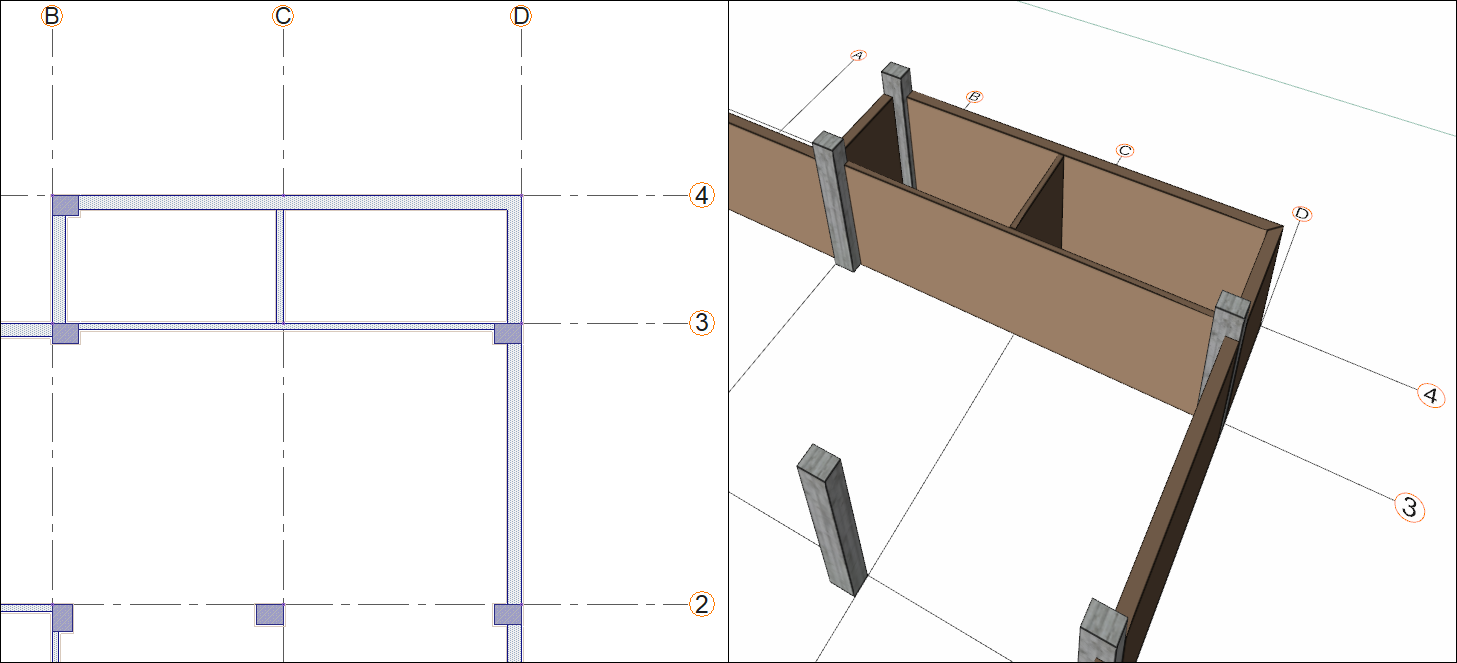
Click on the A-3 axis intersection. Rotate the column so that the 40 cm side of the column is on the axis 3 and place it.

-
Click on the B-4 axis intersection. Rotate the column so that the 40 cm side of the column is on the axis 4 and place it.

-
Click on the B-3 axis intersection. Rotate the column so that the 40 cm side of the column is on the axis 3 and place it.

-
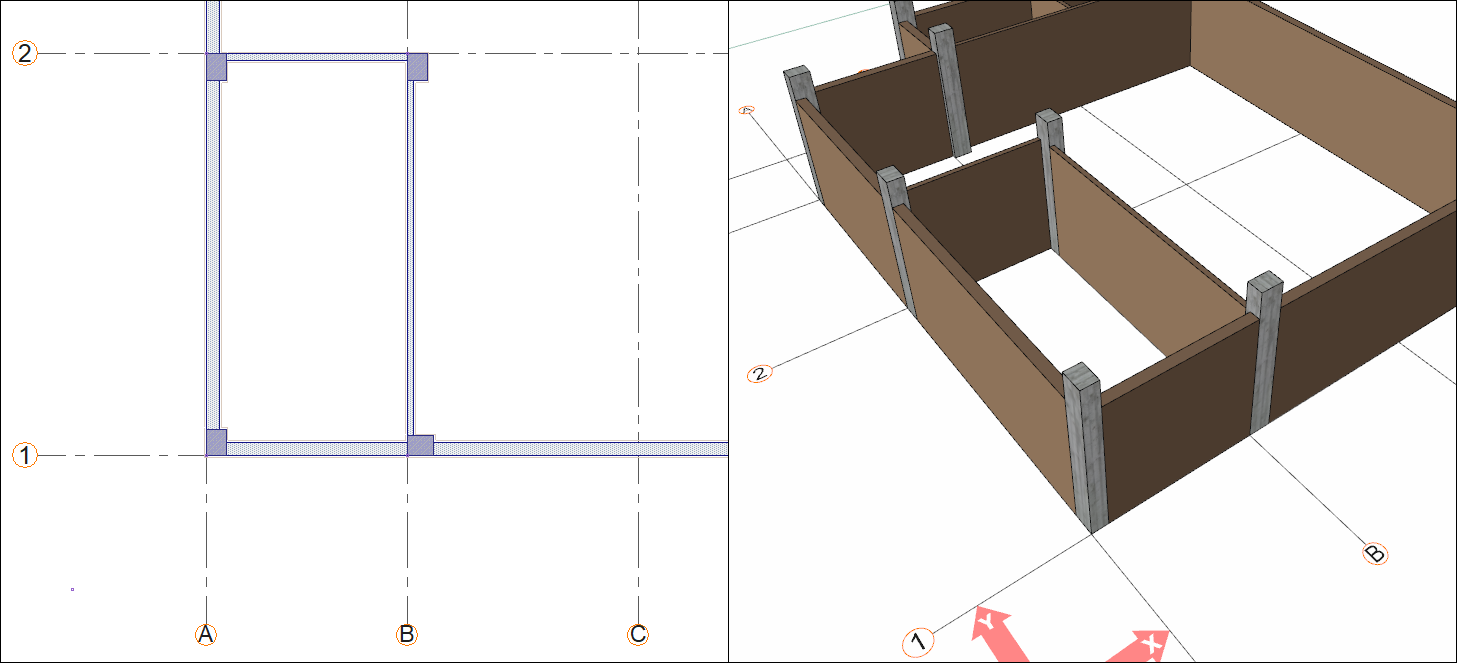
Click on the B-2 axis intersection. Take the symmetry of the column with the spacebar.
-
Rotate the column so that the 40 cm side of the column is on the axis B and place it.
-
Click on the B-1 axis intersection. Take the symmetry of the column with the spacebar.
-
Rotate the column so that the 40 cm side of the column is on the axis 1 and place it.
-
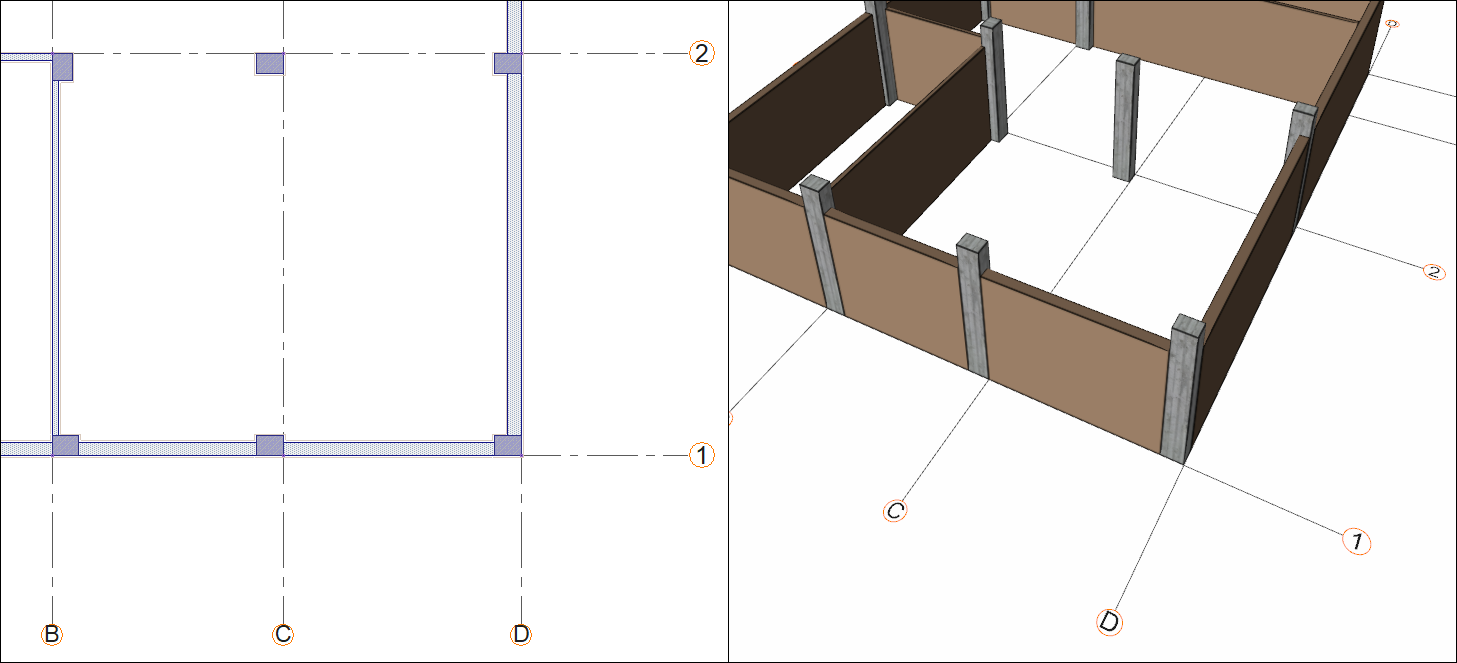
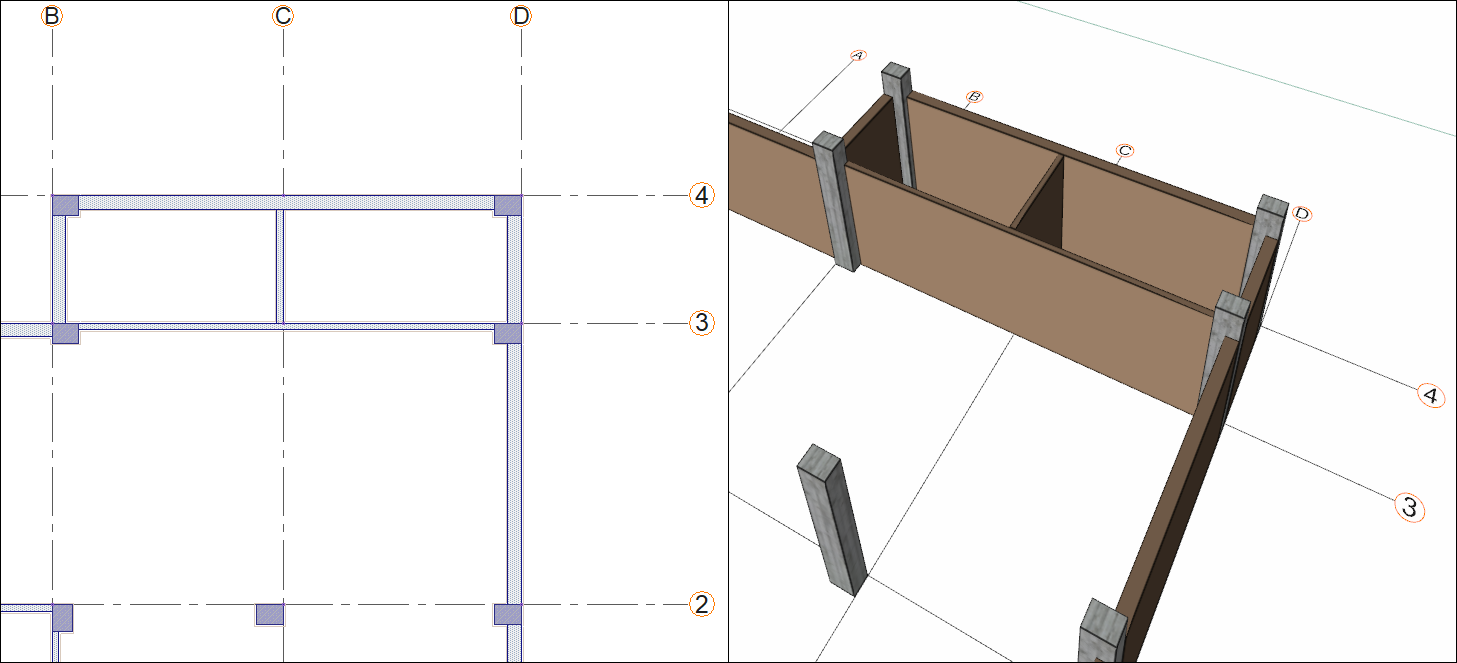
Click on the C-1 axis intersection. Rotate the column so that the 40 cm side of the column is on the axis 1 and place it.

-
Click on the D-1 axis intersection. Rotate the column so that the 40 cm side of the column is on the axis 1 and place it.

-
Click on the C-2 axis intersection. Take the symmetry of the column with the spacebar.
-
Rotate the column so that the 40 cm side of the column is on the axis 2 and place it.

-
Click on the D-2 axis intersection. Take the symmetry of the column with the spacebar.
-
Rotate the column so that the 40 cm side of the column is on the axis 2 and place it.
-
Click on the D-3 axis intersection. Take the symmetry of the column with the spacebar.
-
Rotate the column so that the 40 cm side of the column is on the axis 3 and place it.
-
Click on the D-4 axis intersection. Take the symmetry of the column with the spacebar.
-
Rotate so that the 40 cm side of the column is on the axis 4 and place it.
-
Click on the C-4 axis intersection. Take the symmetry of the column with the spacebar.
-
Rotate so that the 40 cm side of the column is on the axis 4 and place it.

-
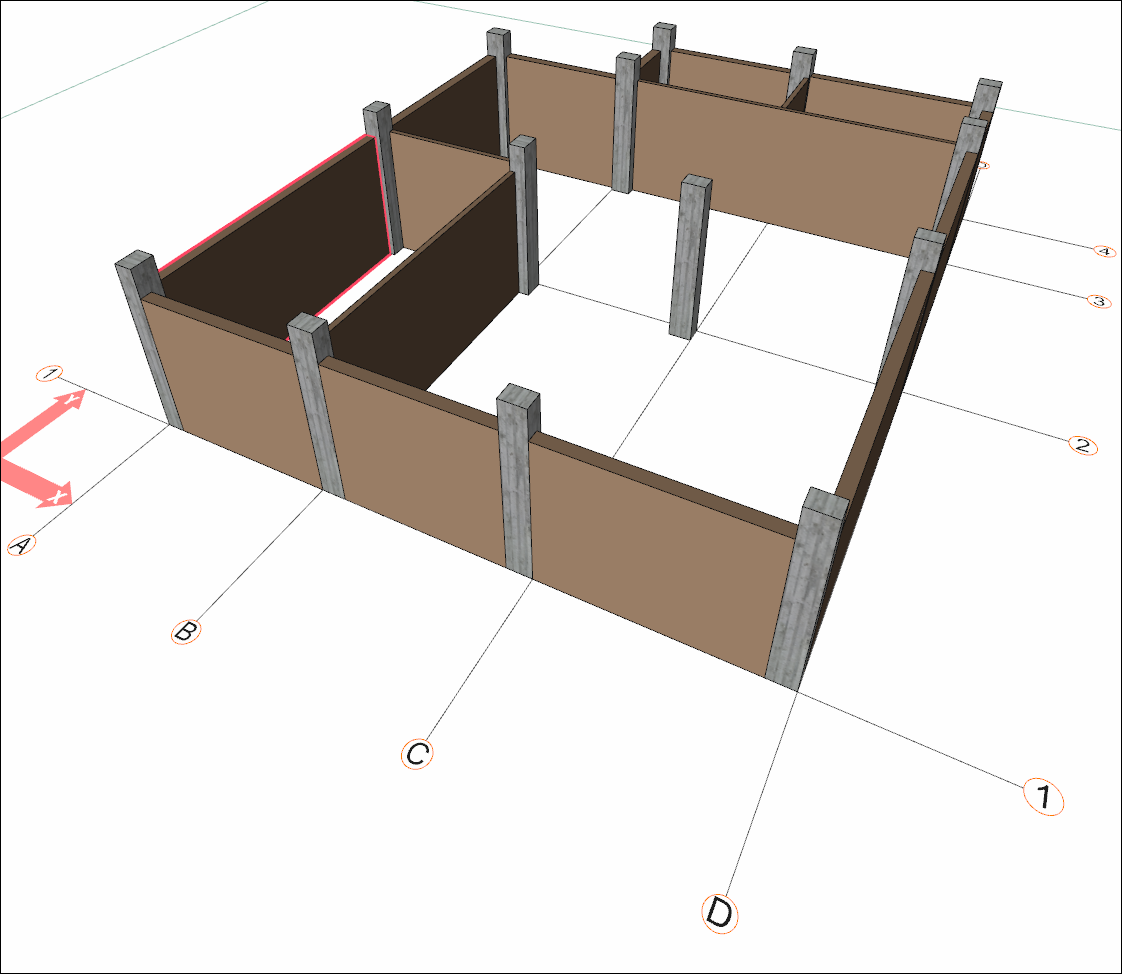
Press the Esc key on the keyboard to exit the command.
-
Base story columns are completed.
Follow the steps of the video below.
Next Tutorial